Care and Maintenance
How Does Water Fed Pole Window Cleaning Work
Learn how does water fed pole window cleaning work, from purified water chemistry to telescopic poles, brush heads, safety benefits, and when to hire pros.


You've just wrapped a renovation, the cabinets are in, the paint looks fresh, and the glass should be sparkling. Then you catch the problem: dust on the window tracks, a powdery film on the trim, and a fine haze that comes back after every wipe. That's the part post renovation cleaning addresses, and it's why it becomes a second project instead of a quick finish-up.
The reason is simple. Renovation dust isn't normal household dust, it's a mix that can include drywall, concrete, adhesive residue, grout haze, and fine debris that settles into vents, tracks, and seams. If the ventilation system wasn't addressed, the space can look clean for an hour and feel dirty again by the next day. That hidden recontamination cycle is where most DIY cleanup falls apart.
The market reflects that reality. Independent reports estimate the global post-renovation cleaning service market at about USD 1.654 billion in 2025, with forecasts rising to USD 2.652 billion by 2034 at a 7.1% CAGR, according to Intel Market Research. That growth says this isn't a casual add-on anymore, it's a specialized trade built around handover readiness, dust control, and finish protection.
A freshly renovated room can fool you. The surfaces look new, but the air still carries fine debris, and that dust settles into places a quick wipe never reaches. I've seen owners walk into a finished kitchen, admire the counters, then come back the next morning and find the same film on the window frame because the vents kept recirculating it.
Construction dust behaves differently from ordinary dirt. It rides in on drywall work, sanding, cutting, and finishing, then clings to trim, fixtures, glass edges, and the inside of tracks. Guidance from ServiceMaster Clean's post-construction checklist stresses that dust sneaks into vents and every nook and cranny, which is why a simple surface wipe leaves the job half done. See the practical breakdown in flawless handover cleaning tips.
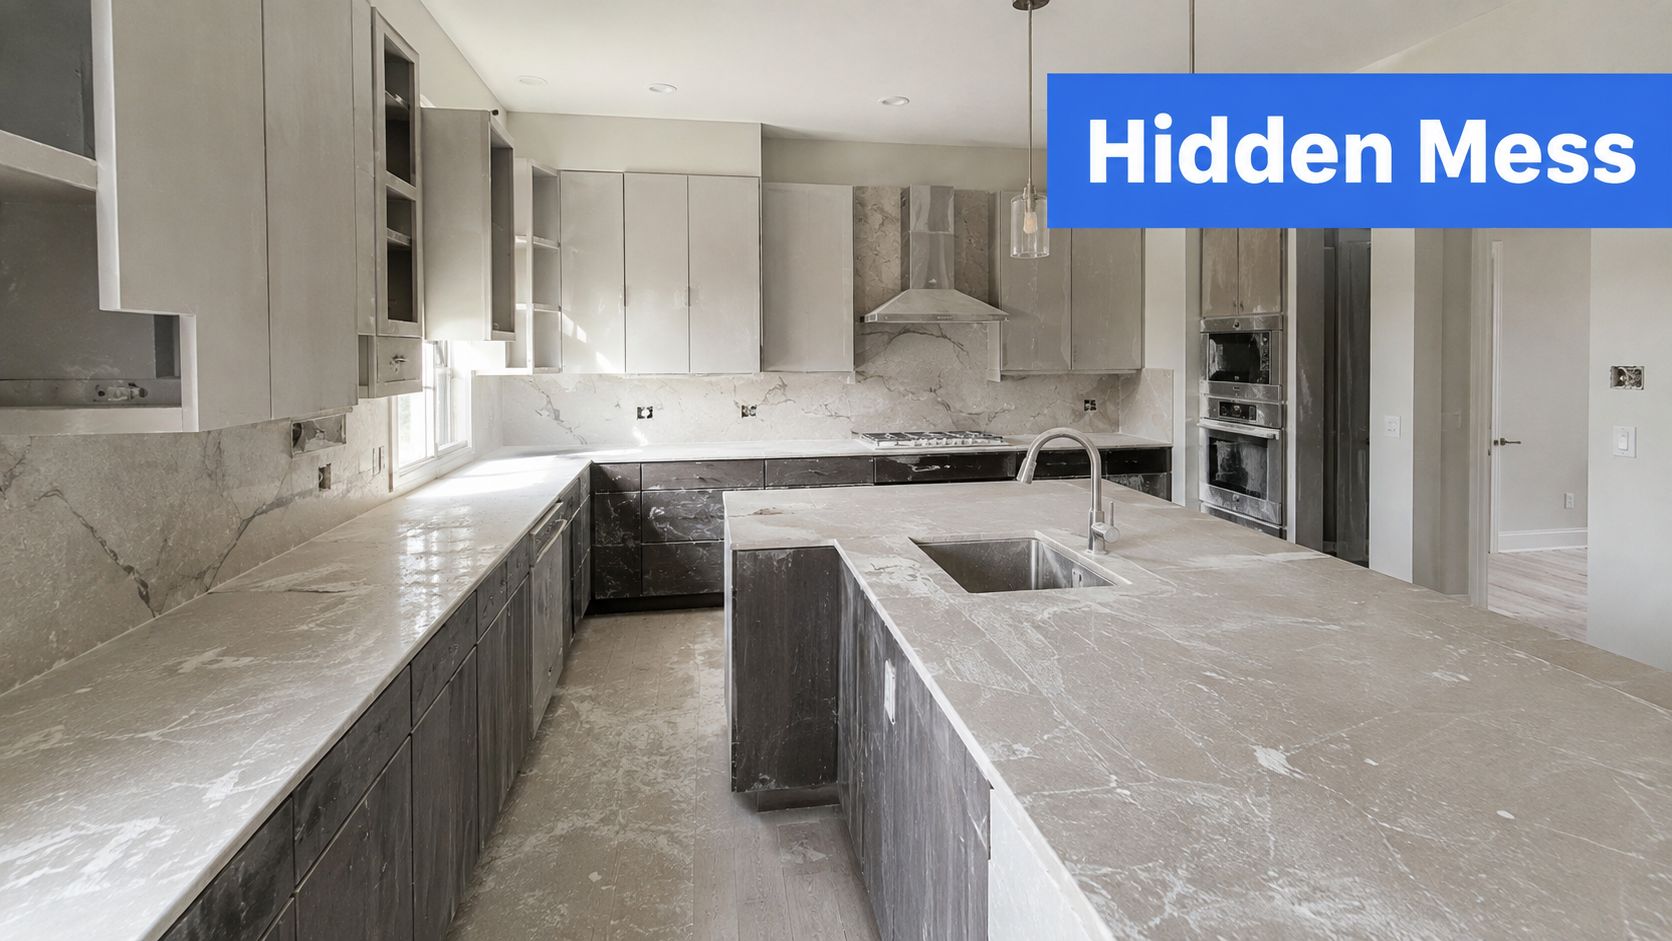
The visible dust is only part of the problem. If HVAC returns, fan-coil units, or supply registers are ignored, particles keep moving through the space and resettling on glass, shelves, and floors. That's why a room can pass the eye test and still fail the hand test, especially when you run a finger across a sill channel or a frame seam.
Practical rule: If you haven't controlled the air and the hidden cavities, you haven't finished the clean.
The industry's growth makes sense once you see the work correctly. Post-renovation cleanup has become a measurable service market because owners, contractors, and property managers need more than tidying. They need a structured process that leaves the space ready for occupancy, photos, inspections, and real use.
The right kit changes everything. Standard household tools can move dust around, but they don't control it, and that's where people waste hours. For post renovation cleaning, the starting point is a HEPA-filter vacuum, microfiber cloths, proper PPE, and enough ladder access to reach the places dust hides.
A HEPA vacuum is essential because construction dust is too fine for a basic vacuum to handle well. Independent cleanup guidance consistently recommends HEPA filtration, microfiber dry dusting, and air-vent cleaning because fine debris settles on trim, light fixtures, and window components. For concrete-floor work, specialized guidance also recommends HEPA vacuuming before wet cleaning, with HEPA filtration defined as capturing 99.97% of particles at 0.3 microns in the referenced construction-cleanup resource construction cleanup guidance.
Other basics matter too:
Drywall and concrete dust are hard on lungs and eyes. A respirator, gloves, and goggles are basic protection, not optional extras. If the site has overhead dust, attic access, or active vent contamination, a full PPE set keeps the clean moving without turning the crew into the cleanup problem.
For a practical checklist of protective gear categories, the Safety Space PPE guide is a useful reference point before you start.
Concrete doesn't reward aggressive chemistry. A widely used preparation standard recommends a mild detergent solution of about 4 ounces per gallon of water for general cleaning after mastic removal or before resealing or painting, and it stresses matching the cleaner to the stain type instead of using one universal chemical approach. That kind of restraint protects the surface and keeps the work from turning into a patching job later.
Field note: If your vacuum, cloths, and PPE can't keep you from revisiting the same dust twice, the setup is wrong before the first room even starts.
Most failed cleanup jobs start with impatience. Someone wants to make the place look finished fast, so they detail glass before the heavy dust is gone, or mop floors before the overhead debris is under control. The result is predictable, because every later trade-off creates more rework.
The rough clean removes the load-bearing mess. That means large debris haul-out, loose packaging, sweeping, and initial vacuuming. Industry guidance describes this as the phase that clears the site for the work to happen, and it's the stage that prevents you from dragging plaster bits and adhesive crumbs across finished surfaces. If this pass gets skipped, everything else becomes slower and dirtier.
The light clean is where surfaces start to matter. Walls, trim, fixtures, shelves, and floors get systematic attention, and top-down cleaning becomes the rule. HEPA vacuuming comes before wet wiping because dry dust can spread when you introduce water too early, turning loose debris into slurry or pushing it into seams.
The final clean exists for what the earlier passes missed or recontaminated. Dust settles again after the site calms down, and that's when glass edges, smudges, fingerprints, and fine residue reveal themselves. This is also the stage where you catch areas that looked clean during the light pass but weren't finished.
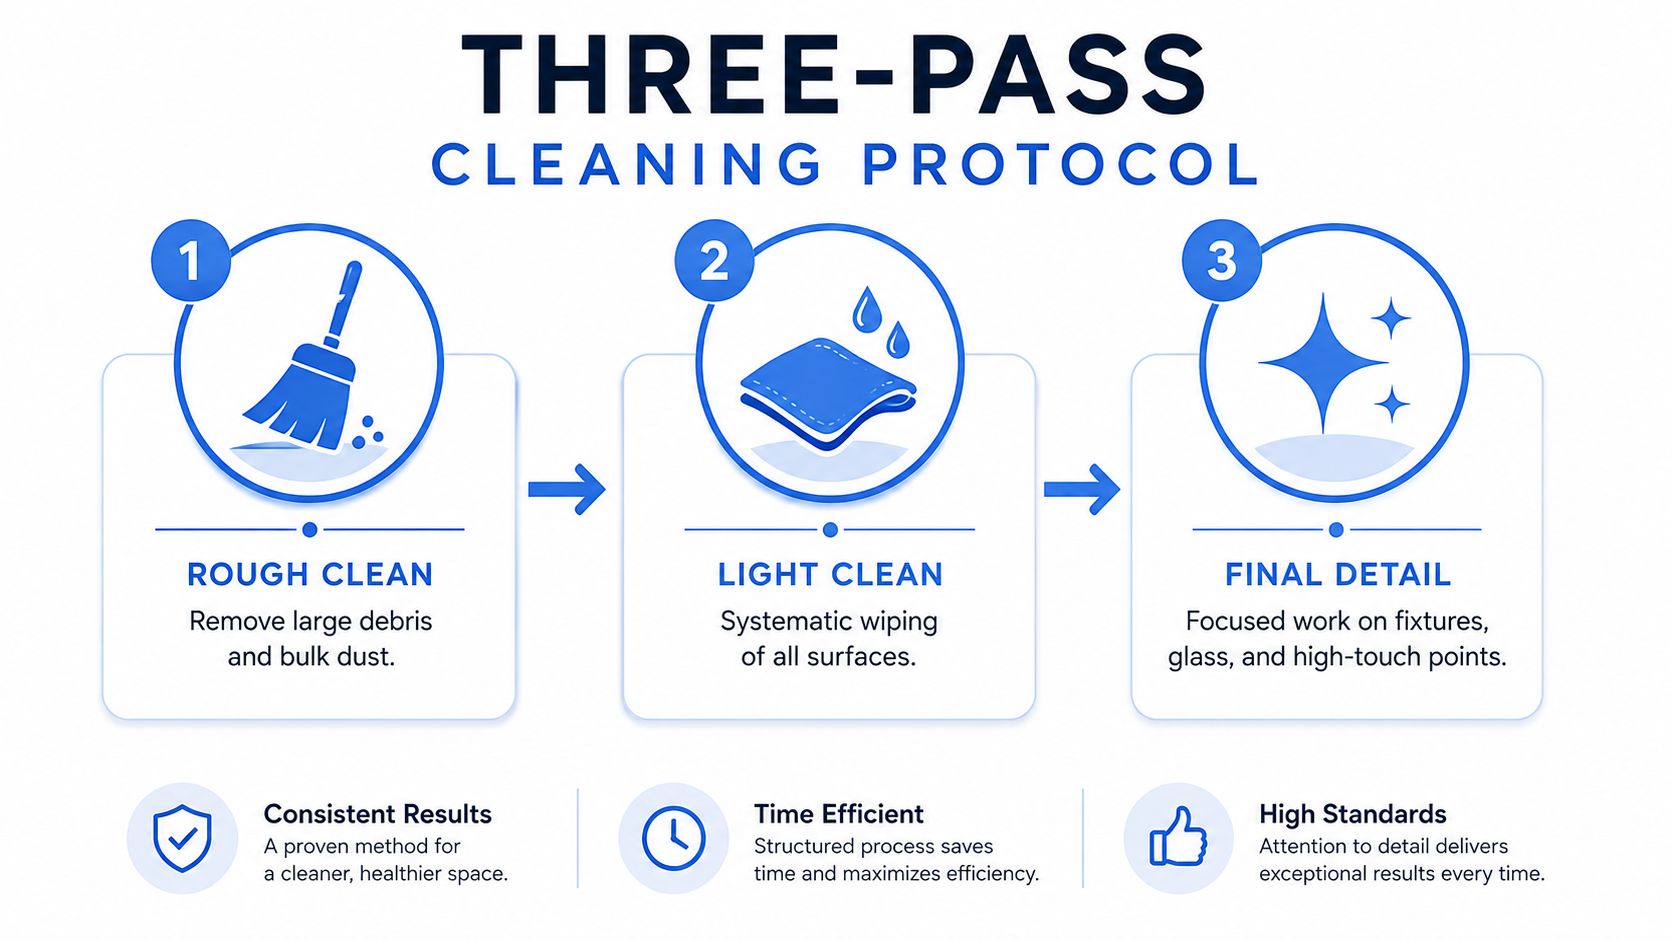
A useful way to think about it is this:
The sequencing protects both the finish and your time. A crew that tries to do all three at once usually ends up doing each one badly.
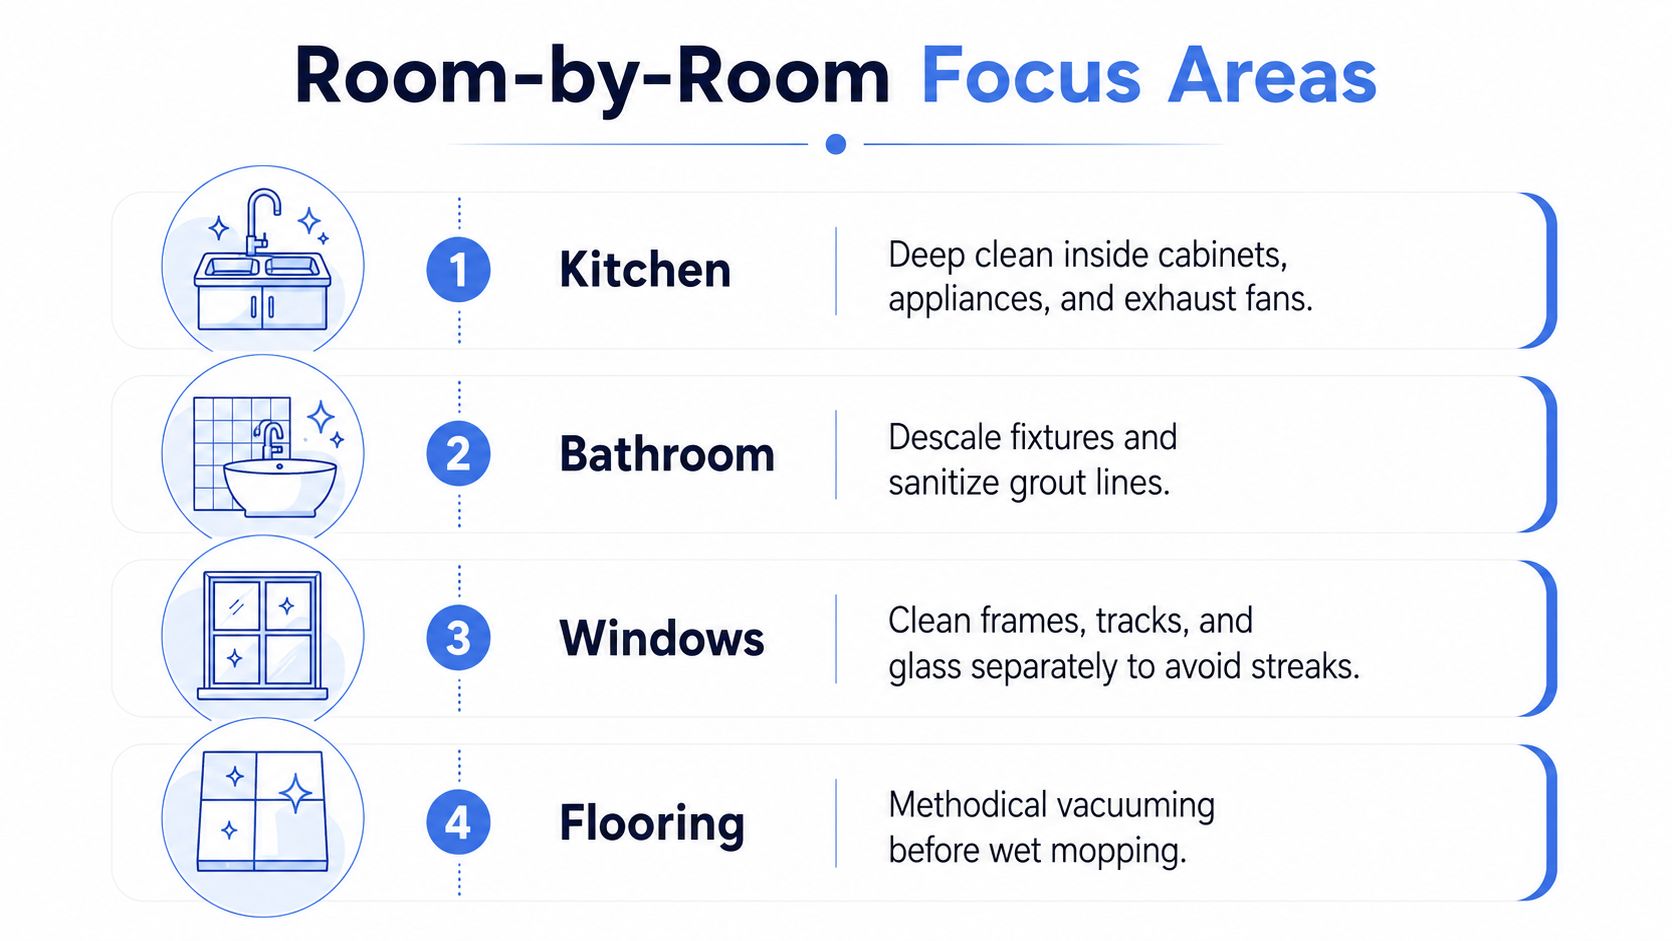
Every room has its own dust behavior, but windows are the most deceptive. They don't just hold glass, they collect residue in frames, tracks, hardware, sill channels, and seals, so treating them like a single surface is how streaks and grime survive the clean. That's why window work has to be separate, deliberate, and done after overhead dust is under control.
Kitchens trap residue in cabinet interiors, appliance edges, and exhaust areas. Bathrooms hold grout haze, silicone smears, and mineral film around polished fixtures. Flooring wants methodical vacuuming first, then wet work, because debris pulled into a mop only moves around unless the dry extraction step comes first.
The same pattern shows up across renovated spaces, dust collects where gravity and air movement take it. Vent covers, top trim, ceiling fans, and recessed light fixtures are the usual hiding spots, and they're exactly where quick cleaning jobs run out of patience.
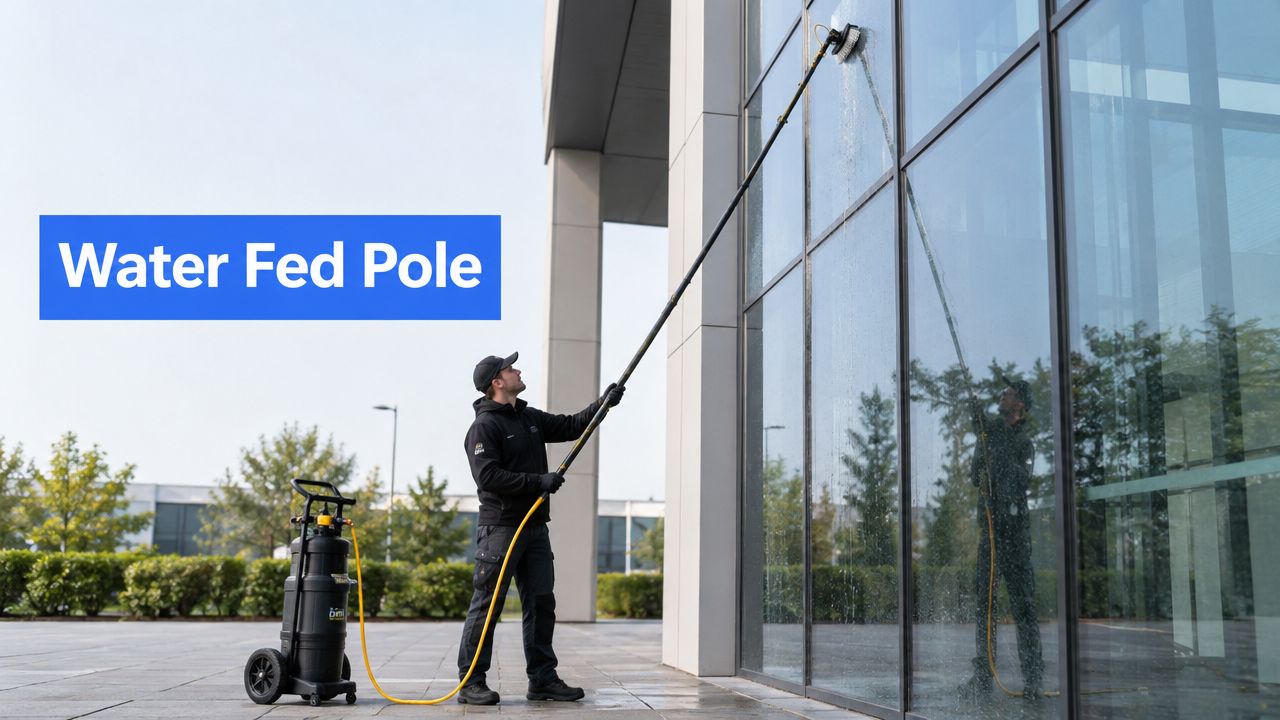
Professional window cleaners use one of two methods, squeegee work or pure-water systems. In the field, those are the two systems that consistently deliver streak-free results, because both are built around controlled water removal rather than random wiping. The company has been cleaning windows for over 26 years, and the reason those methods endure is that they solve the same problem every renovation creates, fine residue on glass and frame edges.
The smart order is frames first, sill channels second, tracks and hardware third, and glass last. Clean the adjacent surfaces before the pane, or you'll chase streaks all afternoon. Adhesive residue, paint specks, grout haze, and installer fingerprints all need a separate check, especially around shower enclosures and window tracks.
For a service-level breakdown of the same workflow, the internal guide at post-construction washing aligns with the sequencing professionals rely on in the field.
If vents and filters are ignored, renovation dust can keep recirculating after the visible work is done. That's why supply registers, return grilles, and accessible duct faces belong in the cleaning plan, not as an afterthought. A polished room with dirty airflow is still unfinished.
Budgeting for cleanup gets easier when you stop thinking of it as a small final task. This is project work, and the pricing reflects surface area, finish level, access, and how much detail the site needs. Industry pricing guides commonly place post-construction or post-renovation cleaning between about USD 0.15 and USD 0.60 per square foot, with final cleaning often around USD 0.30 to USD 0.75 per square foot, according to Ziva Cleaning's cost guide.
A 5,000-square-foot commercial suite can translate into roughly USD 1,500 to USD 3,750 for final cleaning at the square-foot ranges above. Larger 50,000-square-foot facilities can exceed USD 37,500 for detailed final work. Residential projects are smaller, but they're still meaningful, with one national estimate putting the average project near USD 500 to USD 800, and a typical average around USD 650 for an average-sized home, again from Ziva Cleaning's cost guide.
| Property Type | Size Range | Estimated Cost |
|---|---|---|
| Residential home | Average-sized home | About USD 500 to USD 800, with a typical average around USD 650 |
| Commercial suite | 5,000 square feet | Roughly USD 1,500 to USD 3,750 |
| Large facility | 50,000 square feet | Can exceed USD 37,500 |
Complex window work, multiple stories, high-detail finishing, and HVAC-related dust control all increase labor. A site with new glazing, shower glass, detailed trim, and accessible vent cleaning is not the same as a basic wipe-down after painting. The more surfaces that need separate detailing, the closer the job gets to the top of the range.
Timing follows the same logic. Rough clean is usually fastest, light clean takes the most controlled labor, and final detail often stretches the schedule because it's where missed residue shows up. If dust keeps drifting from vents or overhead cavities, the final pass becomes a correction pass.
DIY makes sense when the site is small, the dust load is light, and the finish materials are forgiving. It stops making sense when the property is tall, the glazing is extensive, the HVAC system needs attention, or the handover date leaves no room for a second attempt. High-rise units, commercial interiors, medical offices, and large glass packages are where professional crews earn their keep.
Professional window work isn't just about making glass look good. The process depends on either a squeegee or a pure-water system, and those tools are built to remove residue without leaving streaks behind. Consumer sprays and paper towels don't behave the same way on renovation dust, especially when tracks, frames, and seals are contaminated too.
If you're comparing DIY to professional handling, the closest parallel is carpet work. A helpful comparison on professional carpet cleaning vs DIY shows the same pattern, the right equipment and process matter more than the label on the bottle.
Ask whether the crew works in phases, how they handle vents and glass edges, and whether they detail frames and tracks separately from the pane. A proper provider should know the difference between a quick cosmetic wipe and a true final clean. If the service can't explain its sequence, it probably won't protect your finishes.
Professional Window Cleaning has been in business since 1999 and operates in Arizona, Colorado, and Nevada, including service in Las Vegas, Phoenix, Denver, and Scottsdale. That regional coverage matters when the job calls for specialty window work after renovation.
If you're trying to finish a renovation without chasing dust for another week, Professional Window Cleaning can handle the glass, frames, and final polish that make the space ready. Visit Professional Window Cleaning to schedule service and get the kind of post-renovation finish that holds up after the HVAC kicks back on.
Read our blog posts regularly and keep learning.