Care and Maintenance
Exterior Window Cleaning Cost: A Homeowner's Guide
Learn what drives exterior window cleaning cost in 2026, from per-window and per-pane rates to high-rise and residential pricing, with smart tips to save.


The stain shows up after a hard rain, right where the ceiling meets the chimney chase. The roof shingles look fine from the yard, so the easy assumption is that the leak must be somewhere else. In practice, that brown ring usually points back to the chimney flashing repair area, because the roof, brick, and metal all meet there under constant stress from heat, wind, and water.
A homeowner in Phoenix, Las Vegas, or Denver often sees the same pattern in a different season. In the Southwest, UV and monsoon bursts punish sealants. In Colorado, freeze-thaw movement opens small separations that were barely visible in summer. If you want a cost frame before anyone climbs up, the chimney leak repair cost breakdown is a useful place to compare the leak signs with the kind of repair they usually lead to.
A wet ceiling near the chimney does not mean the leak is directly above the stain. Water can enter at the roof-to-chimney joint, then run along framing before it finally shows up inside. That is why the first clue is often a faint ring, a peeled paint patch, or a musty smell after a storm, not a dramatic drip.
Look at the fireplace surround, the attic side of the chimney, and the top-floor ceiling. Damp drywall, crumbling mortar inside the chase, or rust on visible metal means water has already found a path. On a real job, I check the full flashing stack, apron, step flashing, and counterflashing, because one weak layer can send water behind the others even when the roof surface still looks fine.
A leak that appears on the ceiling is usually the end of the path, not the start of it.
The chimney is a hard interruption in a flexible roof. Shingles move a little with heat, the masonry does not, and the flashing system has to bridge that gap without creating a water shelf. A temporary tar smear can hide the opening for a while, but it does not restore the layered shed path that keeps water moving downhill. In dry heat, sealant dries out and cracks. In monsoon weather, water pushes behind anything that is only patched on the surface. In freeze-thaw conditions, small separations widen fast.
That is also why the chimney leak repair cost breakdown can look higher than homeowners expect. Once the problem reaches the layered metal, the labor usually matters more than the material, especially if the chimney is tall, the masonry needs attention, or the old flashing was installed without enough overlap.
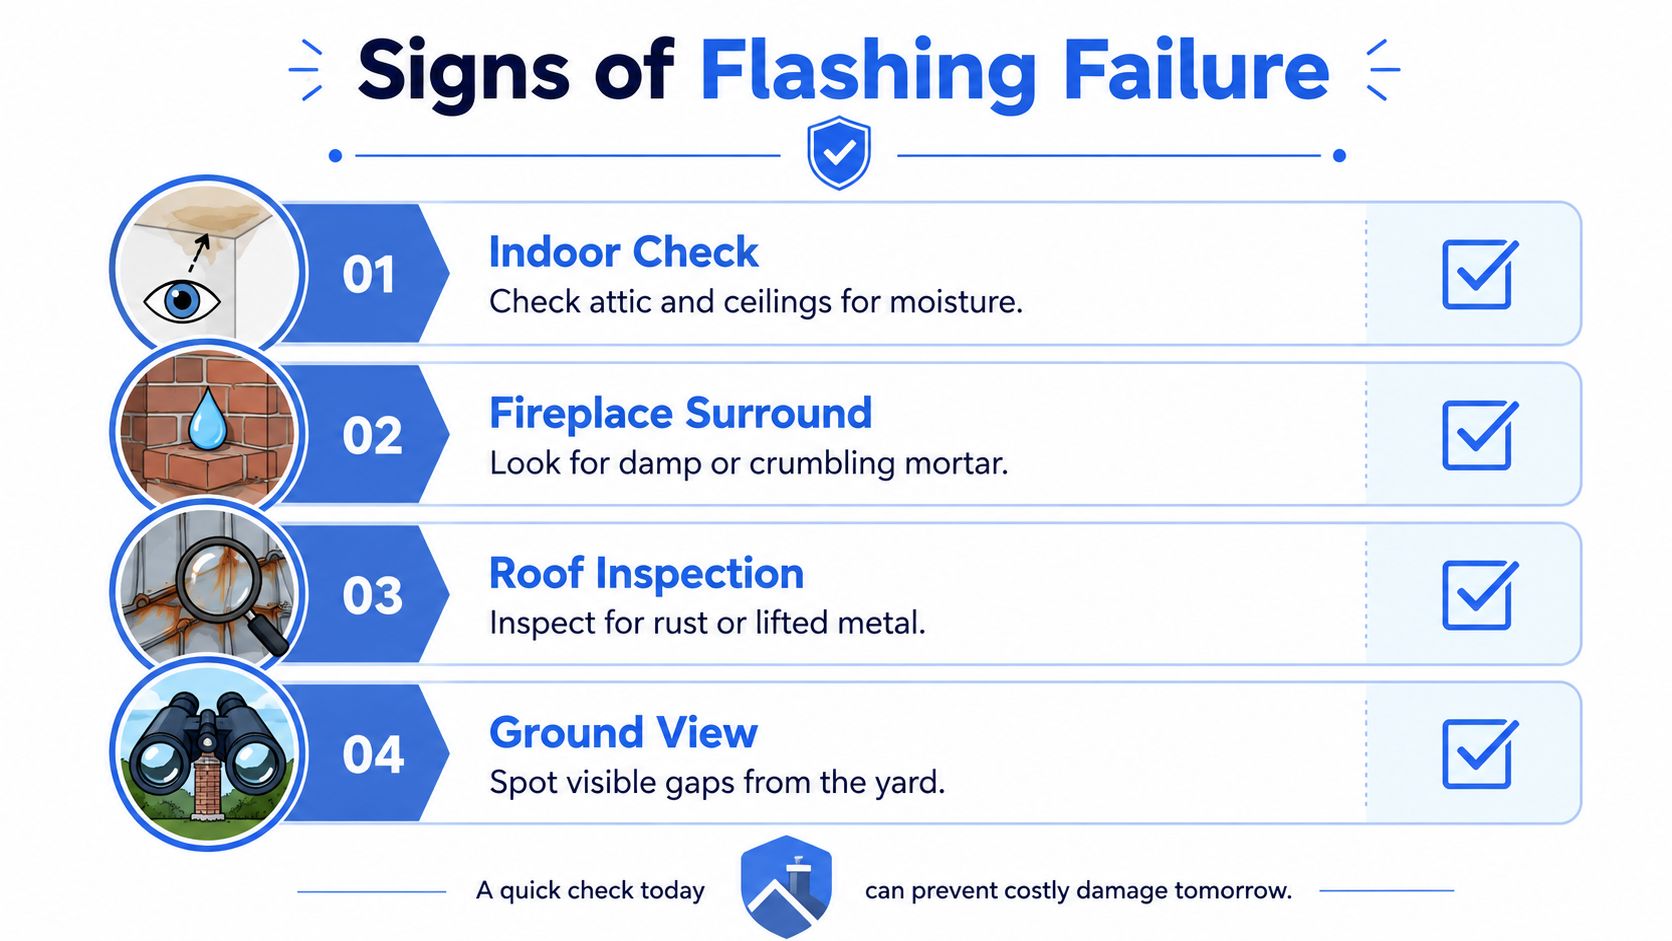
A ceiling stain is usually the last clue, not the first one. Before the leak reaches drywall, the chimney junction often gives off smaller signs that the flashing layers are no longer shedding water the way they should.
Start in the attic if you have access. Look for daylight around the chimney chase, damp framing, rust streaks on exposed metal, or staining that starts near the chimney and tracks outward. On the top floor, check for peeling paint, bubbling wallpaper, or soft drywall along the chimney wall. Those interior signs often show up before the roof surface looks bad enough to draw attention.
Outside, a sound flashing system sits flat and tucks under the shingles where it belongs. A failing one usually shows lifted edges, visible gaps, or a tar patch smeared at the base of the chimney. If sealant is the only thing you can see doing the work, the layered metal assembly is already compromised.
Practical rule: if a thick bead of tar is carrying the load, the repair is usually temporary.
The lower flashing should extend down onto the shingles, not stop at the brick line. The side pieces should look woven into the shingle courses, not laid over them as one continuous strip. If the chimney is wide enough to need a cricket, that saddle behind the chimney should be there instead of being skipped and hidden with caulk.
The upper edge matters too. As noted in the guide to roof flashing basics, the bottom cap flashing should extend far enough onto the shingles to keep water moving downhill, and wider chimneys need a cricket to split runoff before it pools behind the stack. That is the difference between a real water-shedding assembly and a patch that only holds until the next hard rain, hot spell, or freeze-thaw cycle.
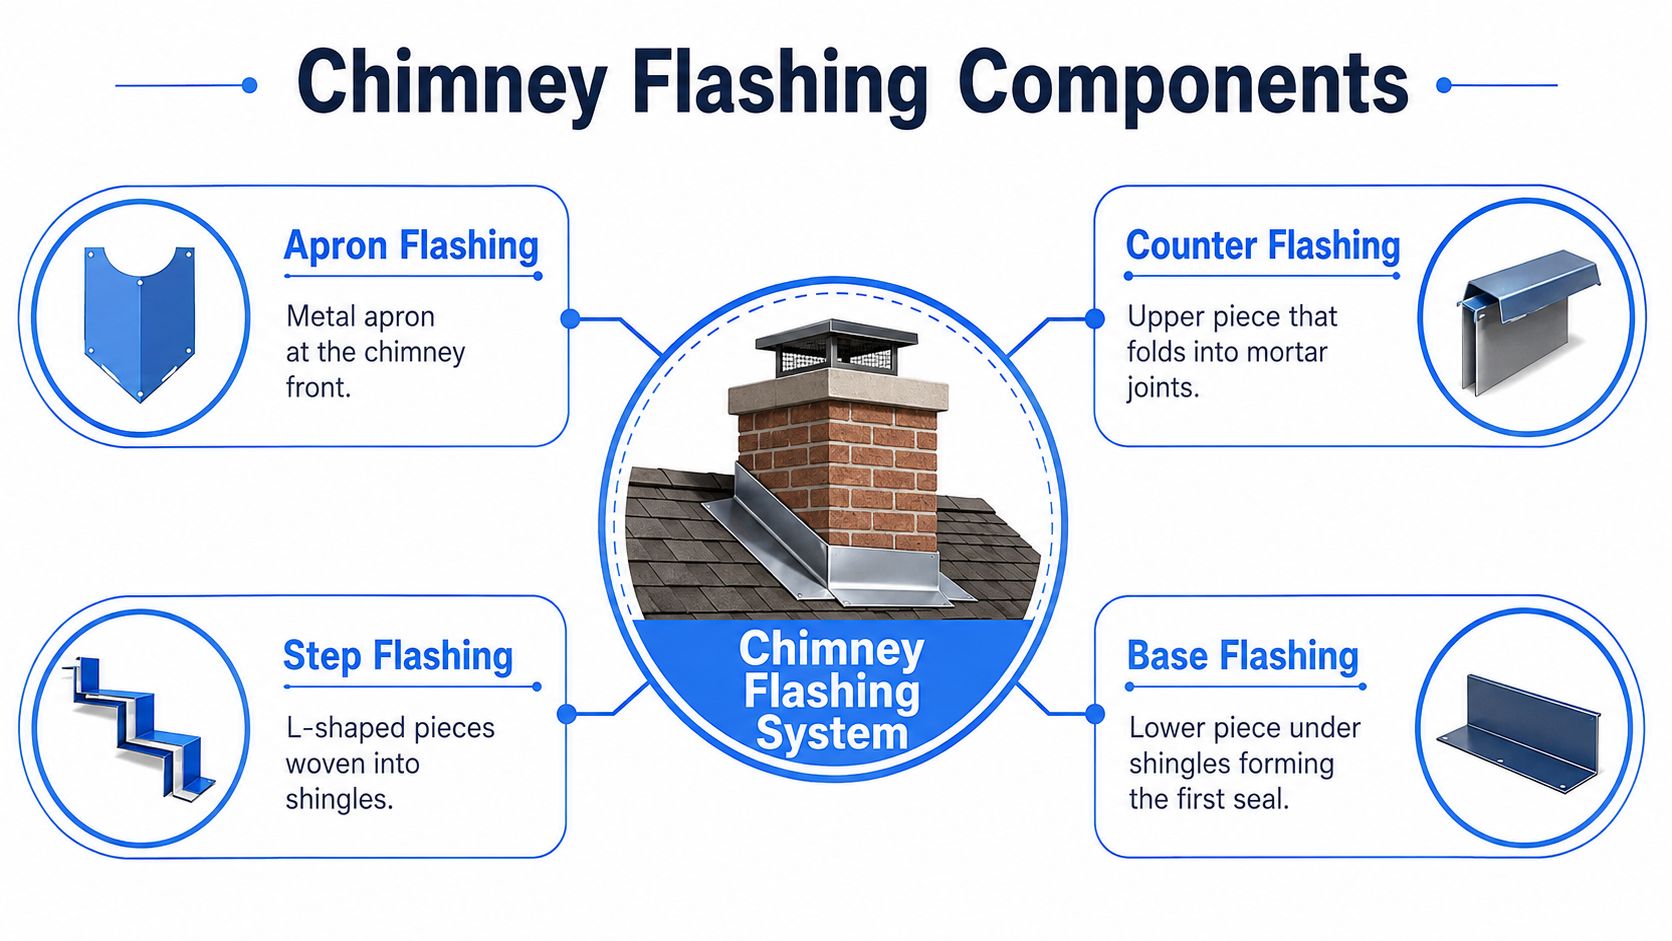
A chimney flashing system is built in layers because water moves in layers. It runs downhill, then sideways, then under any weak overlap it can find. A proper repair follows that path so the metal assembly sheds water by design instead of depending on sealant to hold everything together.
The apron flashing sits on the downhill front of the chimney. It catches the first flow of water where the roof meets the masonry and sends it back onto the shingles. The step flashing runs up both sides in a staggered pattern, one piece per shingle course, so each layer hands water to the next instead of letting it slip behind the chimney wall.
The counterflashing is the upper cap that ties into the masonry, usually set into a mortar joint or reglet. That upper edge keeps wind-driven rain from getting behind the step flashing. On the back side, an optional cricket redirects runoff around wider chimneys so water does not sit behind the stack and press on the joints.
That layered order is what makes the system work in hot, dry weather, in monsoon bursts, and during freeze-thaw cycles. Caulk can hide a gap for a while, but it does not recreate the overlap sequence or stop water from working under the metal.
Industry guides note that properly installed lead flashing can last 80 to 100 years, and some installations have lasted over 400 years. Aluminum or zinc alternatives usually fall in the 20 to 40 year range, while self-adhesive flashband products often last only 5 to 15 years (Bernard Andrews Roofing chimney flashing guide). That spread matters on real jobs, because the best repair is not the one that stops a drip for one storm, it is the one that can handle UV, thermal movement, and water intrusion without splitting apart early.
Hot sun punishes thin sealants and soft materials. Freeze-thaw cycles open tiny gaps at the edges and in the mortar joint. In dry climates, that means a patch that looks fine in spring can start failing after a hard summer or the first cold snap.
The metal choice matters, but the overlap order matters more.
For a plain-English refresher on how flashing pieces interact across a roof, the guide to roof flashing basics is a useful companion piece. The same principle applies at the chimney, where a layered repair holds up longer than a surface patch.
Safety comes first, because flashing work usually happens on the edge of a roof, not in a comfortable flat work zone. The ladder should land on stable footing, not on the flashing itself, and roof access should match the slope and height. On steep or awkward roofs, I'd rather stop than gamble with the setup.
A small seam failure can sometimes be stabilized with cleaned joints, roofing cement, and reinforcing mesh. That's a short-term move for a tiny separation, not a cure. It can buy time through one season, but it won't fix bad overlap, a missing reglet, or corroded metal.
A permanent repair means removing the affected shingles, replacing damaged metal, and rebuilding the overlap sequence the right way. The U.S. General Services Administration says shingles should be removed only as needed, the apron should be installed first, and the first base flashing should cover the nail of the apron flashing while the overlap sequence controls capillary action and wind-driven rain (GSA chimney flashing repair).
A common error is nailing flashing too close to the chimney or leaving fasteners exposed. That traps the metal, limits movement during thermal cycling, and invites leaks to return. One expert repair guide also notes base flashing should extend at least 4 to 6 inches up the chimney side and at least 3 inches onto the roof deck, with counterflashing inserted into a reglet rather than surface-mounted (Rhoden Roofing chimney flashing repair).
After the install, run a hose test and watch the interior side for fresh moisture. If water shows up during the next rain, the problem is usually in the overlap order, the masonry tie-in, or a missed fastener point.
A small chimney leak can start with one stain and end with a layered repair that pulls in metal, shingles, and masonry. In Arizona, Nevada, and Colorado, the bill is shaped less by the flashing itself and more by the conditions around it. Phoenix and Scottsdale punish sealants with long UV exposure, then monsoon runoff forces water at weak seams. Las Vegas adds sharp heat swings, and Denver brings freeze-thaw stress that opens mortar joints and works fasteners loose.
| Region | Minor Patch | Partial Replacement | Full Replacement |
|---|---|---|---|
| Phoenix and Scottsdale | Usually closer to the lower end of the market when access is simple | Mid-range when apron, step, and counterflashing all need replacement | Higher when masonry or roof access complicates the job |
| Las Vegas | Similar to Phoenix, with heat and roof access often driving labor | Mid-range when the chimney needs a full layered rebuild | Higher when the roof pitch or height slows access |
| Denver and Front Range | Often rises when freeze-thaw has damaged mortar | Mid-range to upper-mid when masonry cleanup is needed | Higher when stone chimneys or deck repairs are involved |
Those regional lines sit inside the broader market ranges already noted, about $300 to $800 for typical professional repair and $400 to $1,600 as a broader chimney flashing range, with large or stone chimneys sometimes above $2,000 (Modernize flashing repair cost guide). The pattern is consistent with exterior upkeep work more broadly, where access, materials, and the condition of adjoining surfaces decide how far the job goes, as covered in this building exterior maintenance reference.
Labor usually drives the invoice before material does. Roof pitch, roof height, scaffolding, and masonry condition matter more than the sheet metal itself. If a repair sits too long, a small fix can turn into a larger rebuild once water keeps working behind the apron, step flashing, and counterflashing for more than one season.
That is why a low bid can be misleading on a chimney job. A quick reseal may hold for a while, but if the overlap order is wrong or the masonry tie-in is already failing, the same leak comes back after the next hard rain or freeze cycle.
Some chimney leaks stay in the flashing layer. Others have already moved into the roof deck and masonry, and that is where a repair turns into a roof-and-chimney job. A chimney that is wide enough to need a cricket changes the whole repair plan, because the apron, step flashing, and counterflashing all have to work together to shed water. If the mortar is spalling, cracked, or soft, new metal will not stay tight for long until the masonry itself is corrected.
A steep-slope roof or a two-story setup brings safety concerns before workmanship even enters the picture. Rot around the chimney base does the same thing, because the deck may need partial removal before fresh flashing can seat correctly and stay flat. Historic masonry adds another layer of complication, since older neighborhoods and designated districts in places like Denver and Scottsdale can bring preservation review or permit questions depending on the scope.
Hire out sooner if the chimney base is failing, not just the sealant line.
Ask direct questions before you hire. Find out whether the contractor separates repair from replacement in writing, whether the estimate lists step flashing and counterflashing as different line items, and whether they can show photos of similar chimney work. Ask about licensing, warranty terms, and whether the scope includes masonry repair or only metal replacement.
A contractor who cannot explain the difference between a quick patch and a layered rebuild is usually the wrong fit for this kind of work. The estimate should spell out what gets removed, what gets rebuilt, and what part of the chimney still needs attention after the flashing is done.
In dry heat, UV can dry out sealants and expose weak tie-ins. In monsoon season, wind-driven rain finds every bad overlap. In freeze-thaw weather, any trapped moisture opens up joints that looked fine a month earlier. If runoff backs up near the roof edge, the chimney may also need attention to the surrounding drainage, and the Airtight Spray Foam's ice dam advice is worth reading for that part of the problem.
Pair chimney checks with regular windows and gutter cleaning, because clogged gutters can push water where a solid flashing job should not have to fight it. That matters most after heavy wind, monsoon weather, or a hard freeze, when a weak edge detail can start leaking even if the chimney itself looks unchanged.
Start with a two-minute indoor check. Look for a ceiling stain, a damp fireplace surround, or peeling paint near the chimney wall. Then step outside and check the chimney base from the ground for lifted metal, visible gaps, or tar smeared where flashing should be.
If you live where freeze-thaw or ice dams are part of the season, the roof edge matters even more. The ice dam advice from Airtight Spray Foam Insulation is worth a look if runoff backs up near the eaves and chimney line. For the rest of the year, keep the plan simple, sealant is a last resort, and the effective fix is a layered system that sheds water in the right order.
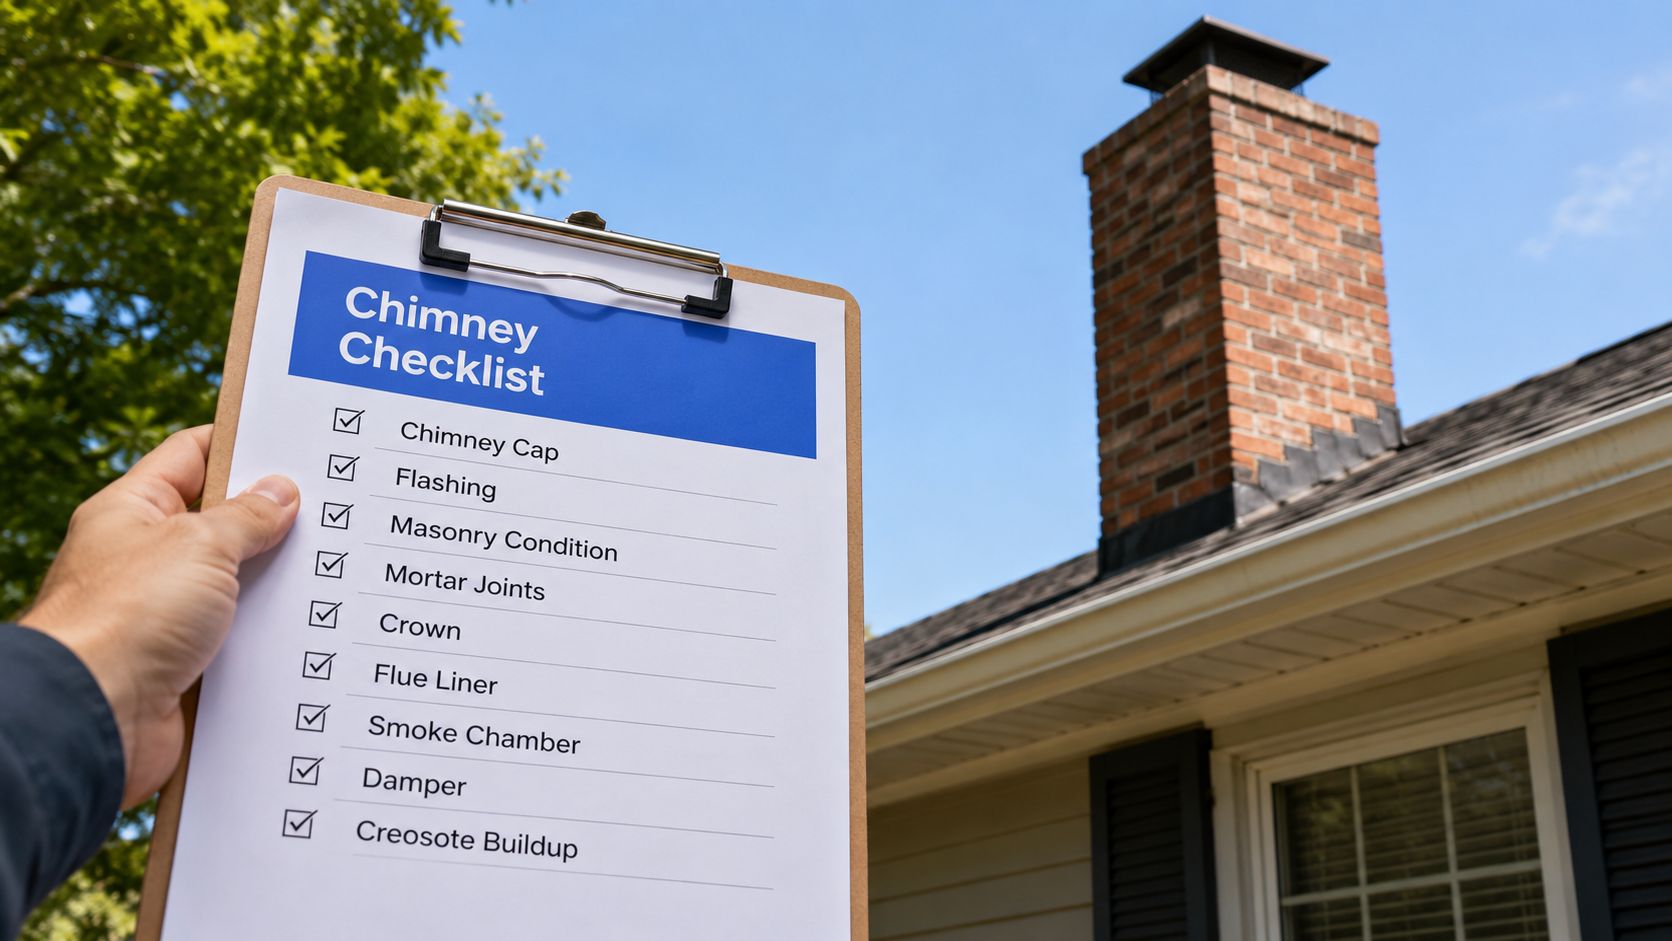
If you want to keep the rest of the exterior working as a system, pair chimney checks with regular windows and gutter cleaning, because backed-up water can make a good flashing job look bad. Recheck the chimney once a year, and sooner after heavy wind, monsoon weather, or a hard freeze.
Professional Window Cleaning also handles chimney flashing and reflash work as part of exterior maintenance. If you've spotted staining, loose metal, or repeat leaks around the chimney, visit Professional Window Cleaning to ask about an inspection and get the problem looked at before the next storm turns it into a bigger repair.
Read our blog posts regularly and keep learning.