Care and Maintenance
Hard Water Stains Removal for Crystal Clear Windows
A complete guide to hard water stains removal from windows. Learn DIY and pro methods for light to severe stains in AZ, NV & CO. Get your glass sparkling again!


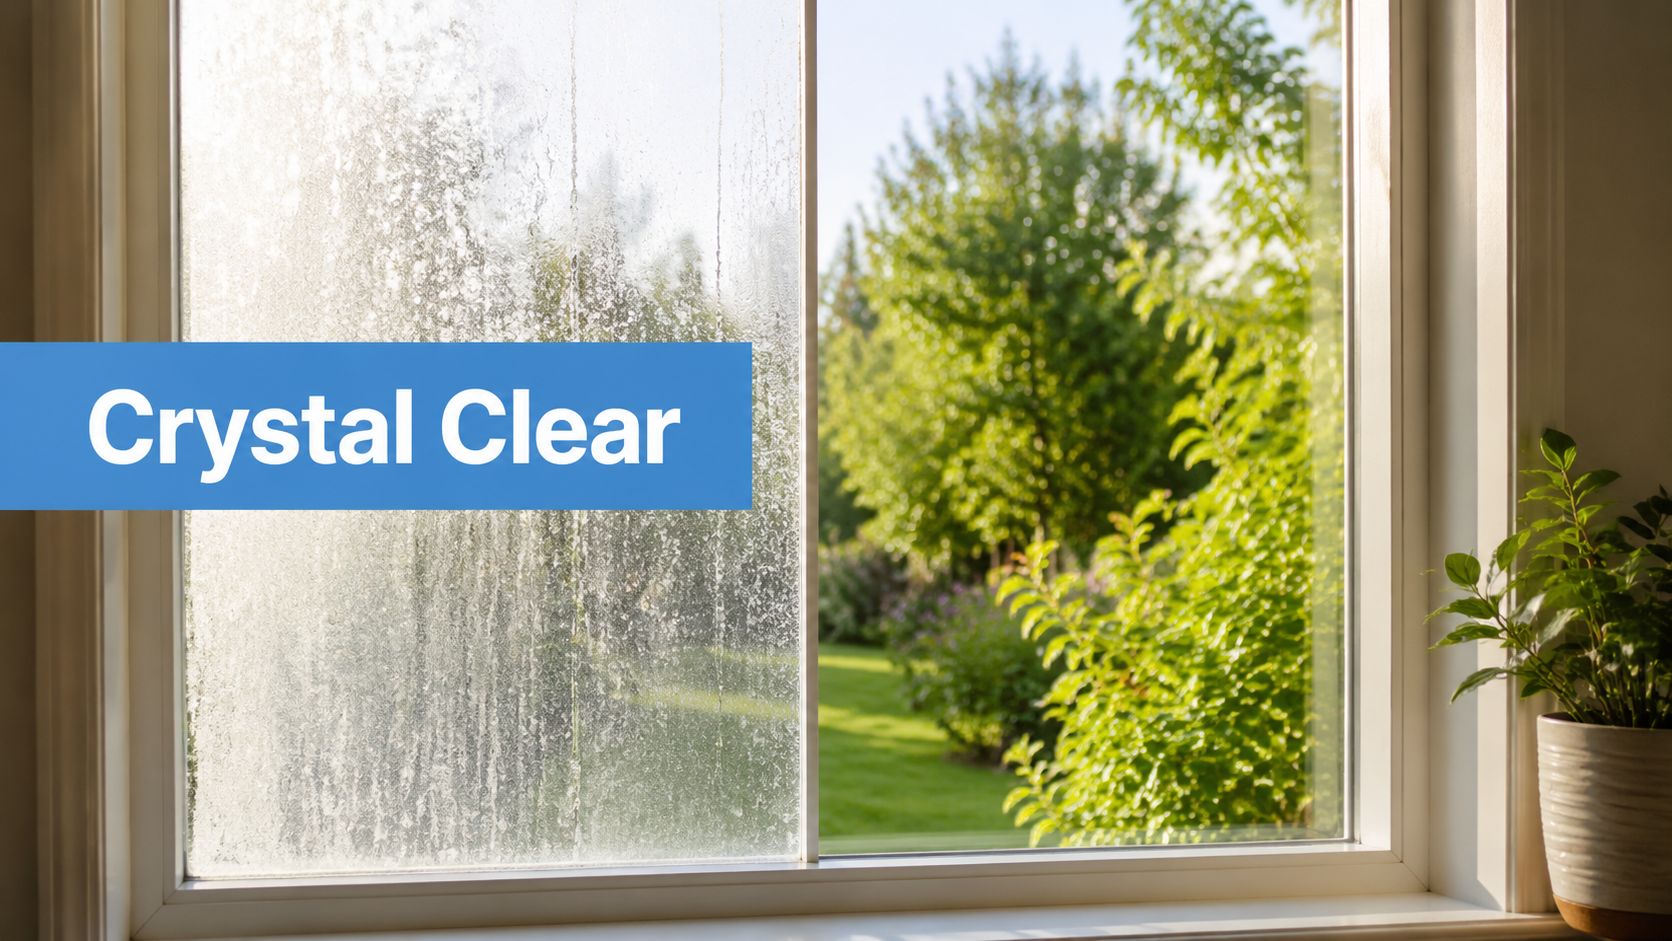
Those milky-white spots on your windows aren't just dirt. They're mineral deposits, mostly calcium and magnesium, left behind when water evaporates. And they don't just sit on the surface; they actually bond with the glass, creating stubborn blemishes that your average cleaner won't touch.
Ever spent an afternoon scrubbing a window, only to step back and see those chalky spots still there, almost mocking your effort? There's a reason they're so persistent, and it has more to do with chemistry than elbow grease.
It all starts with the water itself. When rain filters through mineral-heavy rock like limestone, it picks up dissolved minerals. This is what we call "hard" water. When that water—whether from a sprinkler, a hose, or even runoff from a stucco wall—dries on your window, the H₂O is gone, but the minerals remain.
Unlike a bit of dust you can just wipe away, these mineral deposits form a chemical bond with the silicon dioxide in the glass. Glass looks perfectly smooth to the naked eye, but on a microscopic level, it's porous. The minerals work their way into these tiny pores and start to crystallize.
Sunlight and heat supercharge this process, acting like a kiln that bakes the minerals right into the glass. This is where a simple stain turns into a much bigger problem called etching. At this point, the minerals have started to physically corrode and alter the glass itself.
It's a common mistake to think hard water stains are just another type of grime. In reality, they're mineral deposits that have begun to chemically fuse with your glass. That's why soap and water just don't cut it.
While hard water is the root cause, a few environmental factors can make the problem of hard water marks on windows a lot worse. Pinpointing these sources is your first line of defense.
This isn't a rare problem. Hard water marks on windows are everywhere, especially in cities. It's estimated that over 85% of tap water in the United States is hard enough to cause staining. And it’s more than a cosmetic issue—if left untreated for years, the resulting etching can shorten a window's lifespan by 20-30%. You can learn more about the ugly truth of hard water stains and their long-term impact. Understanding the science here is key to knowing why a targeted approach is the only way to win this battle.
Before you grab a bottle of anything, you need to play detective. Not all hard water stains are created equal; some are fresh, surface-level annoyances, while others are the ghosts of mineral deposits past, physically etched into the glass. Nailing the diagnosis is the most critical first step—it ensures you use the right weapon for the right battle.
Your first clue is always visual. Are the spots faint and milky, maybe only visible when the light hits just right? That’s good news. You're likely looking at Stage One damage, which means the mineral deposits are recent and haven't had time to truly bond with the glass.
But if the stains are opaque, chalky white, and obvious even from a distance, you’re dealing with a more stubborn, semi-permanent buildup.
To really know what you're up against, you have to get hands-on. The best diagnostic tool you have is surprisingly simple: the fingernail test. Just run your fingernail gently across a dry, stained part of the window.
Figuring out where the water is coming from can also give you a major hint. Most of the time, the culprit isn't a mystery.
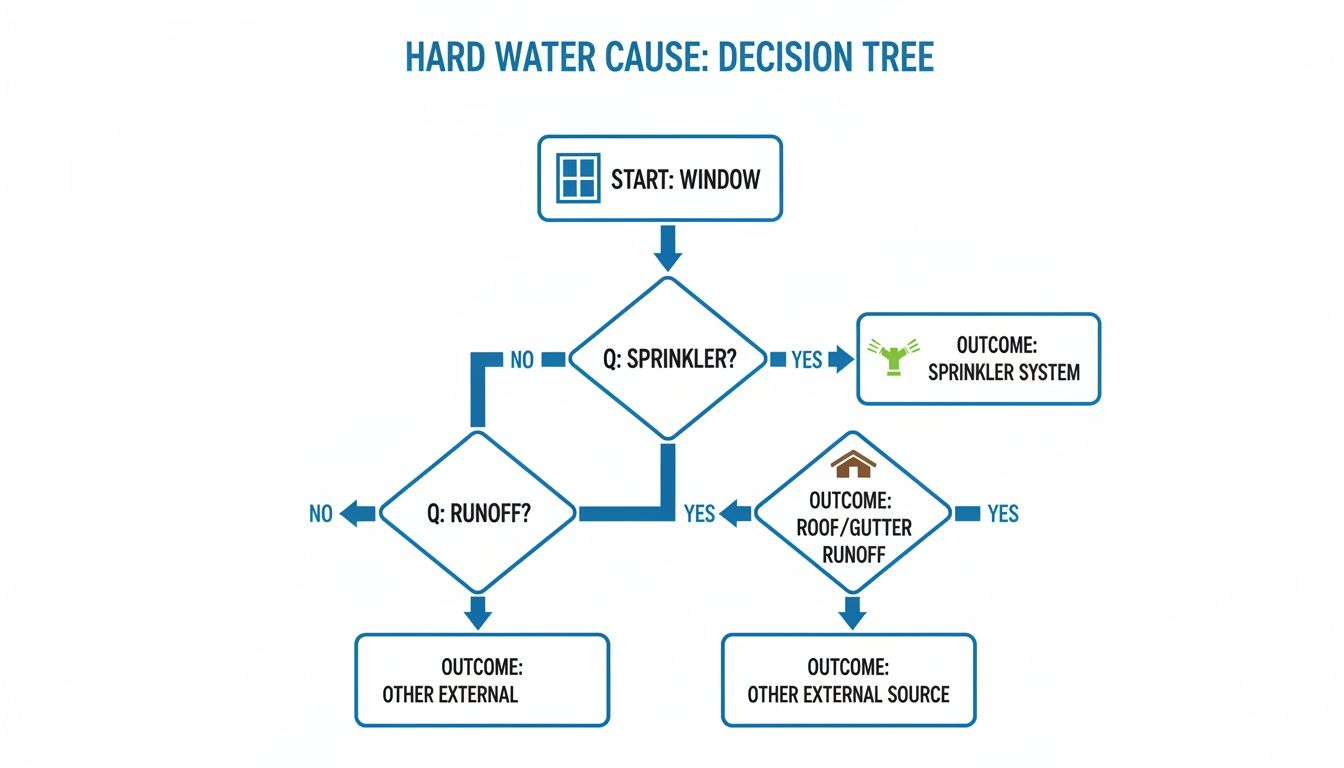
As you can see, sprinklers and roof runoff are the usual suspects for serious hard water staining on home windows.
To make it even easier, here's a quick reference guide to help you identify the severity of your hard water damage.
This table should help you match what you're seeing and feeling to the right solution, saving you from wasting time on methods that won't work.
Guessing wrong here is a recipe for frustration. You can spray vinegar on deeply etched glass all day and get zero results. On the flip side, bringing out the heavy-duty abrasives for a minor spot is a great way to scratch your window for no reason.
Knowing the stage of damage sets realistic expectations. Surface stains are often removable with DIY methods, but etched glass typically requires professional intervention. Professionals use either a squeegee or a pure-water system for cleaning, and for severe damage, they may turn to glass polishing with specialized compounds.
This assessment is especially critical in regions with notoriously hard water. For homeowners in places like Phoenix or Las Vegas, stains can progress from a minor nuisance to permanent etching much faster. Taking five minutes to properly assess the damage will save you time, money, and a whole lot of headaches.
If you've taken a look at your windows and just see some light, milky spots, you're in luck. Catching these fresh hard water marks on windows early means you can likely handle it yourself. With a few things you probably already have in your pantry and the right approach, you can get your glass looking crystal clear again without needing harsh chemicals or professional gear.
The secret is using a mild acid. This is what breaks down the mineral deposits—usually calcium and magnesium—that are clinging to your glass.
This is the method everyone talks about for a reason: it's simple, safe, and works surprisingly well on those early, Stage One stains. The acetic acid in plain old white vinegar is perfect for dissolving the alkaline minerals that create those chalky spots.
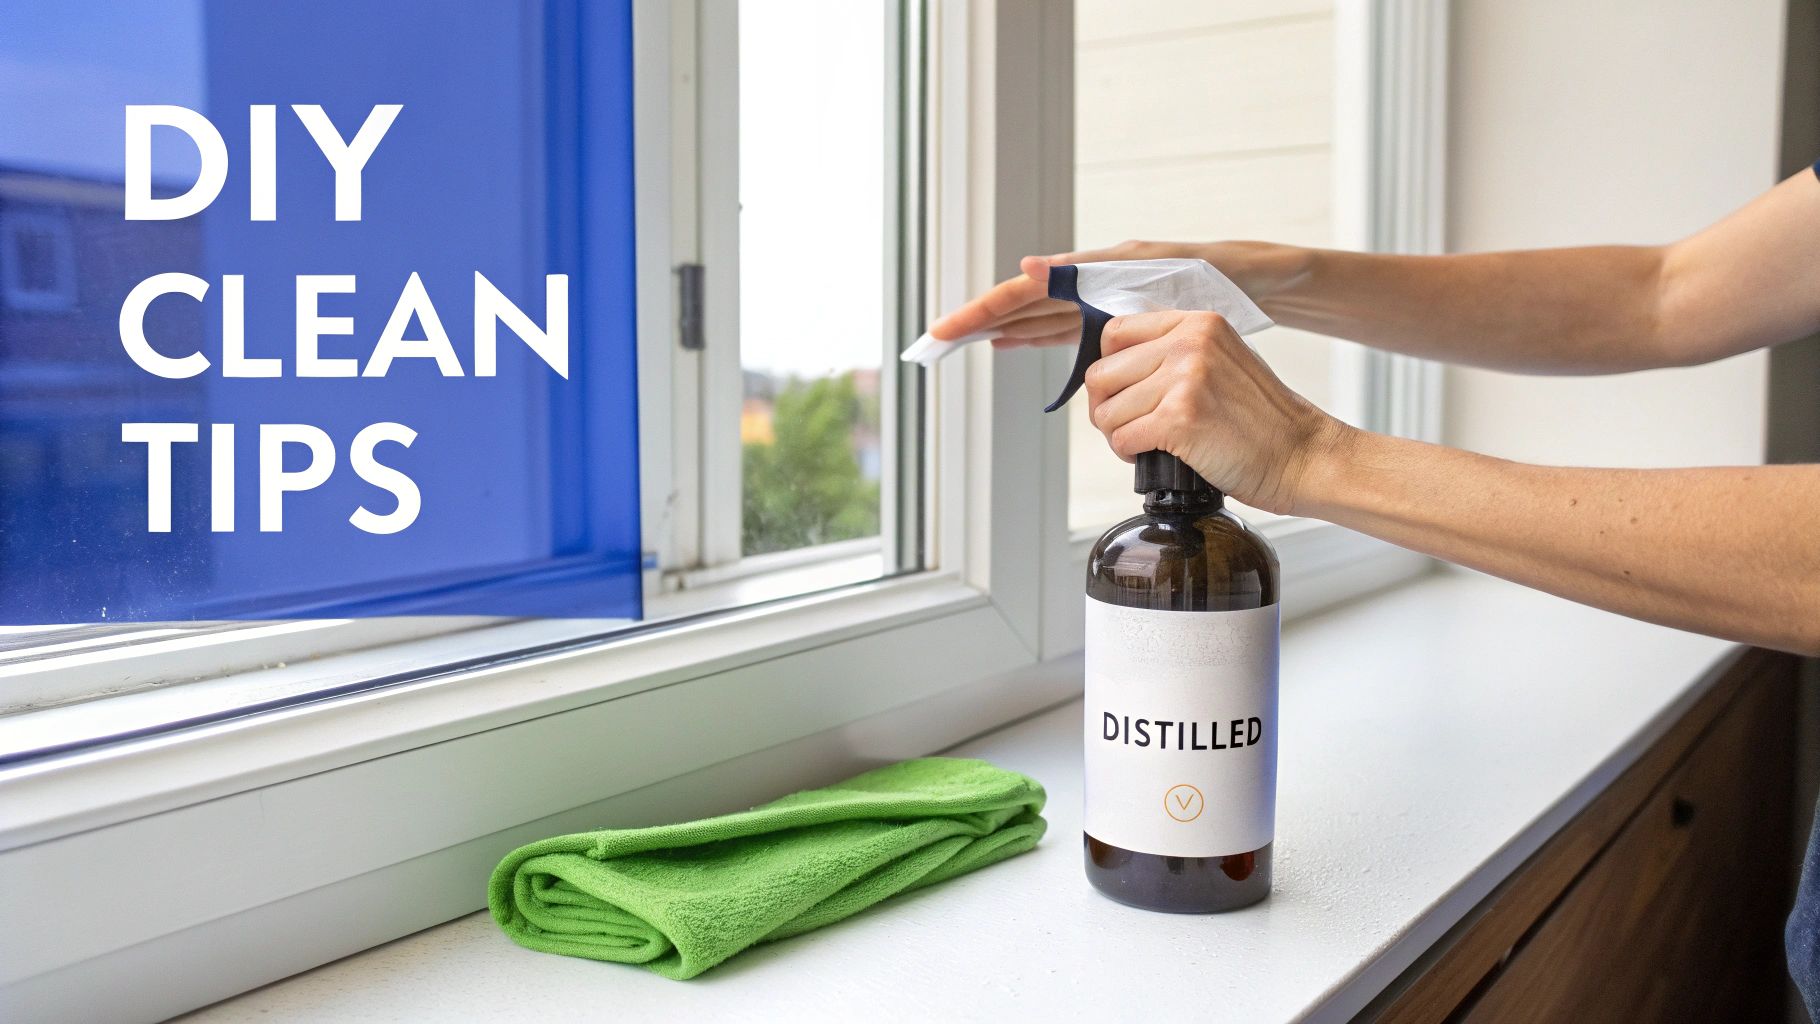
Here's what you do: mix equal parts distilled white vinegar and distilled water. Using distilled water is a non-negotiable pro tip. If you use regular tap water, especially in a place with hard water like Denver, you're just adding more minerals back onto the glass you're trying to clean.
Pour your 50/50 mix into a spray bottle and get to work. Spray it generously over the stained areas—don't be stingy. You want to completely soak the mineral buildup. Then, just let it sit and do its thing for at least 10-15 minutes. This "dwell time" is where the magic happens, as the acid needs a moment to break down the deposits.
A critical mistake is letting the vinegar solution dry on the glass, especially in the sun. It can bake the dissolved minerals right back on, making your job harder. If you see it starting to dry, just spray a little more on.
Sometimes a spray just isn't enough, particularly for spots that are a bit more stubborn. If the stains are concentrated or on a vertical surface where liquid just runs right off, a paste gives you more direct cleaning power.
You've got a couple of great options for a paste that won't scratch your glass:
Apply whichever paste you choose directly over the hard water marks, covering them completely. Let it sit for about 10 minutes. Then, grab a non-abrasive pad or a microfiber cloth and gently scrub in a circular motion. The combination of the acid breaking down the minerals and the gentle scrubbing action is often all it takes to lift lighter stains.
Having the right cleaning solution is only half the battle. How you apply and remove it is what separates sparkling, clear glass from a streaky, frustrating mess.
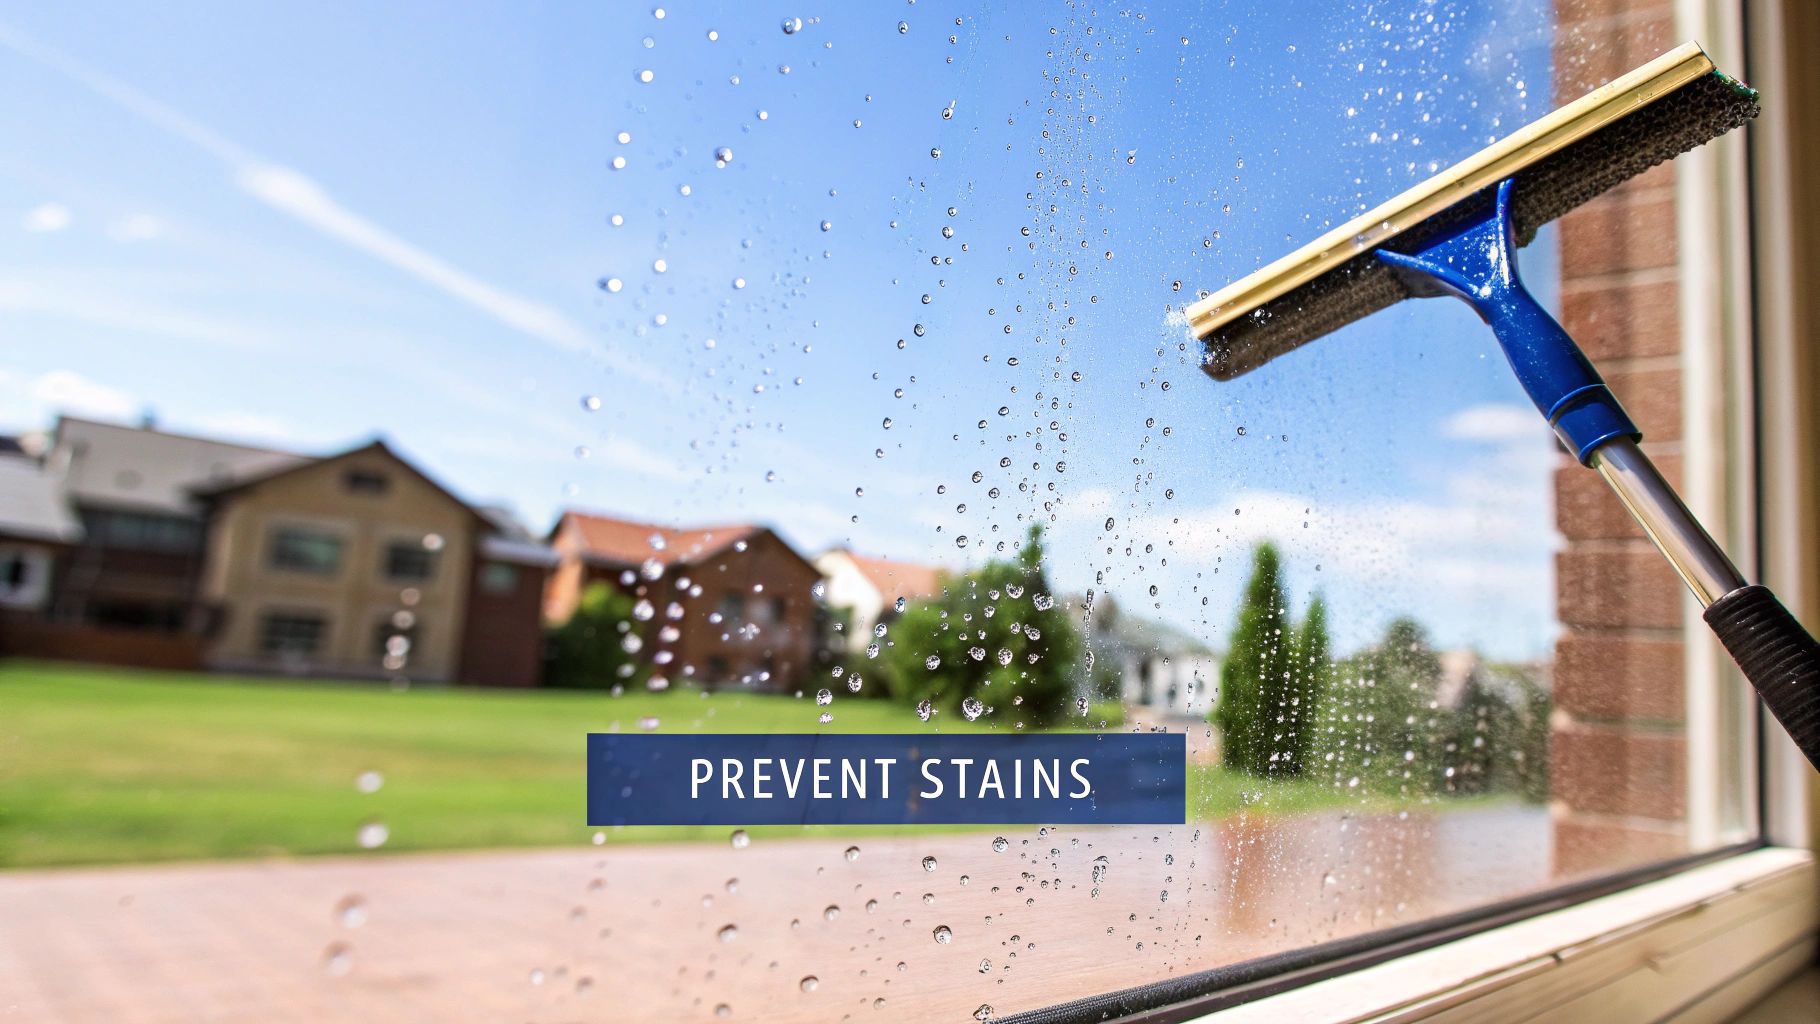
After letting your solution sit, it's time to agitate and rinse. Use a clean, high-quality microfiber cloth to scrub the window. Microfiber is your best friend here because it’s designed to trap dirt without leaving scratches. Use firm, consistent pressure in small circles right over the stains.
Next, the rinse—and this step is vital. Rinse the glass thoroughly with distilled water to wash away every last bit of dissolved mineral and cleaning residue. Skipping this is how new spots form while the window is drying.
Finally, dry the glass completely. A professional would use a squeegee for a perfect finish, but a clean, dry microfiber cloth works just fine for a DIY job. This ensures no water droplets are left behind to evaporate and create new hard water marks. If you're looking to up your game, checking out different recipes for a homemade cleaning solution for outside windows can give you more tricks for achieving that professional shine.
Even with the best intentions, it's easy to make a wrong move that could damage your windows or just not work. Watch out for these common slip-ups:
When your DIY efforts with vinegar and baking soda just aren't cutting it, that's a tell-tale sign the mineral deposits have graduated from a simple surface stain. This is where you need to step up your game for those stubborn, semi-permanent hard water marks on windows that have started to etch the glass. Think of this as the bridge between simple home remedies and calling in a pro.
The jump from DIY solutions to more advanced methods means bringing out specialized tools and commercial-grade cleaners. The focus shifts from just dissolving minerals to physically—but safely—abrading them off the glass. This takes a careful hand and the right materials to avoid turning a fixable problem into a permanent scratch.
I know what you're thinking: steel wool on glass? It sounds alarming, but when done correctly with the right product, it's a game-changing technique we use in the field all the time. The absolute key is to use #0000 grade steel wool, which is the finest available. Anything coarser will absolutely destroy your windows.
You'll also need a good lubricant; never, ever use steel wool on dry glass. A simple solution of soapy water or even your leftover vinegar-and-water mix works perfectly.
Always, and I mean always, test this method on a small, inconspicuous corner first. This little step ensures you have the right grade of steel wool and are using the correct pressure before tackling the whole pane.
For the most deeply set hard water marks that laugh at milder treatments, you’ll probably need an extreme water spot remover designed for tough stains. These commercial products are specifically formulated with mild acids and fine abrasives to break down and polish away heavy mineral buildup without damaging the glass.
These cleaners often come as a paste or a thick liquid, and the application is everything. You'll apply the product to a non-abrasive applicator pad, then work it into the glass using firm, overlapping circular motions. It’s a lot like polishing a car; the goal is to break down the deposits without harming the glass itself.
The economic toll of these stubborn stains can be surprising. While mild stains sometimes yield to vinegar, etched glass often requires professional intervention. If left untreated, these stains can etch permanently within just a few years. The professional window maintenance industry, valued at $2.5 billion, attributes as much as 40% of its revenue to services directly related to hard water damage.
Even these more advanced techniques have their limits. If you’ve tried a commercial remover and #0000 steel wool and can still feel a rough, pitted texture on the glass, the problem has moved past staining. You’re dealing with true etching.
At this stage, the glass itself is damaged. No amount of cleaning or scrubbing is going to fix it.
The only real solution is to physically resurface the glass through a process called polishing. This involves using a power polisher with a special pad and a cerium oxide compound to carefully grind down the glass surface until it's smooth and clear again. This is a delicate, highly skilled task. Trying this without proper training and equipment can easily lead to distorted or permanently damaged glass. If your stains have reached this level, it’s time to look into professional glass polishing services to restore your view.
While you're escalating your methods, it's just as important to know what to avoid. Using the wrong tool can turn a reversible problem into a permanent, costly mistake.
While DIY methods are fantastic for tackling fresh mineral spots, there comes a point where even the best home remedies and advanced techniques hit a wall. Recognizing when to step back and call for backup isn't admitting defeat—it’s the smartest move to protect your windows from permanent damage.
So, when are hard water marks on windows a job for the pros?
The most obvious sign is when the glass feels physically rough or pitted to the touch, even after you’ve tried cleaning it. This isn't just a stain anymore; it means the minerals have started to etch, or corrode, the glass surface. At this stage, no amount of scrubbing is going to fix it.
Another clear indicator is the scale and location of the problem. If the stains are on second or third-story windows, or in other places that are tough to get to, safety becomes the top concern. Widespread damage across every single window of your home is also a pretty good signal that a professional will be far more efficient and effective.
When you hire an expert, you're not just paying for their time; you're investing in their specialized equipment and proven techniques. There are ONLY 2 methods of window cleaning professionals use.
These interventions are remarkably effective. Water-fed poles paired with deionized rinses can achieve 99% spot-free results, slashing mineral residue by as much as 95%. It's a widespread issue, too—a recent assessment flagged 55% of major cities' water supplies as hard, which has fueled a rise in window etching problems.
For glass that’s severely etched, a professional has one more tool in their arsenal: glass polishing. This process uses a power polisher with a specialized pad and a cerium oxide compound to carefully grind down the glass surface. This removes the etched layer and restores the window’s original smoothness and clarity. This is a delicate, highly skilled job that should never be attempted as a DIY project.
Calling a professional isn't just about cleaning; it's about restoration. For etched glass, they are performing a micro-resurfacing of the window, a feat no DIY method can replicate safely or effectively.
Professionals in areas with notoriously hard water, like Las Vegas or Phoenix, also bring a ton of experience with this specific type of damage. They understand the local water chemistry and have fine-tuned their methods to deliver the best possible results.
To get a better sense of the specific gear and solutions the experts rely on, check out our guide on what professional window cleaners use to achieve those pristine results.
After all the hard work of removing those stubborn hard water marks on windows, the last thing you want is for them to creep right back. Winning the battle is one thing; winning the war requires a proactive game plan. Prevention is all about smart habits and a few strategic adjustments to stop mineral deposits from ever taking hold.
Honestly, this final step is probably the most important one. It's what saves you from having to repeat the entire cleaning marathon in just a few months. The good news? Most of these preventative measures are simple, straightforward, and incredibly effective.
For most homeowners, the undisputed champion of creating hard water stains is a rogue sprinkler system. A sprinkler head that consistently mists your windows is like giving them a daily mineral bath. That constant cycle of wetting and drying under the hot sun quickly bakes those deposits right onto the glass.
The fix is straightforward but absolutely essential. You need to take a few minutes to audit your irrigation system. Turn it on and just watch where every stream of water lands.
This simple maintenance task can single-handedly prevent 80% or more of future hard water problems for many homes.
One of the best long-term moves you can make is to get your windows to actively repel water. A hydrophobic glass sealant creates an invisible, ultra-smooth barrier on the glass surface. Instead of clinging to the window and evaporating, water just beads up and rolls right off, taking all those dissolved minerals with it.
Think of it like waxing your car. The sealant fills in the microscopic pores of the glass, leaving nowhere for minerals to get a foothold. Application is usually a simple wipe-on, wipe-off process that can give you protection for several months up to a year, depending on the product and your local climate.
Prevention isn't a one-and-done job; it’s about weaving small, consistent actions into your home maintenance routine. You don't need to deep clean your windows every single week, but a little upkeep goes a surprisingly long way.
A quick pass with a squeegee after you wash the siding or rinse down the patio can make a world of difference. As professionals, we know the two most effective methods are using a high-quality squeegee for a perfect streak-free finish or a pure-water system that leaves zero residue behind. Just having a good squeegee on hand and using it occasionally is a fantastic preventative habit.
The longer mineral deposits are allowed to sit on the glass, the more they bond and the harder they are to remove. A quick, regular wipe-down is infinitely easier than a deep scrub once a year.
If you really want to put an end to hard water stains for good, especially if you live in an area with notoriously hard water, it might be time to look at a more fundamental solution like installing a water softener. A whole-home water softener removes minerals like calcium and magnesium from your water supply before they ever reach your tap, hose, or sprinkler system.
This solves the problem at its core, benefiting not only your windows but also your pipes, appliances, and shower doors. While it's a bigger upfront investment, a water softener is the most comprehensive and effective long-term strategy for anyone who is just tired of constantly fighting mineral buildup.
Even with the best guide, you're bound to have a few questions pop up when you're staring down some stubborn hard water marks on your windows. We get it. Here are the straight-up answers to the questions we hear most often from homeowners just like you.
This is a big one, and the short answer is: please don’t. While you might see pros use razor blades for specific tasks like scraping off paint, it's an incredibly risky move for hard water removal. Why? Because hard water deposits are full of gritty, abrasive mineral crystals.
When you drag a razor blade across them, you’re not just scraping the spot—you’re dragging those sharp little particles across your glass. That’s how you get deep, permanent scratches. It’s much safer to stick with methods that dissolve the minerals, not just bully them off the surface. Think acidic solutions, specialty removers, or even fine #0000 steel wool. For the really tough, etched-in stuff, professional glass polishing is the only way to go without causing damage.
A whole-home water softener is your best friend in the fight against hard water stains. It tackles the problem right at the source by removing the minerals (calcium and magnesium) that cause the spots in the first place. This is a game-changer for any water coming from your own pipes, like sprinklers or the hose you use to rinse things down.
But—and this is a big but—it can't control the weather or your neighbors. A water softener won't stop stains that form when rainwater runs down mineral-heavy surfaces like stucco or brick walls. It also won't protect you from the overspray of a neighbor's untreated sprinkler system. A softener is a fantastic defensive tool, but pairing it with smart strategies like aiming your sprinklers correctly is the key to total victory.
Magic erasers seem like they can clean anything, right? They're made of melamine foam, which works like an extremely fine sandpaper. Because of this, you might see some minor results on very light, fresh hard water spots.
However, for anything more than a faint blemish, they just don't have the chemical muscle to break down those bonded mineral deposits. Worse, if you scrub too hard or too often with a magic eraser, you can create thousands of tiny micro-abrasions on the glass. Over time, this will leave your window looking hazy and dull. It’s always better to use products and tools specifically designed for glass.
A common mistake is treating glass like any other hard surface. Its porous nature and susceptibility to scratching mean that specialized, non-abrasive techniques are essential for preserving its clarity and integrity.
They certainly can be. While any glass can get etched by hard water, older panes are often a bit softer and more vulnerable to damage. If a window already has some surface wear or micro-scratches from years of use, those imperfections give mineral deposits more to cling to.
At the end of the day, though, the biggest culprit isn't the type of glass—it's exposure. The windows right in the line of fire from sprinklers, under a roofline where water drips, or in the splash zone of a pool will always be at the highest risk. This is where applying a hydrophobic sealant can be a huge help, giving any window—new or old—a protective shield.
When your DIY efforts just aren't cutting it and you need a guaranteed, crystal-clear finish, Professional Window Cleaning is here to help. Our experts use industry-leading pure-water systems and squeegee techniques to restore your windows safely and effectively. Get your free estimate today!
Read our blog posts regularly and keep learning.