Care and Maintenance
How to Restore Window Glass and Frames the Right Way
Learn how to restore window glass, frames, and seals with pro methods, real tools, and honest trade-offs. A practical guide


You've just paid to have a clean, dark tint installed, and the glass already looks slightly hazy. The temptation is obvious: grab a spray bottle, wipe away the marks, and make the window look finished. That instinct causes some of the most avoidable tint damage I see. New film needs time to bond before it needs cleaning.
Learning how to clean tinted window film safely comes down to two disciplines: respect the curing period, then remove dirt with soft tools, clean water, and light pressure. The wrong chemical can attack the film, while the wrong pad or blade can scratch its surface permanently.
A homeowner can ruin fresh tint without scrubbing hard. Wiping a newly installed pane, opening and closing a freshly filmed window, or pushing moisture toward an unfinished edge can disturb the adhesive while it's still bonding to the glass.
The cure period isn't identical for every installation. A widely repeated aftercare standard is to avoid cleaning newly installed tinted film for about 7 days to 30 days, depending on the installer and film type. Several care instructions specify waiting 1 week, while Solar Gard's film-care guidance says not to clean the film for 30 days after installation.
Film adhesive continues curing after the installer has finished. Temperature, humidity, and film thickness affect how quickly that process settles. During this period, moisture may remain visible as light haze or small pockets, and the appearance can improve naturally as the adhesive finishes bonding.
Introducing water and wiping too early can interfere with adhesion. Moisture intrusion may contribute to bubbles, edge lifting, or stress at the film border, particularly where a window frame or gasket traps water.
Practical rule: Use the installer's written cure guidance as the final authority. If you weren't given a schedule, treat the first cleaning as a curing milestone, not a routine chore.
Some film-care guidance recommends waiting at least 48 hours before cleaning or opening and closing windows, while other manufacturer guidance calls for a longer period. That difference isn't contradictory. It reflects variations in product, installation, and climate. For a recently installed vehicle window, keep it closed until the installer's stated period has passed. For architectural film, ask the installer before introducing water, especially in cool or humid conditions.
Patience costs nothing. Replacing lifted or permanently bubbled film does.
Professional cleaners generally rely on only two window-cleaning methods: a squeegee or a pure-water system. Both can work around tinted film, but neither method excuses dirty tools, excessive pressure, or careless work at the edges.
A squeegee method gives you direct control. Wet the surface first, use a clean soft applicator, and finish with a soft rubber squeegee in controlled passes. Keep the rubber edge clean and intact. A damaged or gritty channel can drag particles across the film instead of lifting them away.
A pure-water system takes a different approach. Professional equipment commonly uses reverse osmosis and deionization to produce purified water for exterior glass. According to professional purified-water equipment guidance, these systems are designed to leave no soap residue and dry spot-free. That makes pure water useful for exterior tinted glass where mineral spotting and detergent residue are concerns.
| Method | Where it works well | Main trade-off |
|---|---|---|
| Soft rubber squeegee | Interior glass and controlled residential washing | Requires clean solution, clean rubber, and careful edge work |
| Pure-water system | Exterior glass, larger panes, and elevated work handled by professionals | Requires suitable equipment and disciplined rinsing technique |
For DIY work, the safest adaptation is modest. Use a clean microfiber towel or soft sponge, keep the applicator wet before it touches the film, and work in straight, light passes. Don't let a dry cloth grind dust into the coating.
Professional Window Cleaning has been cleaning windows for over 26 years, using squeegee and pure-water approaches for residential, commercial, and high-rise work. The same principle applies at home: the method matters less than controlling contamination, pressure, and moisture.
A squeegee should glide, not chatter. Pure water should rinse away loose debris rather than blast the film. High-pressure washing, steam, brushes, hard edges, and contaminated cloths all create unnecessary risk.
Here's a visual demonstration of a controlled cleaning process:
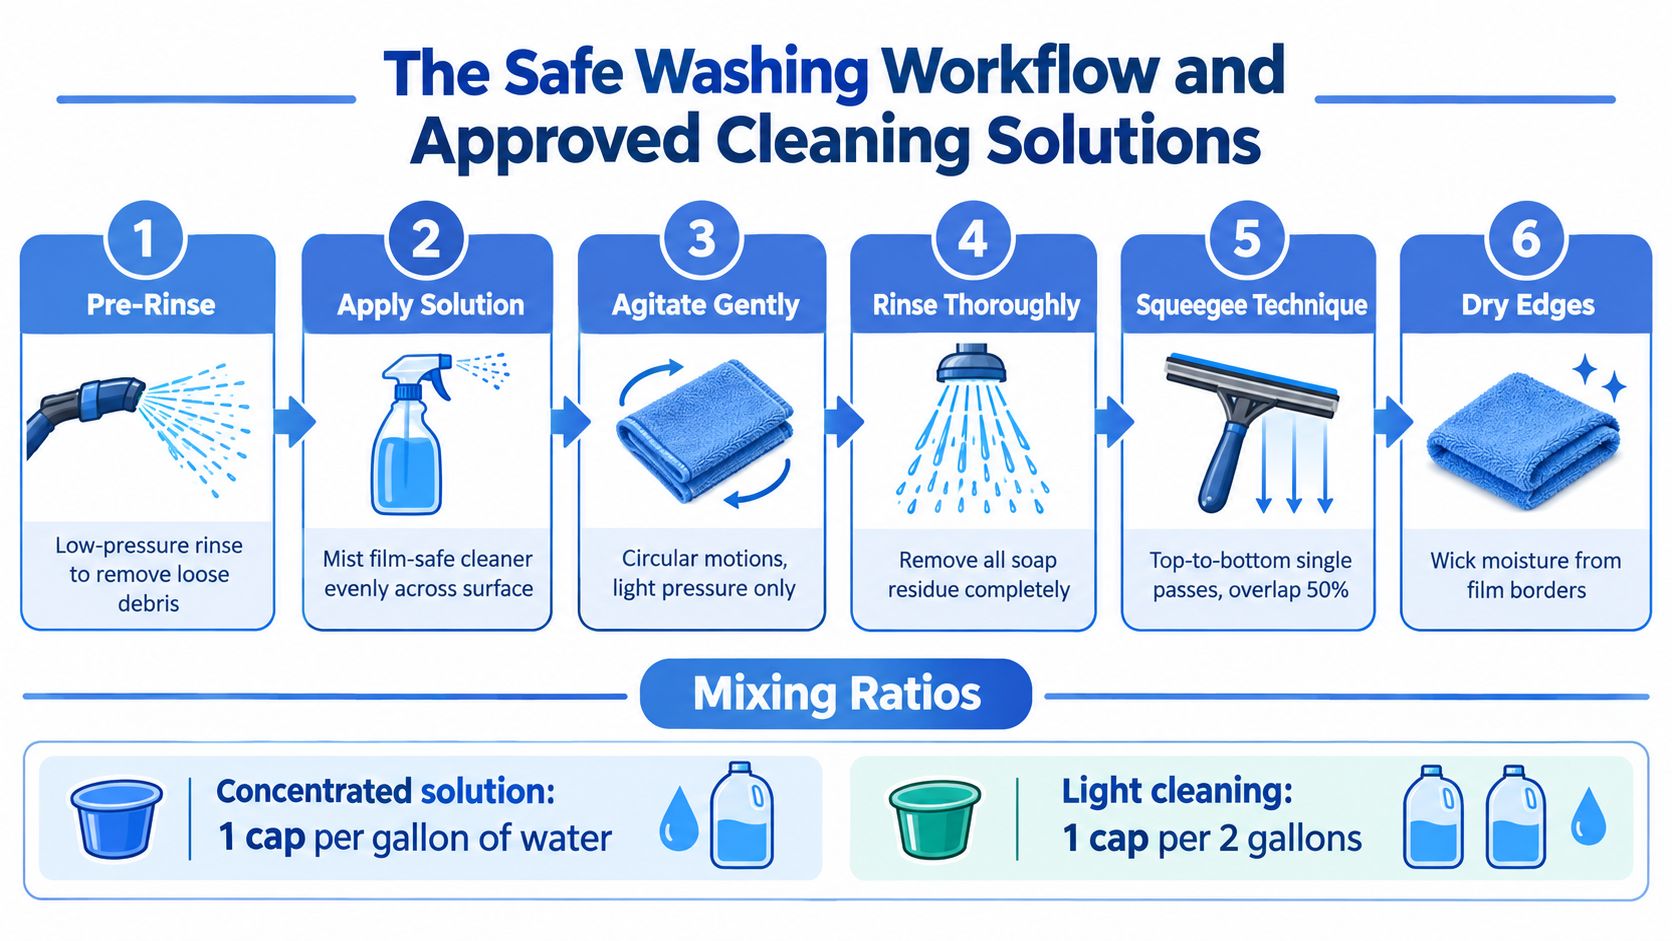
Once the film has reached its installer-approved cure point, start with the simplest safe workflow. The objective isn't to flood the window. It's to suspend dirt in clean liquid, move it away with minimal friction, and dry the borders before moisture can collect there.
Inspect first. Look for lifted edges, loose particles, or existing scratches. Cleaning won't repair a failed film, and aggressive work can make a small defect worse.
Prepare fresh water. Use clean water and a pH-neutral, non-abrasive cleaner. Solar Gard's cited care benchmark uses 1/2 ounce of liquid dish soap per 1 quart of fresh water for film-safe cleaning, as described in film-care guidance from Armolan. Don't keep using cloudy bucket water after it has collected grit.
Wet the applicator first. A damp microfiber towel or soft sponge should make the first contact. Applying cleaner to the cloth rather than soaking the film reduces runoff toward the edges.
Wash with light pressure. Use straight passes and let the liquid do the work. If a spot remains, re-wet it and make another gentle pass instead of scrubbing harder.
Rinse or wipe clean. Replace dirty water regularly. Manufacturers warn that particles in contaminated water can scratch the film and that dirty water can redeposit grit on the surface.
Dry with a separate cloth. Use a clean, dry microfiber towel for buffing. A soft rubber squeegee can also remove water, provided the rubber is clean and you work in controlled passes.
The two-cloth system is simple and effective. One cloth washes, the other dries. Don't use the same towel on an exterior sill, wheel, or dusty frame and then bring it onto tinted glass.
For additional guidance on choosing a compatible product, see this explanation of non-ammonia glass cleaner. Products marketed for another delicate coated surface can also help you compare formulation priorities, including these best products for paint protection film, though the window-film manufacturer's directions should still control.
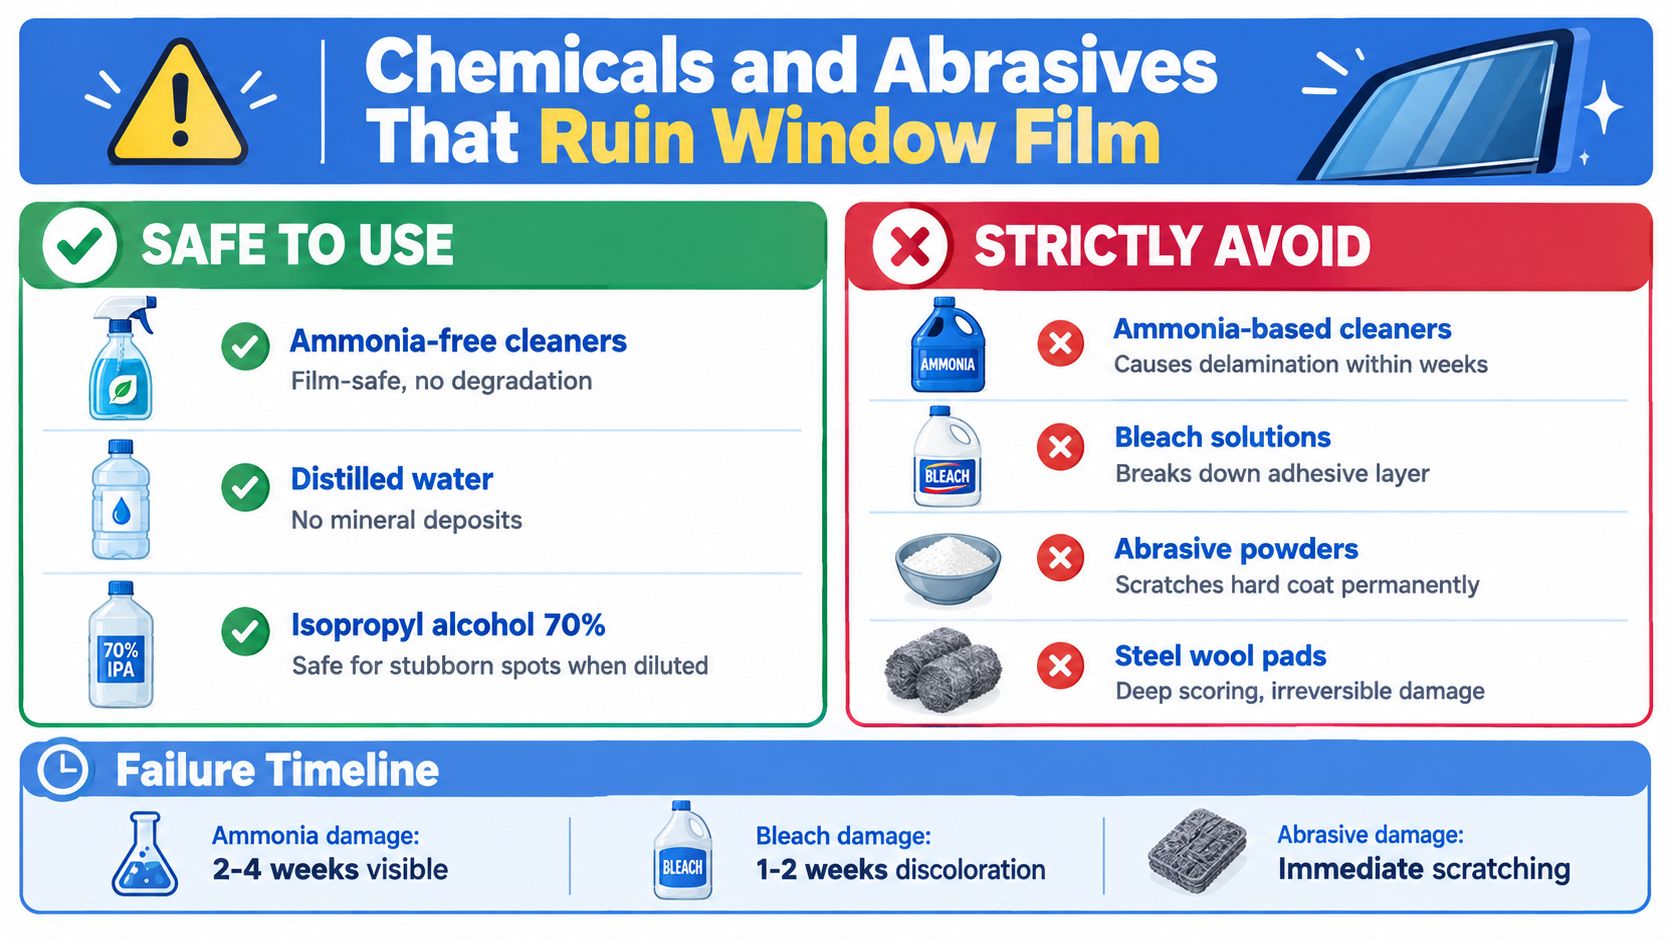
Regular glass cleaner isn't automatically safe for tinted glass. The familiar bottle under the sink may contain ammonia or other ingredients that attack the film's hard coat or adhesive layer. A product can leave ordinary glass looking bright while gradually damaging a coated surface.
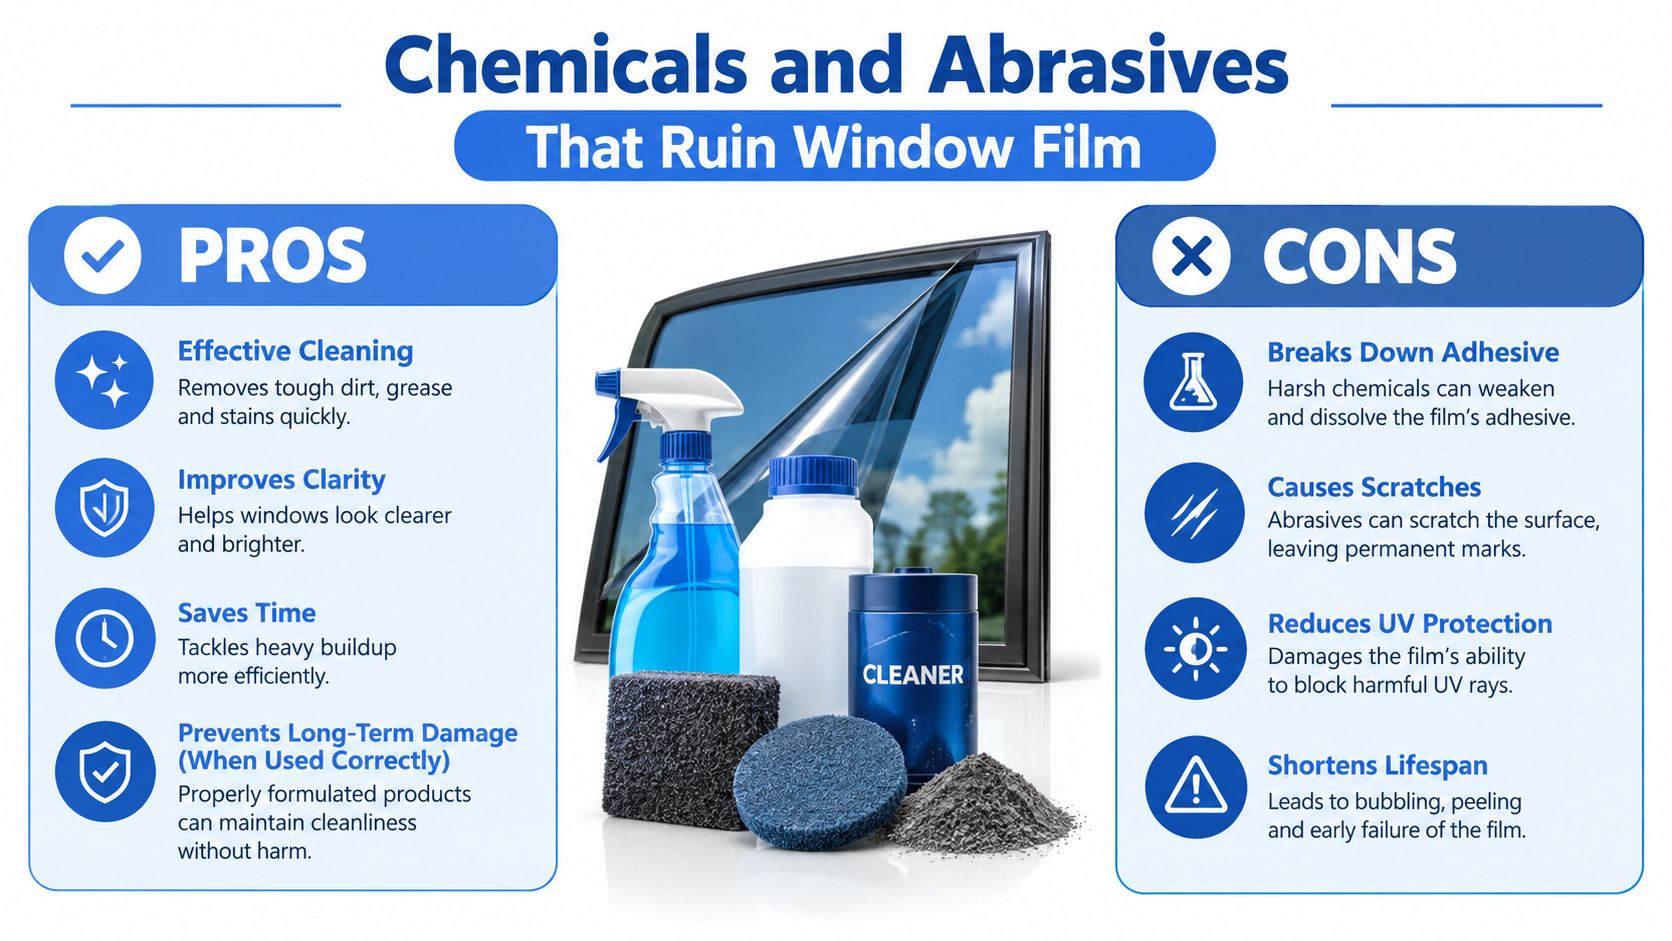
The two major failure modes are chemical attack and mechanical abrasion. Ammonia, strong acids and alkalis, acetone, and methylated spirits are repeatedly identified in film-care guidance as substances to avoid. Abrasive particles, scrub pads, and rough tools create a separate problem by scoring the surface.
Read the label before using any cleaner. Choose a product identified as film-safe, ammonia-free, pH-neutral, and non-abrasive. If the label is unclear, use clean water first or ask the film installer.
Avoid:
Spraying directly at the glass also creates a practical problem. Liquid can run into the frame, collect along the film edge, and work beneath the adhesive. Spray the cloth or applicator instead, then wipe with enough moisture to lift soil without saturating the border.
A razor blade may be suitable for certain uncoated glass-cleaning tasks, but that doesn't make it safe for window film. Bristle brushes, scrub pads, abrasive powders, newspapers, steel wool, and dirty towels can scratch the hard coat. More discussion of why blades require strict surface judgment appears in this guide to using a razor blade for cleaning.
A soft microfiber towel is the safer default, but only when it's clean. A cloth that picked up sand from a sill can become an abrasive pad. Wash towels separately from gritty work cloths, inspect them before use, and retire any that feel rough.
A film-safe cleaner can't compensate for a contaminated towel or a damaged squeegee channel.
Tint defects need diagnosis before action. A hazy appearance or small water pocket soon after installation may be part of the normal curing process. Scrubbing at it can turn a temporary visual issue into a scratched or displaced film.
Fresh tint can show haze while moisture dissipates and the adhesive settles. If the installer has provided a cure schedule, leave the film alone during that period. Don't press bubbles with your fingers, chase moisture with a hard tool, or repeatedly wet the glass to make it look clearer.
A soft squeegee can be appropriate for ordinary post-cure washing, but it isn't a cure-all for film defects. Pushing hard against a bubble can crease the film or drive moisture toward an edge. The safest response is restraint, followed by professional inspection when the defect persists.
Climate also affects what you see. Temperature and humidity influence the cure period, so two identical installations may not look identical during early aftercare. If the film's appearance worsens, the border lifts, or defects remain beyond the installer's stated curing window, stop cleaning that area and request an assessment.
Long-term tint care is mostly a matter of avoiding preventable stress. Wait for the installer-approved cure period, use fresh water, choose a pH-neutral non-abrasive cleaner, and keep microfiber towels and squeegee rubber clean. Work gently around borders, and don't mistake a harsh household product for a professional solution.
Large panes, high-rise glass, commercial storefronts, and expansive residential properties add access and safety concerns. Professional crews can select between squeegee work and purified-water cleaning while controlling runoff, equipment, and edge contact.
Professional Window Cleaning has operated since 1999 and services Las Vegas, Phoenix, Denver, and Scottsdale, along with other Southwest communities. The right maintenance choice is the one that preserves both clear glass and intact film.
For tinted windows that need careful residential, commercial, or high-rise cleaning, contact Professional Window Cleaning. Their crews use controlled squeegee and pure-water methods to remove dirt without exposing film to harsh chemicals, abrasive tools, or unnecessary edge moisture.
Read our blog posts regularly and keep learning.