Care and Maintenance
Building Exterior Cleaning Services: A Complete Guide
Get a complete guide to building exterior cleaning services. From pressure washing to high-rise windows, learn how to choose a contractor and budget


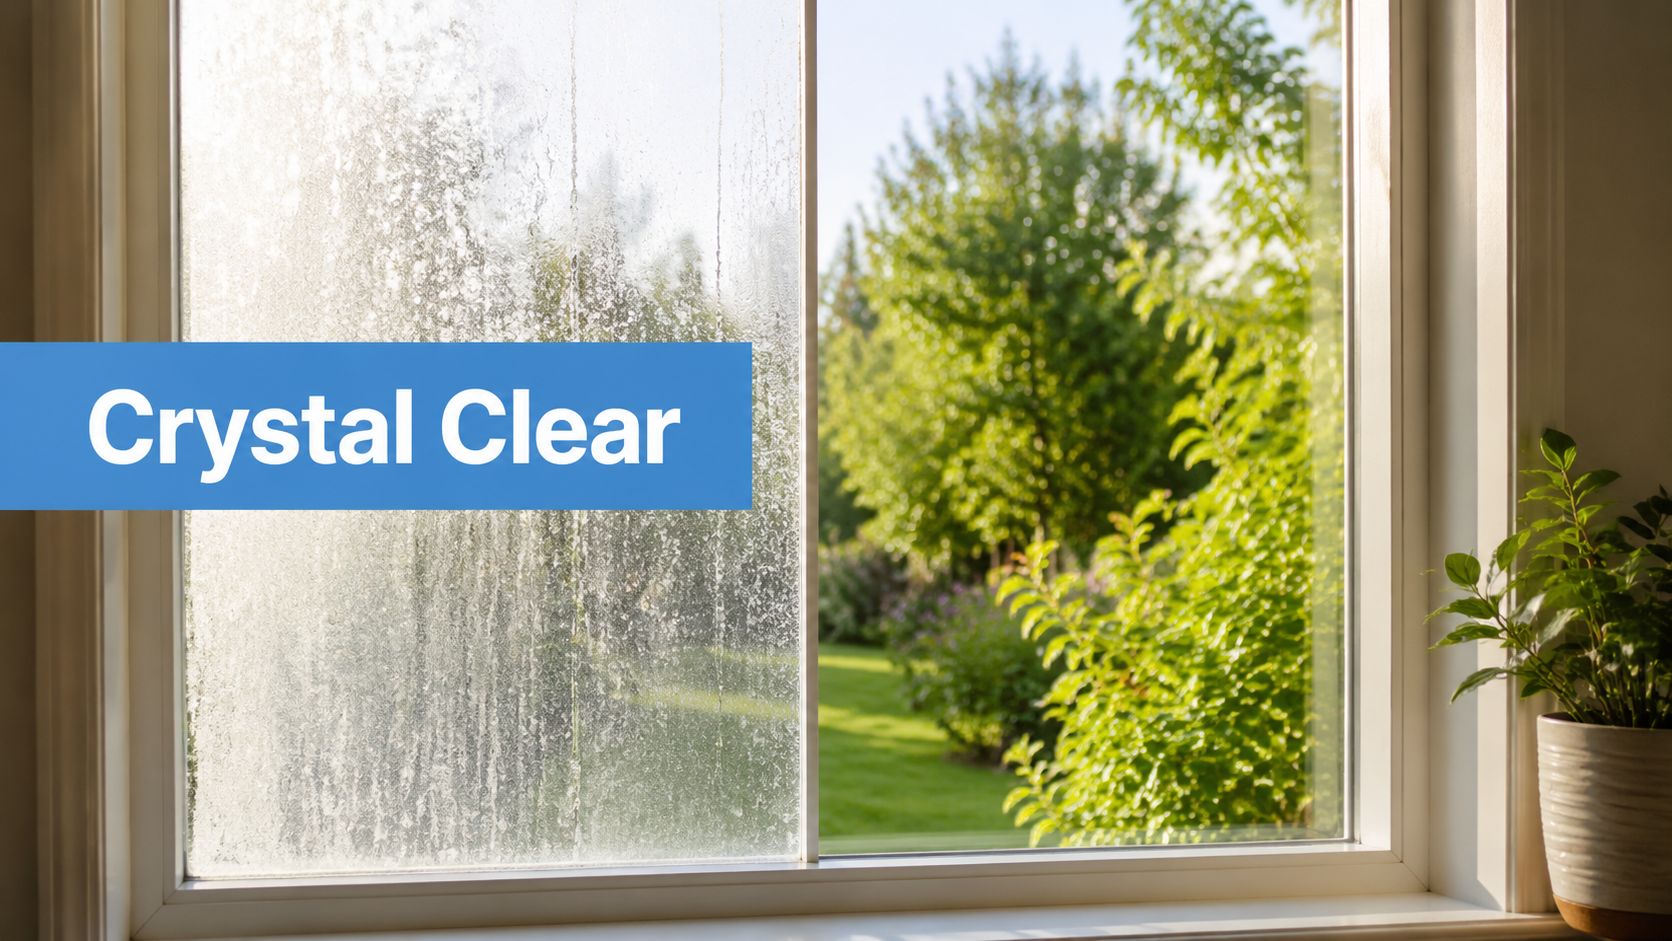
If you want that perfectly clear, streak-free shine on your windows, you need to start with the right gear and a solid plan. When professionals clean windows, they use one of two methods: a squeegee for a hands-on, perfect finish, or a pure-water system for high and hard-to-reach exterior glass. This guide focuses on mastering the squeegee, which is the essential skill for most residential and commercial window cleaning. It all begins with a quality squeegee, a plush washer for your cleaning solution, and a stack of clean microfiber towels for the finishing touches.
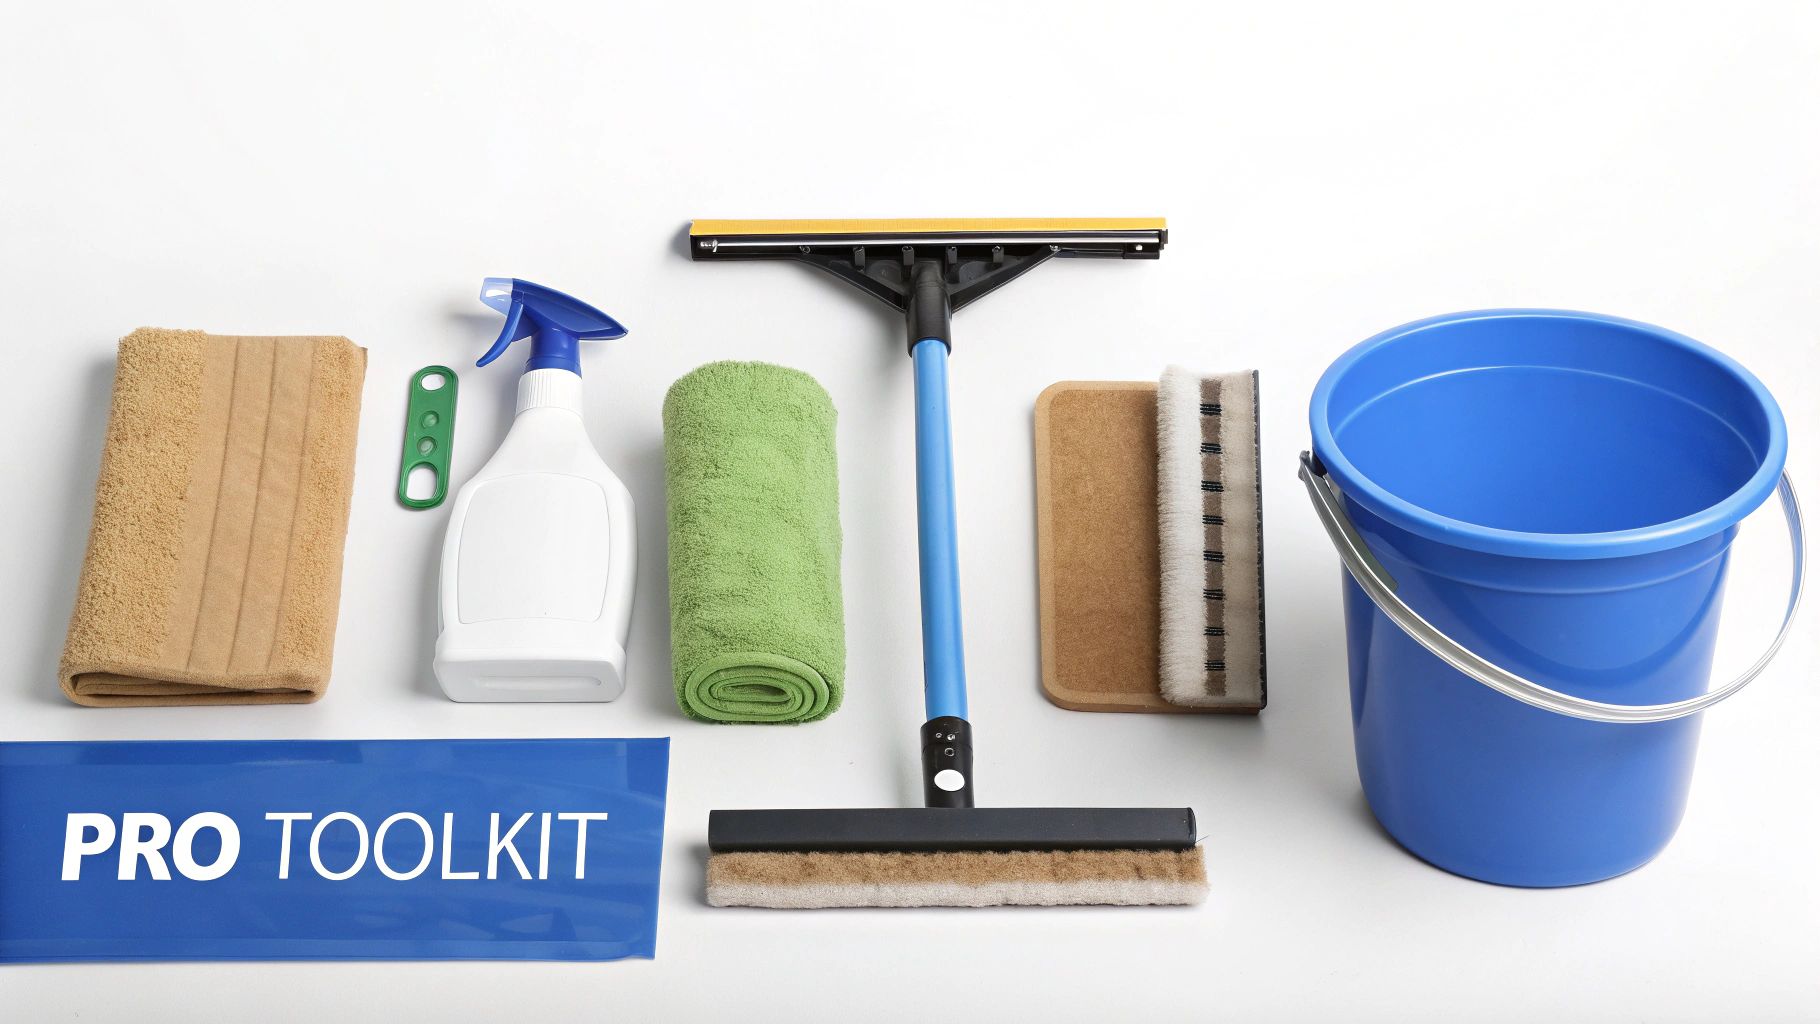
Achieving that crystal-clear, "invisible glass" look starts long before the squeegee ever touches the pane. Professionals depend on a specific set of tools, each one designed for maximum efficiency and a flawless finish. Putting together the right kit is the first—and most important—step toward mastering how to squeegee windows like an expert.
This isn’t about just grabbing any old squeegee and a bucket of soapy water from under the sink. The quality and type of your equipment will make or break your results.
Your success really comes down to four key items: the squeegee itself, a strip washer, the right cleaning solution, and plenty of clean towels.
The demand for better gear has fueled real innovation. The window squeegee market has grown to a value of approximately USD 1.2 billion and is expected to hit nearly USD 1.8 billion by 2033. This growth is all about better materials and smarter designs that help everyone get professional results more easily.
The secret to a streak-free finish isn't some magical cleaning formula; it's a sharp, high-quality squeegee blade and the discipline to keep it perfectly clean. A nicked or dirty blade is the #1 cause of those frustrating streaks.
Getting your toolkit right is half the battle. Here’s a quick checklist of what the pros use to get that perfect clean, every single time.
With these items in your arsenal, you’re set up for success and ready to tackle any window with confidence.
While there are plenty of professional-grade soaps on the market, a simple and highly effective DIY solution works just as well. All you need is a few drops of a quality dish soap—make sure it’s one without lotions or heavy degreasers—mixed into a gallon of water. The goal is to get just enough soap to give the blade good "slip" without creating so many suds that they leave a residue.
For a deeper dive into the specific products and brands the pros swear by, be sure to check out our guide on what professional window cleaners use. Nailing this foundational toolkit is your first step toward mastering the art of the squeegee.
The real secret to a flawless squeegee finish isn’t in the final swipe of the blade—it’s in the prep work. Honestly, skipping these initial steps is like trying to paint a wall without cleaning it first. You're just trapping grime underneath, which guarantees a subpar result.
Taking a few moments to set the stage ensures you’re actually removing dirt from the glass, not just pushing a muddy mixture around the pane. Proper prep prevents messes, protects your home, and makes the whole process smoother and way more effective.
First things first: you need a clean and safe workspace. This sounds basic, but it’s a critical step that prevents accidental damage to your belongings and lets you move around freely without tripping over a stray end table.
A clean workspace isn't just about being tidy; it's a foundational step for efficiency and safety. Taking five minutes to clear the area can save you from a much bigger cleanup job later on.
For landlords and property managers following an ultimate rental property cleaning checklist, knowing how to achieve streak-free windows is invaluable, and this prep work is where it all begins.
Some windows need a little more elbow grease than just a quick wipe. In sunny climates like Phoenix, for example, you’ll often find baked-on dust and hard water stains that require extra attention before you even think about the squeegee.
Applying your cleaning solution directly to thick grime will only create a muddy mess and can even dull your squeegee blade.
Instead, pre-treat these problem areas. For stubborn spots like bird droppings or tree sap, use a glass-safe scraper on a wet window to gently lift the residue off. If you're dealing with heavy layers of dirt or hard water buildup, a pre-soak with your cleaning solution or a specialized cleaner can break down the grime, making the squeegee’s job much easier and far more effective.
Alright, your windows are prepped and your tools are ready—it's time for the main event. This is the moment you turn a soapy mess into a perfectly clear, invisible barrier. Learning how to squeegee windows like a pro is less about brute force and more about finesse. It’s all in the precise, controlled movements that professionals use to get a flawless, streak-free shine every single time.
Forget that random, frantic wiping you might be used to. A professional technique is deliberate and efficient, designed to control the flow of water and leave nothing behind. The methods are simple enough, but they definitely take some practice to perfect.
Before you even touch the glass, make sure your tools are within easy reach. A well-organized workspace, whether you're cleaning ground-floor windows in a Denver suburb or a high-rise storefront in Las Vegas, makes the whole process go a lot smoother.
This infographic breaks down the essential prep work—clearing screens, dusting frames, and removing obstructions—that sets you up for a perfect squeegee job.
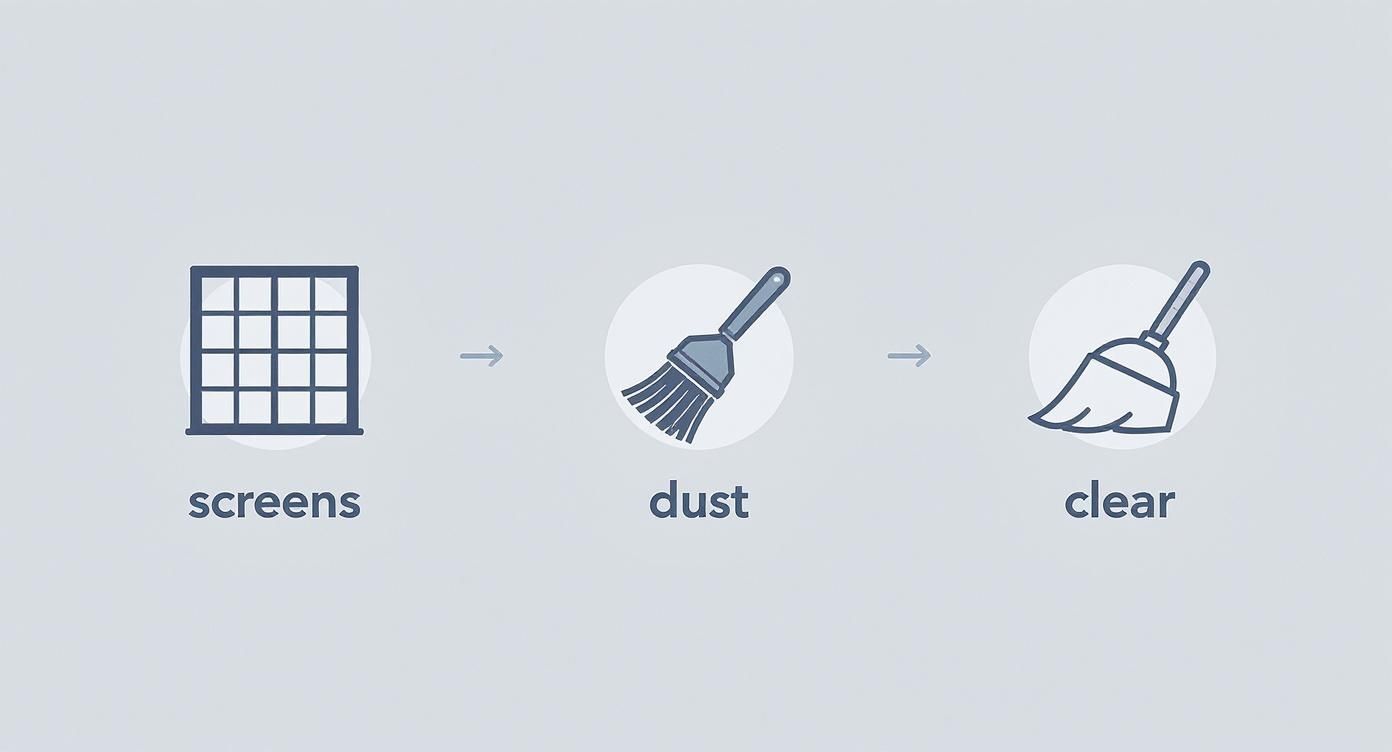
It’s a simple three-step flow: screens, dust, clear. Following this ensures no loose gunk will mess up your work, which is the foundation for a professional finish.
The two most critical parts of your technique are the angle of the blade and how much pressure you apply. If you get these right, you're 90% of the way to a perfect result.
The ideal squeegee angle is between 30 and 45 degrees to the glass. If you go too steep, the blade will chatter and skip across the window. Too shallow, and it will just glide over the water instead of pulling it away.
As for pressure, think light but consistent. You only need enough force to keep the entire edge of the rubber blade in firm contact with the glass. Pressing too hard will just warp the blade, create streaks, and tire your arm out in no time.
Let the squeegee do the work. Your job is simply to guide it with a steady hand, maintaining that perfect angle and light pressure from top to bottom.
Professionals mainly rely on two methods, picking the best one based on the size and shape of the window. For most residential windows, the classic straight pull works great. For bigger commercial panes, the S-Method is the go-to.
This technique is perfect for smaller or standard-sized residential windows. It’s easy to get the hang of and gives you excellent control.
Also known as "fanning" or "swiveling," the S-Method is a more advanced technique that lets you clean large panes of glass in one continuous motion. It’s incredibly efficient but takes some practice to master the fluid wrist movement. You basically move the squeegee across and down the glass in a serpentine pattern, always keeping a leading wet edge.
Adopting these pro methods really pays off. Mastering the squeegee can cut your cleaning time by up to 30% compared to just using cloths. Plus, studies show that a straight downward stroke produces 25% fewer streaks than random motions, and pros agree that a 10% overlap is the sweet spot for a flawless finish. You can dive deeper into these efficiency gains by exploring the full market research.
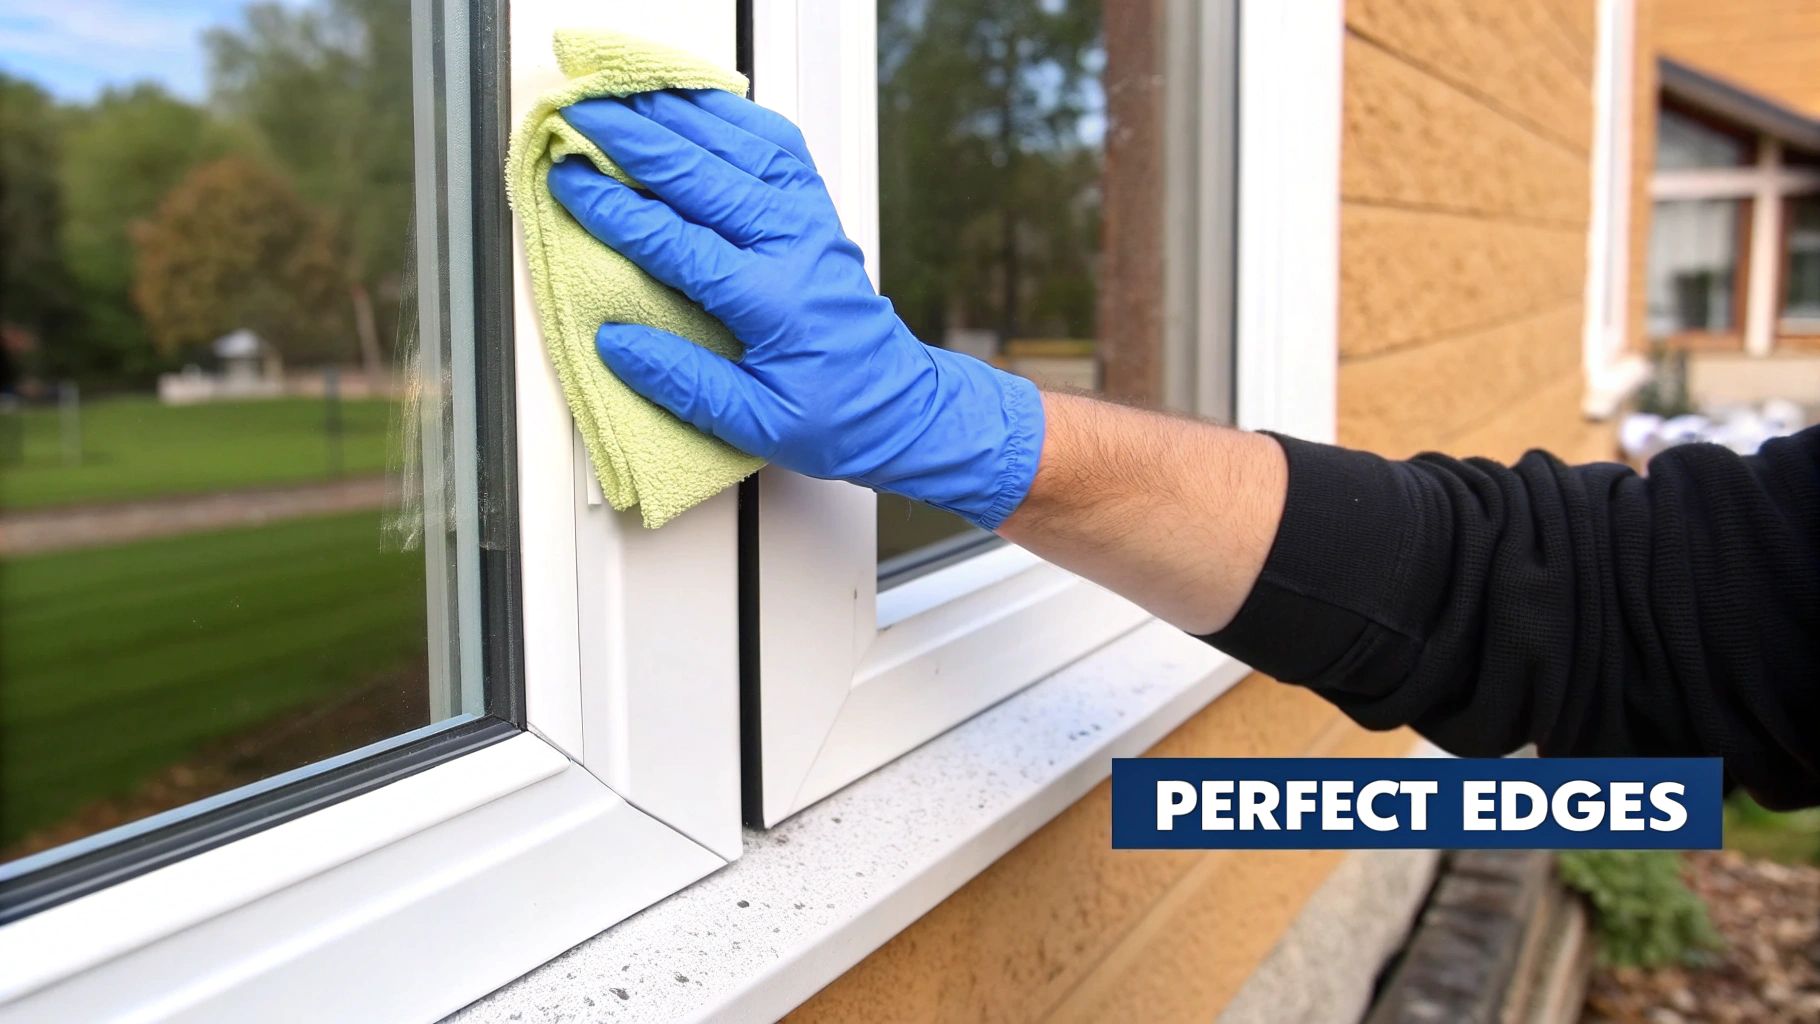
You’ve prepped your space, mixed the perfect solution, and pulled the squeegee like a pro. The main pane of glass looks incredible, but don't pack up just yet. Even the most skilled professional leaves a tiny bit of water clinging to the very edges of the window, hiding right along the gaskets and tucked into the corners.
Leaving that moisture behind is the difference between an amateur job and a professional one. As that leftover water dries or runs, it creates small, frustrating drips that ruin an otherwise perfect finish. This final detailing step is what truly makes a window look like it has disappeared.
The key to a flawless finish is a technique we call "detailing" or "cutting in the edges." For this, you’ll want a clean, dry, and super-absorbent microfiber cloth. While many pros swear by a special low-lint cloth called a scrim, any high-quality microfiber will do the trick just fine.
Your goal here is simple: remove any lingering water from the perimeter of the glass without smudging the beautiful work you just did. It all comes down to precision.
This final wipe-down is more than just cleaning up drips; it's about framing your work. A perfectly detailed edge makes the entire window look sharper and cleaner, ensuring a truly professional result.
To get the control you need, fold your dry microfiber cloth a couple of times, then wrap it tightly around your index finger. This simple move turns your finger into a precise, absorbent tool that you can guide with total accuracy. Run your finger along the top and side edges first, then finish with the bottom sill to catch every last drop.
Detailing is a simple but critical part of learning how to squeegee windows. It should become an automatic final step for every single pane you clean.
By making this a habit, you create a sharp, clean frame around the perfectly clear glass. For a deeper dive into how this fits into the complete process, our guide on how to get streak-free windows covers every detail you need. This final touch is the signature of a job well done.
Learning what not to do is just as important as mastering the right technique. Even with the best tools in hand, a few common mistakes can leave you with a window full of streaks and a whole lot of frustration. Knowing these pitfalls and their simple fixes is the key to troubleshooting your work on the fly.
One of the biggest culprits? Working in direct sunlight or on hot glass. The sun will bake your cleaning solution onto the window almost instantly, leaving behind soap residue and streaks before you even have a chance to squeegee them away. Always try to work on an overcast day or just follow the shade around your property as you clean.
Streaks and smears aren't random—they're symptoms of an underlying issue with your technique or your tools. Pinpointing the cause is the first step toward getting that perfect, invisible finish you’re after.
A dull or damaged blade is another huge one. A tiny nick or a worn-out edge on your squeegee's rubber blade will leave a perfect, thin line of water with every single pass. Before you start any job, run your finger along the blade's edge to check for imperfections. It should feel perfectly smooth and sharp.
Another classic issue is applying inconsistent pressure. If you push too hard, you can warp the blade. Too little pressure, and you'll let water sneak right underneath. The goal is a light but firm touch that keeps the entire blade edge in solid contact with the glass from start to finish.
The most common source of streaks isn't some complex technique flaw; it's often something simple. A dirty blade, worn-out rubber, or working in direct sun accounts for the majority of window cleaning problems.
Sometimes, the cleaning solution itself is the problem. Using too much soap creates a mountain of suds that are nearly impossible to remove completely, often leaving a hazy film behind. You only need a few drops to get that necessary lubrication or "slip" for the blade—not a bucket full of foam.
If you’ve finished cleaning and find yourself staring at stubborn residues like mineral deposits, you might be facing a different challenge altogether. Hard water spots require a specific approach, and our guide on how to remove water spots from glass can walk you through that process step-by-step.
Finally, don't forget the most important habit: wiping your blade. Failing to wipe the rubber clean with a dry microfiber cloth after every single stroke is a guaranteed way to create streaks. This simple move prevents you from dragging dirty water back across the clean glass on your next pass.
Correcting these common mistakes will dramatically improve your results and put you on the fast track to squeegeeing windows like a true professional.
To help you diagnose issues on the spot, here’s a quick troubleshooting guide for the most common problems you'll run into.
Keep this table in mind as you work. Most of the time, a small adjustment is all it takes to go from frustrating streaks to a flawless, crystal-clear finish.
Even after you get the hang of the basic moves, a few questions always pop up. Getting really good with a squeegee is all about understanding the little details and knowing how to handle those common "what if" scenarios. We hear the same questions all the time, so let's clear them up right now.
Think of this as the final piece of the puzzle, filling in the gaps to take your window cleaning skills from good to great.
You might be surprised, but the pros almost always stick to the basics: a few drops of a good dish soap in a gallon of water. That’s it. This simple mix creates the perfect amount of "slip," helping the blade glide effortlessly across the glass. It cleans effectively without creating a mountain of suds that are a pain to get rid of.
If you want to step it up a notch, commercial-grade window cleaning soaps are fantastic. They're specially formulated to leave behind zero residue.
One thing to steer clear of? Ammonia-based cleaners, especially if you're working outside on a sunny day. They evaporate in a flash and will leave streaks behind. Be careful with pure vinegar solutions, too—that acidity can be tough on rubber window seals over time.
The blade is everything. A sharp, perfectly smooth rubber edge is the secret to a streak-free finish, and it's not something you can compromise on. Make it a habit to check the rubber for nicks, cracks, or a rounded edge before you even start cleaning.
For a homeowner who only cleans their windows a couple of times a year, a high-quality blade might last for years. A pro, on the other hand, might be swapping theirs out weekly, or even daily, depending on how much glass they're cleaning.
The rule of thumb is simple: the second you see a consistent line or streak being left by the blade itself, it’s time for a change. Many professional squeegees have reversible blades, so you can often just flip it around for a fresh edge before you need a whole new replacement.
This is probably the most common mistake in the book. The short answer is no, you really shouldn't. Direct sun and heat are your enemies here, causing your cleaning solution to dry almost instantly. This leaves soap scum and mineral deposits on the glass before you even get a chance to squeegee it off, which is a guaranteed recipe for streaks.
The best time to wash windows is on a cloudy, overcast day. If that’s not in the cards, just work smarter, not harder. Follow the shade around your house, cleaning the sides of the building that aren't getting blasted by the sun. This one small adjustment will make a world of difference in your results.
When you look at how the professionals do it, they rely on two primary methods: the classic squeegee and the modern pure-water system. The "better" choice really just comes down to the job at hand.
For most homeowners, mastering the squeegee is the most practical skill you can learn. It's the foundation for tackling the vast majority of windows on any property, whether it's a home in Denver or an office in Phoenix.
For a truly professional finish without lifting a finger, you can always trust the experts. Professional Window Cleaning has been delivering streak-free results for homes and businesses since 1999. Book your service today and let us make your windows sparkle!
Read our blog posts regularly and keep learning.