Care and Maintenance
Master Your Window Washing System: Pros' Top Methods
Explore the top two window washing system methods pros use: squeegee and pure water. Learn which is best for your residential or commercial property in 2026.


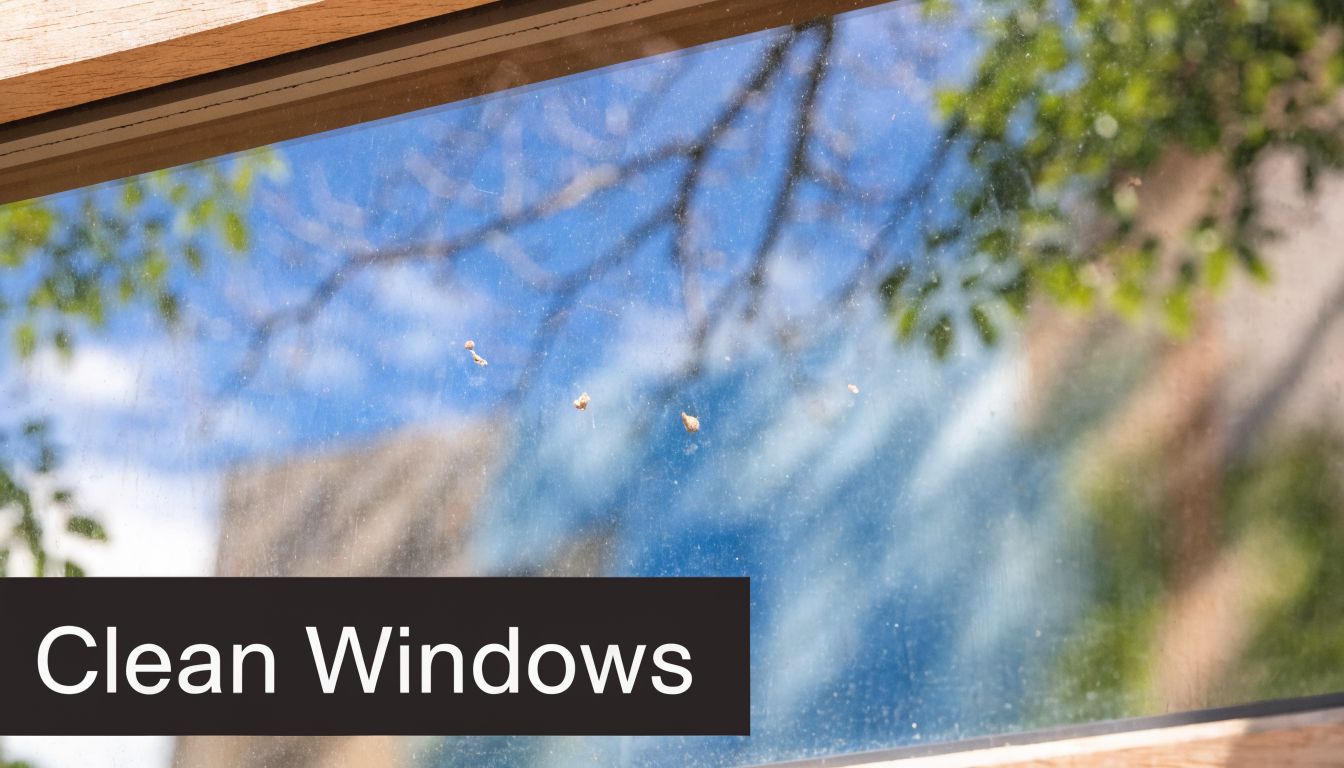
Fresh paint on the trim looks great until the sun hits the glass and every speck shows up. It is often noticed after the job is "done," when the room is clean, the ladders are gone, and the windows suddenly look worse than before.
That’s where a lot of damage starts. Someone grabs a dry razor, a harsh solvent, or a heat gun, and turns a cleanup problem into scratched glass, stained frames, or a haze that won’t come off. After more than 26 years in this trade, the biggest lesson is simple. Paint removal is really a glass preservation job first, and a cleaning job second.
A common call goes like this. The remodel is finished, the painter did solid work, and then the homeowner notices flecks of white or tan paint across the windows in afternoon light. On a house in Scottsdale, that might be light overspray on exterior panes. On a commercial property in Denver, it might be thicker trim paint along the edges after touch-up work.
The right fix depends on what landed on the glass. Tiny latex specks usually come off with a scraper and proper lubrication. Heavy oil-based buildup on old wood windows is a different animal. Painted-on residue near seals, tempered glass, and coated glass needs even more care.
The market around paint stripping is shifting, not just the techniques. The global paint remover market is estimated at USD 2.10 billion in 2026, with residential remodeling holding 33.8% market share, according to Coherent Market Insights on the paint remover market. That same source notes the EPA’s 2024 ban on methylene chloride is pushing homeowners and professionals toward safer removal methods.
That matters on real jobs. Years ago, some contractors reached for aggressive chemical strippers first. Today, the better approach is usually more selective. Start with the least invasive method that will work, and only step up when the paint, frame, and glass type justify it.
Practical rule: If the paint is light, remove it mechanically. If it’s thick and cured, slow down and assess before you touch it.
A good window paint remover process doesn’t stop when the paint is off. The glass should finish clear, the edges should stay intact, and the frame shouldn’t show collateral damage from the cleanup. On professional jobs, that last part is where experience shows.
What works in a DIY blog often falls apart on real buildings. High sun, dry air, wind, older coatings, and hard water all change how paint behaves on glass. That’s especially true on larger properties and upper floors, where access and safety complicate every choice.
The first five minutes matter more than the next hour. Before you pick a scraper, solvent, or heat tool, check three things. What type of paint is on the glass, what kind of window is it, and what sits around the glass that you could damage by mistake?
Latex and oil-based paint don't behave the same way. Latex usually softens easier and often releases with moisture and patient scraping. Oil-based paint tends to bond harder, especially if it has baked in the sun or sat for weeks.
A quick field check helps. Rub a small spot with a cloth and a little rubbing alcohol. If the paint softens, smears, or transfers, it’s often latex. If it barely reacts, treat it like a harder cured coating and proceed more cautiously.
A lot of people focus only on the pane. That’s a mistake. Frames, gaskets, glazing, and surrounding finishes decide what you can use safely.
Don’t treat every pane like standard glass. Newer windows can be less forgiving than older ones.
Some paint removal is cleanup. Some is restoration. Those are not the same thing.
If you’re looking at a few specks from recent overspray, a mechanical method is usually enough. If you’re staring at layered paint on an older sash, painted edges, or hardened drips that bridge from frame to glass, the job may call for a slower and more controlled approach.
A useful way to sort it is this:
If the window has construction dust, grit, or visible debris stuck to the surface, don’t scrape yet. Wash first. Dry scraping across grit is one of the fastest ways to score glass.
If you see seal failure, damaged glazing, failing wood, or questionable coatings, slow down and test a small corner. A window paint remover method that works on one pane can create a much bigger repair on the next one.
For most paint specks and light overspray, mechanical removal is the first tool out of the bag. It’s fast, direct, and if you do it correctly, it avoids the mess and uncertainty of chemicals.
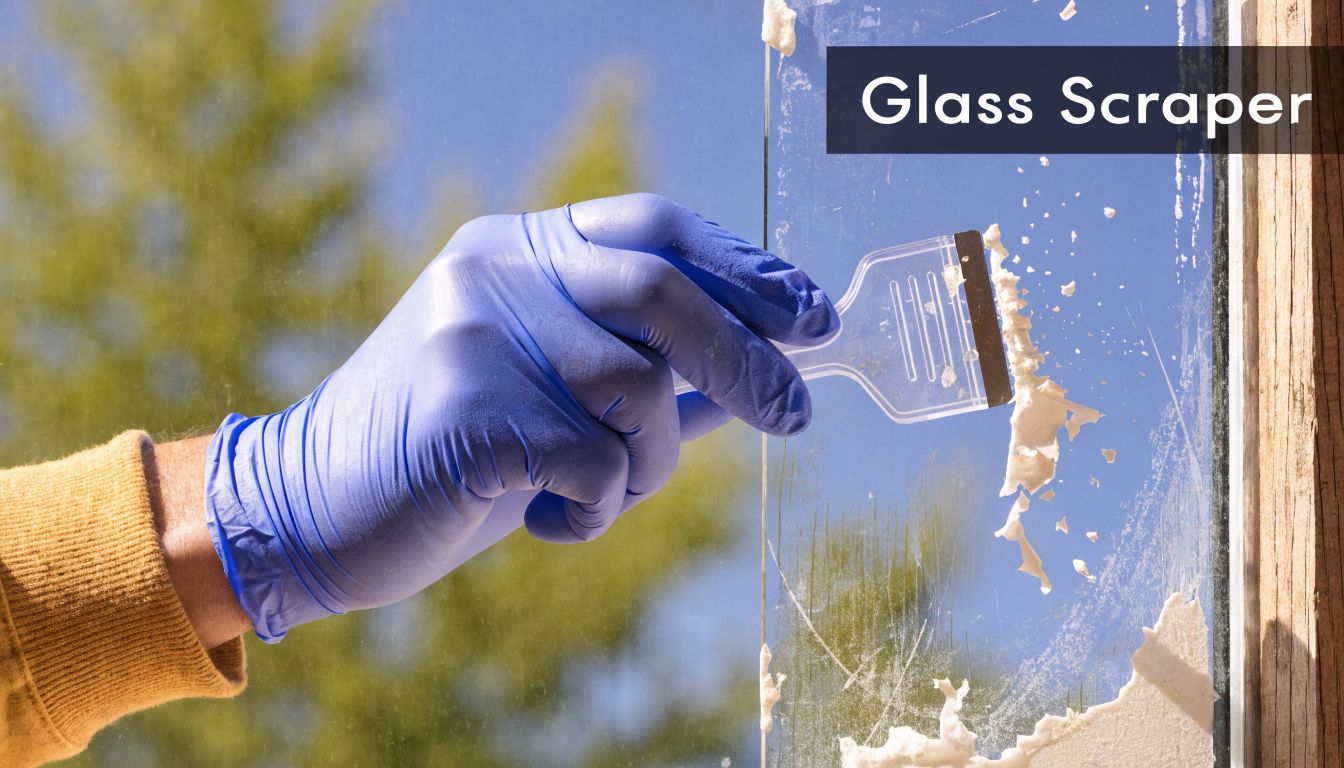
The mistake people make is thinking the scraper does the work by force. It doesn’t. Lubrication, blade condition, and angle do the work. Pressure is usually what causes damage.
Start by wetting the glass thoroughly. A simple soap-and-water mix works well because it gives the blade glide and keeps loose debris from dragging. Then use a new blade. Not a blade from the last job. Not one with a tiny corner nick. A fresh blade.
Hold the scraper low to the glass, around a shallow working angle, and push forward in one direction. Keep the glass wet the whole time. If the area starts drying, stop and re-wet it.
Here’s the short version professionals rely on:
If you want a deeper look at blade selection and safe handling, this guide on using a razor blade for cleaning covers the basics well.
Scrapers are simple, but they punish bad habits. Dry glass is the big one. Heavy downward pressure is another. So is using a metal blade right up against a frame edge where grit, cured paint ridges, or sealant can catch the corner.
A few warning signs mean you should stop immediately:
A scraper should feel smooth and controlled. If it feels rough, something is wrong.
Later in the process, this video gives a helpful visual reference for controlled scraping technique:
Mechanical removal is strongest when the paint is on the glass surface, not fused into surrounding materials. It’s ideal for:
It’s weaker when paint is thick, old, layered, or tied into wood fibers and glazing. In those cases, forcing the issue with a scraper usually creates extra work.
Some paint won’t yield to a scraper alone. Thick cured drips, layered oil-based coatings, and old edge buildup often need a chemical assist. That doesn’t mean reaching for the harshest product on the shelf. It means choosing the least aggressive remover that can soften the coating without damaging the surrounding window components.
Safety stopped being optional. Methylene chloride-based paint removers, now banned for consumer use as of April 2024, were responsible for at least 56 documented deaths in the U.S. since 1980, as reported by the Center for Public Integrity’s coverage of paint stripper deaths and EPA action. Poor ventilation made those products especially dangerous on residential and commercial jobs.
That history matters because some people still talk about old-school stripper performance as if speed is the only factor. It isn’t. On window work, residue control, frame protection, and worker safety matter just as much as raw stripping power.
Modern removers tend to work slower. That’s not a flaw. Slow action often gives you more control.
A careful process looks like this:
For paint that came from overspray rather than brush-applied trim work, this article on how to remove spray paint on glass is a useful companion.
Chemical removers help when paint has body and thickness. They are less impressive on scattered specks, where setup and cleanup often take longer than the removal itself. They also create new risks if you’re careless.
What tends to work well:
What usually causes headaches:
If a remover leaves the glass looking cloudy after the paint is gone, the job isn’t finished. It still has to be cleaned off the window completely.
On upper floors, windy exteriors, and delicate historic windows, chemicals can become more trouble than they’re worth. They evaporate, drip, stain, and leave residue that interferes with final clarity. That’s why many pros reserve chemical use for targeted situations instead of treating it like the default window paint remover solution.
Non-chemical methods deserve more attention than they usually get. For many jobs, they’re cleaner, easier to control, and less likely to create a second problem while solving the first.
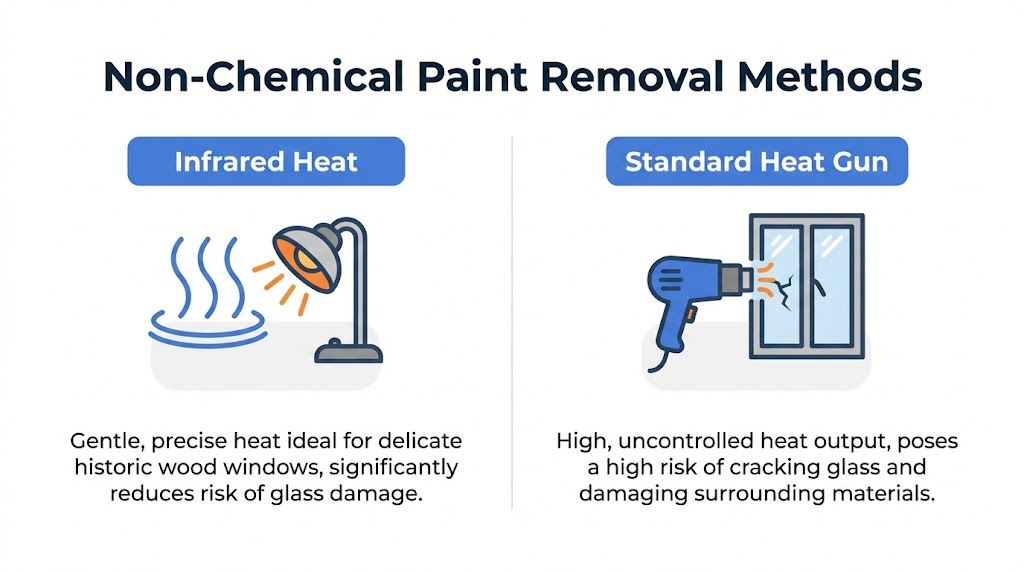
Infrared heat is the method I’d look at first for old painted wood windows where preserving the sash matters. It softens paint in a more controlled way than a typical heat gun, and it avoids soaking the area with chemicals.
According to Rehab Dorks’ discussion of infrared paint removal methods, infrared heat combined with a pre-conditioning layer of linseed oil can achieve 95% complete paint removal on up to eight layers of lead-free paint in controlled tests. The same source says it cuts drying time by 50% compared with chemical stripping and pressure washing.
That’s useful on restoration work and commercial projects where downtime matters.
Infrared heat gives you control. A standard heat gun often gives you speed right up until it gives you damage.
| Method | Best For | Safety | Speed | Risk of Damage |
|---|---|---|---|---|
| Scraper with lubrication | Light overspray and small paint specks on glass | Good when used correctly | Fast on minor contamination | Moderate if used dry or with a damaged blade |
| Chemical remover | Thick cured paint and edge buildup | Varies by product and ventilation | Moderate | Moderate to high around frames, seals, and residue-sensitive glass |
| Infrared heat | Historic wood windows and layered paint | Strong option when controlled carefully | Moderate | Lower than a standard heat gun on delicate window restoration |
| Fine steel wool with lubrication | Very light residue on appropriate surfaces | Good when used selectively | Moderate | Surface-dependent, so test first |
Use a scraper when the paint is clearly sitting on the glass and you can keep the pane wet and clean. Use infrared when the paint is bonded into older assemblies and the window itself needs preservation. Use chemicals sparingly when thickness and curing make mechanical methods inefficient.
Standard heat guns are where people get overconfident. They can overheat glass, stress surrounding materials, and create problems near older painted assemblies. They’re common because they’re easy to buy, not because they’re the best choice.
If the problem isn’t paint from remodeling but tagged or coated glass on an exterior surface, a more specialized approach may be smarter. In those cases, professional graffiti removal services can be a useful reference point because graffiti cleanup often deals with stubborn surface contamination, substrate sensitivity, and finish preservation in ways that overlap with difficult glass restoration work.
Some paint removal jobs are perfectly reasonable for a careful homeowner. Some are not. The dividing line usually isn’t effort. It’s risk.
High glass, large glass, and uncertain glass all deserve caution. If the paint is on second-story windows, a condo exterior, or a commercial building, access changes the entire job. The same is true when you suspect older lead-based coatings or when paint coverage is spread across many panes.
The professional hazard side is real. As noted by Indigo Instruments’ discussion of overspray removal gaps for pros, chemical window paint removers create unique risks in high-rise settings, especially in windy, arid climates like Nevada and Arizona. Rapid evaporation and residue that affects final clarity are exactly the kind of problems most DIY guides skip.
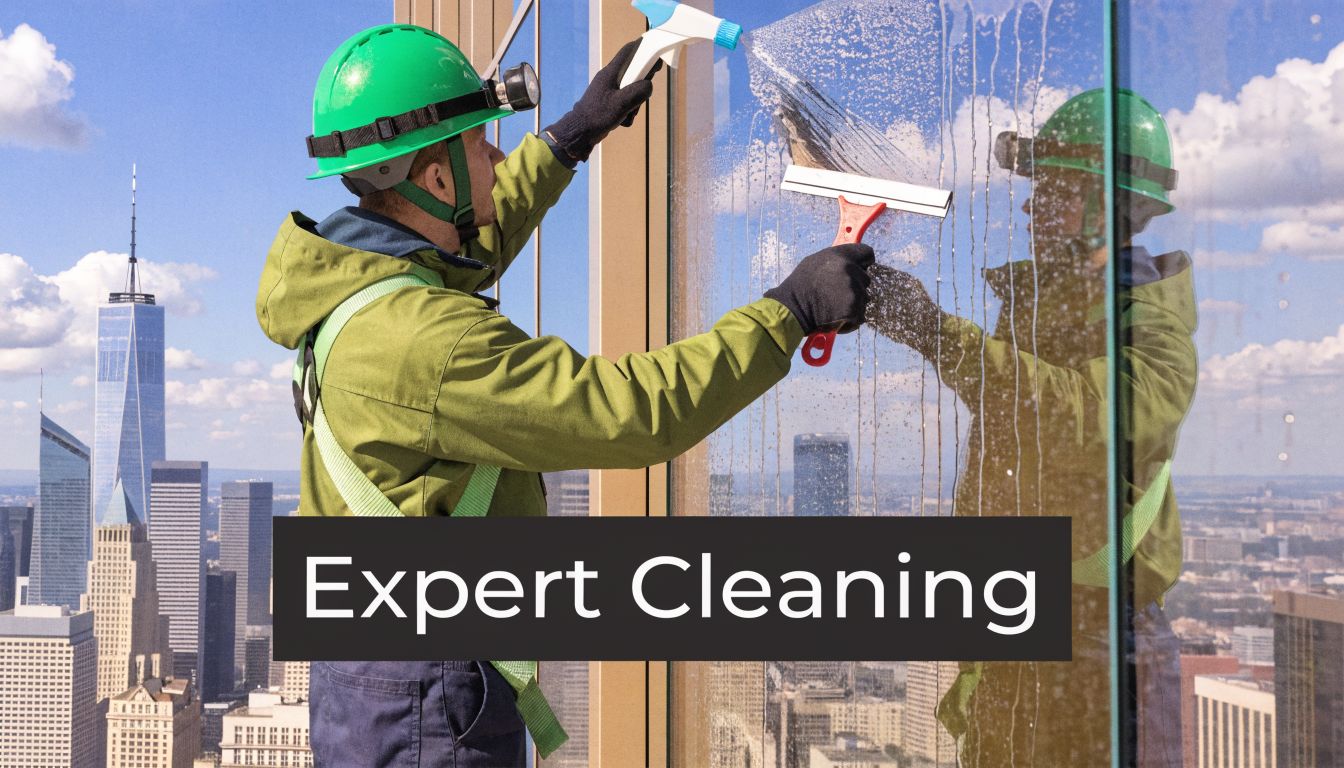
There’s another point homeowners rarely hear. In professional window cleaning, there are really only two cleaning methods pros rely on for the finished glass. A squeegee system and a pure-water system. That’s it.
The squeegee is still the standard for close-detail work, interior glass, edge control, and final inspection-level results. Pure-water systems handle exterior work efficiently, especially on hard-to-reach glass, because purified water rinses clean without leaving mineral spotting.
Those methods matter after paint removal because cleanup isn’t complete when the paint is gone. The window still has to be washed correctly so no film, drag marks, or residue stay behind.
Call for a pro when any of these apply:
If you’re comparing products before deciding whether to tackle it yourself, even a general resource like this professional glass cleaner review can help you think more critically about finish quality. The main point is that clean glass isn’t just paint-free. It has to be clear in direct sun, at angles, and across the whole pane.
For service-area context, this comes up often on upper-floor and commercial properties in Las Vegas and Phoenix, where sun, heat, and access make rushed methods even less forgiving.
If your windows have paint specks, overspray, or heavy residue and you want the glass cleaned without scratches, haze, or frame damage, Professional Window Cleaning can help. The company has been in business since 1999 and brings over 26 years of experience to residential, commercial, and high-rise window cleaning across Arizona, Colorado, and Nevada.
Read our blog posts regularly and keep learning.