Care and Maintenance
Window Cleaning and More: Expert Care for Homes and Offices
Window cleaning and more for homes and businesses: bundle exterior services that protect siding, glass, and gutters while keeping your property spotless all


You need privacy from a bathroom window, entry sidelight, cabinet door, or home-office pane, but you don't want to order custom glass or make an expensive mistake. That's where frosting glass DIY becomes appealing. A can of spray, a tub of etching cream, or a roll of film can change the appearance of clear glass, but each method behaves differently after installation.
The important question isn't only how to create a cloudy finish. It's whether that finish should be permanent, removable, easy to clean, safe to apply indoors, and suitable for the type of glass you already have. This guide compares the practical trade-offs, including the problems homeowners often discover only after the surface has dried.
Frosted glass can soften glare, obscure a direct view, and add a decorative surface without replacing the pane. The right method depends on the glass, the building, and how much commitment you're comfortable making.
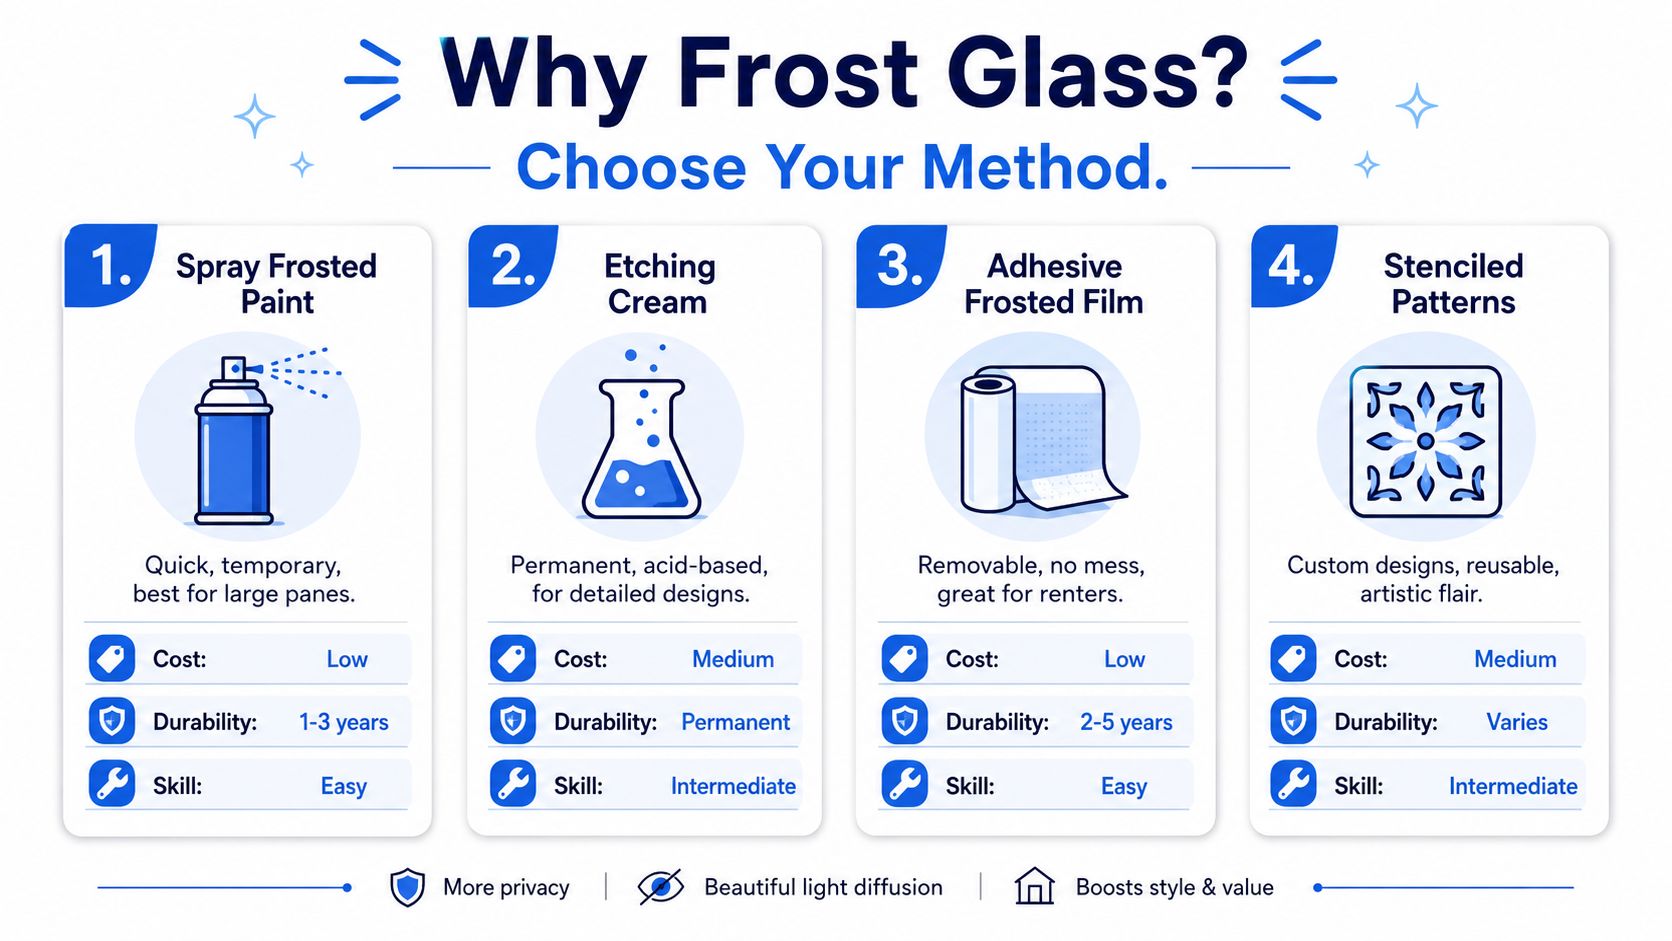
There are four common DIY routes:
Check the pane before buying materials. Tempered, Low-E, mirrored, or otherwise coated glass may resist etching cream or suffer permanent damage, so film is generally the more controlled option for those surfaces. If you're also preparing or repainting surrounding trim, this guide to painting house windows offers useful preparation context.
The rest of the process comes down to surface preparation, controlled application, safe cleanup, and realistic expectations for maintenance.
Spray frosting works well on interior windows, cabinet glass, and sidelights when you want a consistent haze without handling acid-based cream. It's still a coating job, not ordinary painting, so overspray control and thin application determine whether the result looks intentional or cloudy with runs.
Gather the following before opening the can:
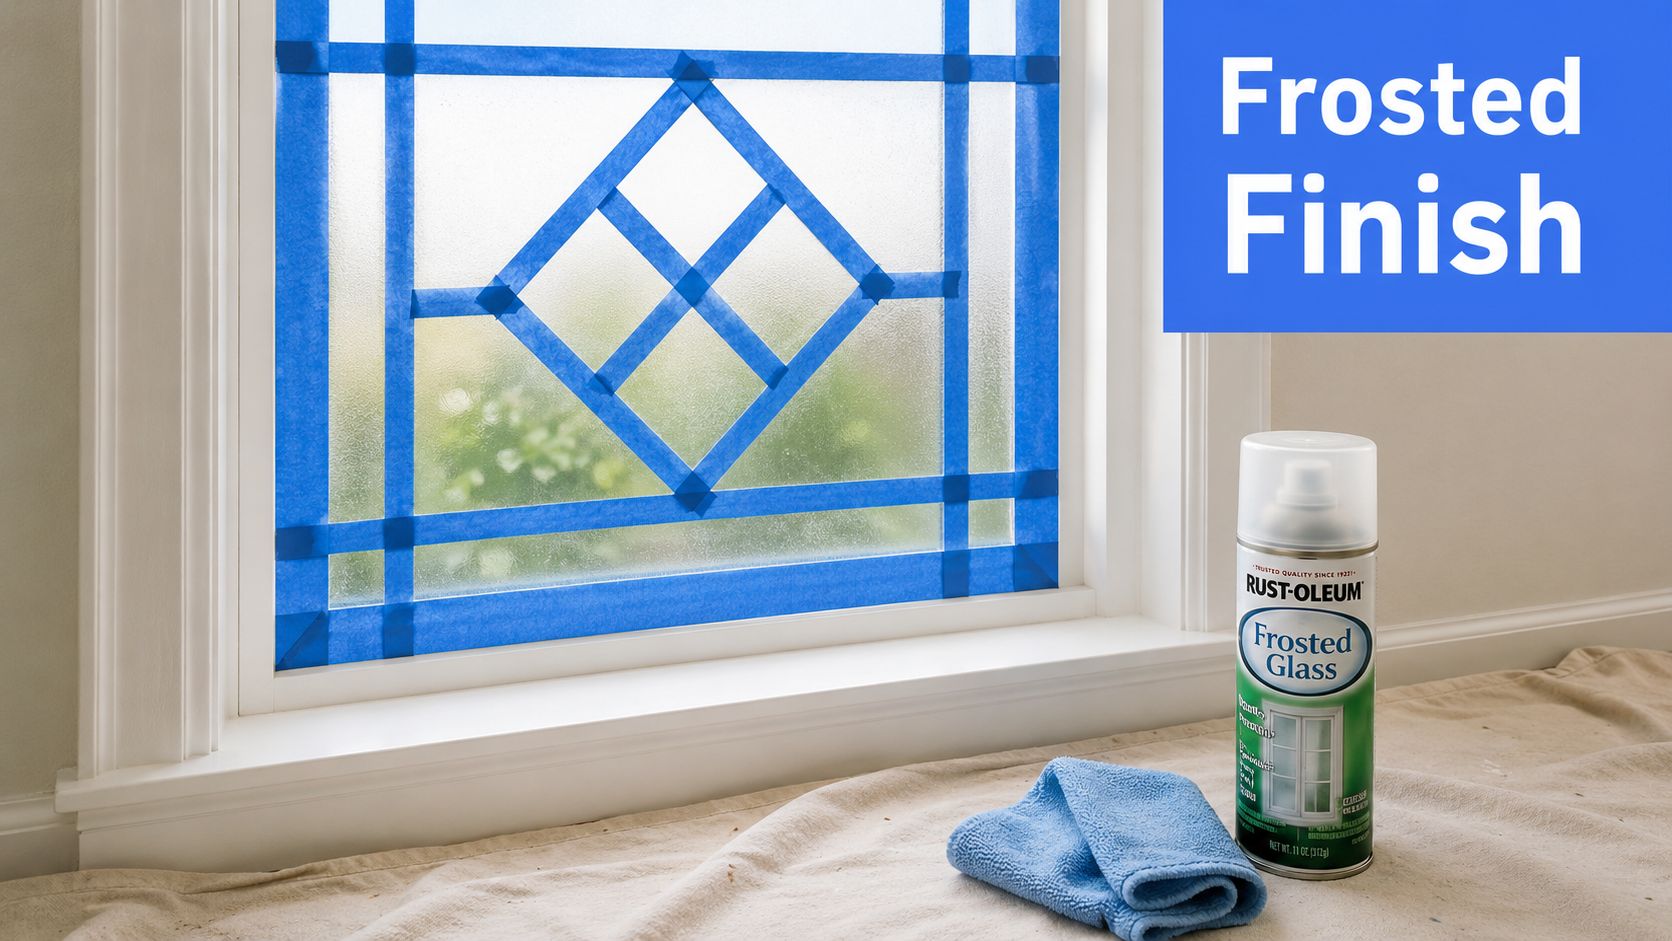
Wash the glass first, then degrease it with isopropyl alcohol. Oils, silicone residue, fingerprints, and old cleaner can cause uneven adhesion. Let the surface dry completely before applying tape.
Mask the trim, frame, hardware, gaskets, and any area that must remain clear. Extend the drop cloth beyond the immediate window because aerosol mist travels farther than expected. Open windows or provide mechanical ventilation, and keep people and pets away from the spray zone.
Test the spray pattern on cardboard. This lets you judge the distance, fan shape, and speed of your pass without creating the first defect on the glass. Consumer guidance commonly places the can roughly 6 to 16 inches from the surface, with thin overlapping passes and 10 to 30 minutes between coats depending on the product, as described in this frosted-glass spray walkthrough.
Shake the can according to its label, but don't attack it aggressively immediately before spraying. Excessive agitation can contribute to an unstable spray pattern and drips. Apply two or three thin coats, waiting about 10 to 15 minutes between passes, then allow 24 hours for curing before judging the final appearance.
A heavy first coat usually creates sags, uneven opacity, and visible edges. If a sag forms, let the coating dry, smooth the defect lightly with fine abrasive paper, remove dust, and apply another restrained coat. Don't try to wipe wet spray from the pane, because that often spreads the defect and damages the surrounding film.
For broader cabinet or trim projects, these prep and DIY tips for 2026 provide additional surface-preparation ideas. Once cured, frosted paint behaves as a permanent film and resists most removers. It may be possible to scrape or strip sections, but restoration is labor rather than a simple peel-off task.
Etching cream produces a permanent frost by chemically changing the glass surface. It's useful for jars, mirrors that are confirmed compatible, and removable panes taken to a controlled workspace. It's also the method that deserves the strongest safety warning, because the cream is toxic and caustic rather than a harmless decorative coating.
Set up a plastic drop sheet and keep these tools separate from household cleaning equipment:
Deep-clean the pane with soap and water, then remove remaining grease with isopropyl alcohol. Dry it fully. Fingerprints, moisture, and old soap film can block the reaction and leave clear or blotchy spots inside an area that was meant to frost evenly.
Press stencil edges firmly, especially around small letters and tight corners. Seal exposed borders with painter's tape. The cream will etch any glass it touches, even if the contact is brief, so keep the work area organized and avoid placing contaminated tools on unprotected surfaces.
Apply a thick, opaque layer, roughly 1 to 2 millimeters deep, rather than brushing the cream into a thin translucent film. Product directions commonly describe short dwell times, often about 1 to 5 minutes for consumer products, while other guidance may specify 5 to 10 minutes or a different label interval. Follow the exact product instructions, not a generic timing chart. The Vari-Cream manual explains the importance of thick application, PPE, ventilation, and controlled exposure.
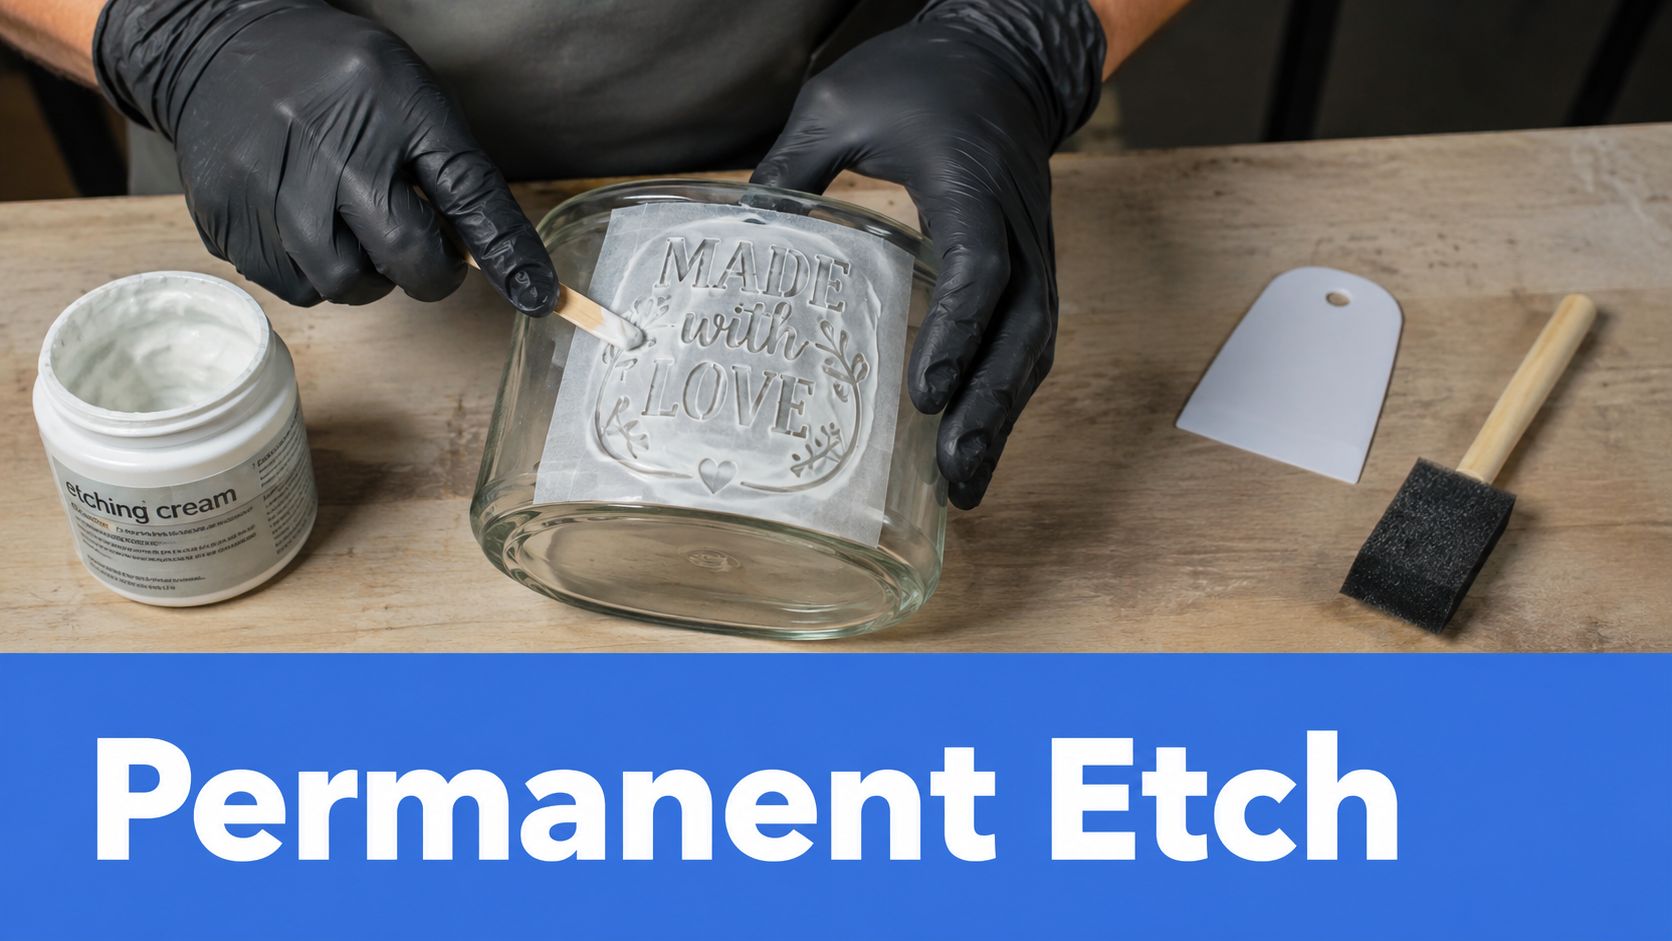
Rinse the cream thoroughly with water while controlling where the residue goes. Scrape softened residue gently with a plastic scraper, then remove the stencil only after the active material has been washed away. Neutralize remaining acidic residue as directed by the product safety documentation, and never send concentrated etching sludge into a storm drain.
Etching doesn't improve linearly with extra exposure. As crust forms, the reaction can slow, and prolonged contact can worsen surface quality rather than create a better frost. Never use this method on tempered, Low-E coated, mirrored, or other treated glass unless the manufacturer specifically confirms compatibility. Permanent damage is the central risk, not just an unattractive finish.
Adhesive frosted film is the most forgiving option when reversibility matters. It creates privacy without altering the glass, and many products can be repositioned during installation if the pane is wet and the adhesive has not fully set.
Start by measuring the inside-frame dimensions. Add a small 1/8-inch overlap on each side so the film reaches beyond the visible opening, then trim it accurately after installation. For an arch, sidelight, or other irregular shape, trace the pane onto kraft paper first instead of trying to manage a full roll against the glass.
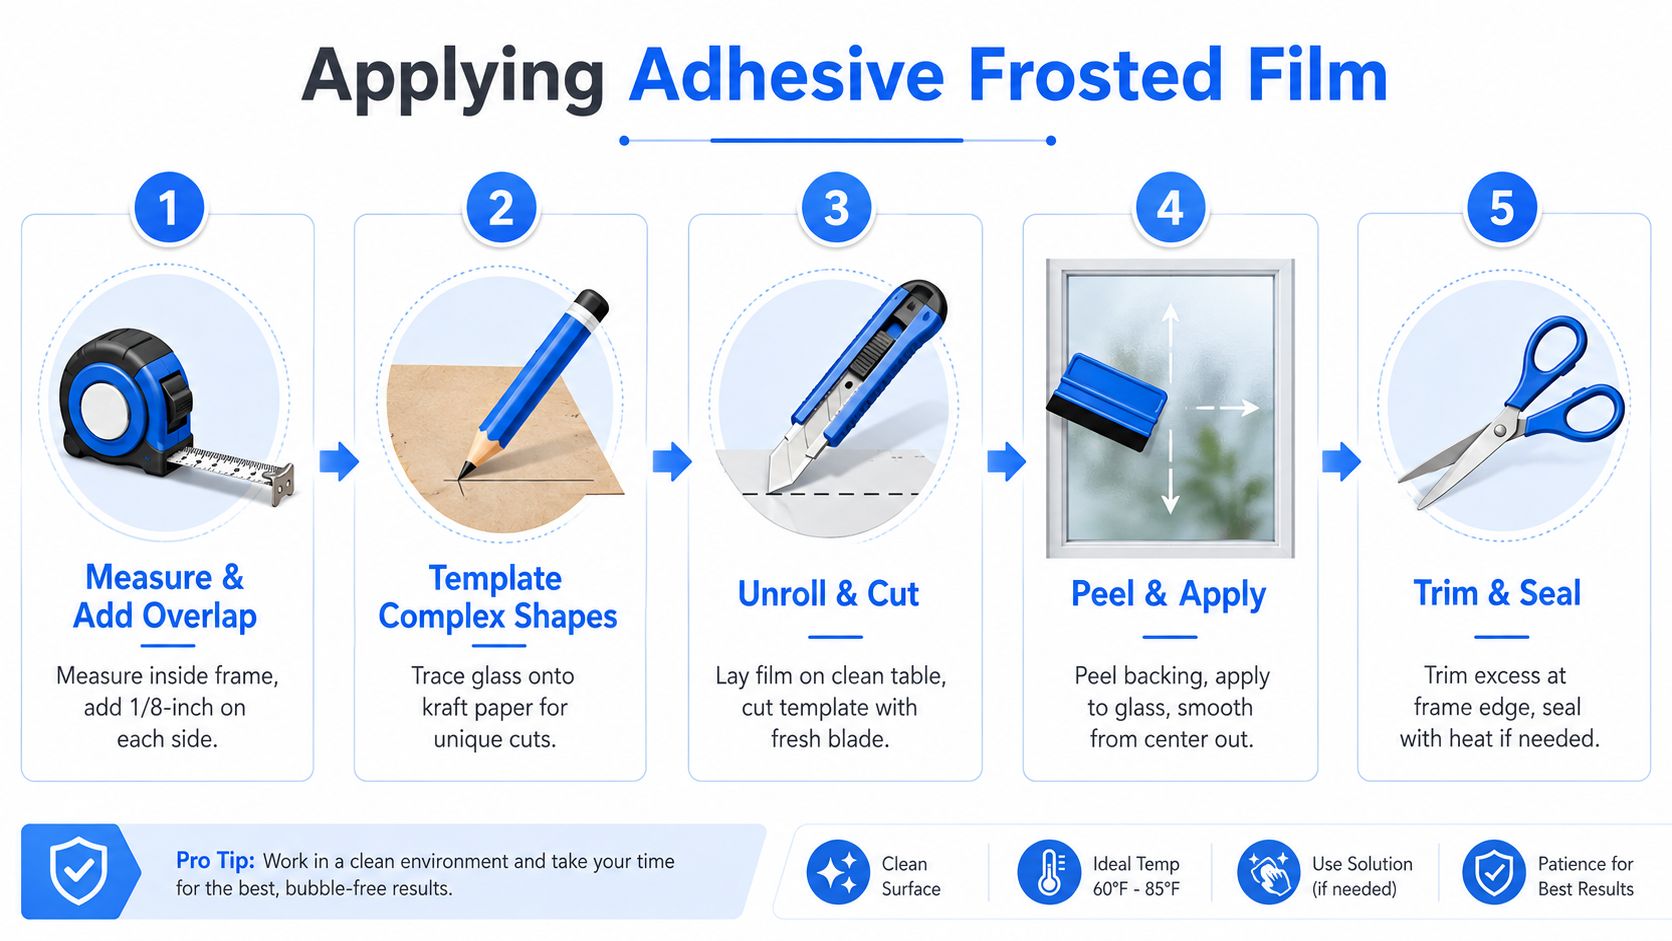
Lay the film on a clean table and cut it with a fresh utility blade against a metal straightedge. Clean the glass thoroughly, then mist it with slip solution made from water and a few drops of dish soap per pint. Peel only part of the liner, align the top edge, and gradually expose more adhesive as you work downward.
Use a plastic or Bondo squeegee with diagonal strokes from the center toward the edges. Follow with horizontal and vertical passes to move water and air outward, then re-squeegee the perimeter. Wrap the tool in a low-lint cloth for the final pass so the vinyl doesn't receive scoring marks.
Film beats spray or cream in leased apartments, on shower doors where humidity can lift a coating, and on large sidelights that are awkward to etch safely in place. It's also a practical choice for double-pane glass when the product is approved for interior use. The adhesive film installation guidance reinforces the basics, clean glass, careful cutting, and squeegee pressure from the center outward.
Each method solves a different problem. Etching offers the strongest permanence but the least forgiveness, while film gives up some surface integration in exchange for a removable finish. Spray sits between them in appearance and commitment, and stencils function as a design strategy that can be combined with another method.
| Method | Durability | Reversibility | Cost/sq ft | Finish | Safety effort |
|---|---|---|---|---|---|
| Spray frosting | Permanent coating once cured, with potential wear or discoloration in demanding exposure | Difficult, usually requires scraping or removal work | Varies by product and coverage | Flat translucent haze when applied evenly | Ventilation, respiratory protection, masking, and overspray control |
| Etching cream | Permanent alteration of the glass surface | Not peelable; restoration may require glass replacement or specialist work | Varies by cream, stencil, and coverage | Dense, etched frost with crisp stencil edges when prepared correctly | Highest effort, chemical PPE, rinsing, and residue control |
| Adhesive frosted film | Replaceable surface finish that can wear or scratch | Removable and repositionable during application | Varies by roll size and waste | Uniform haze, with possible seams, bubbles, or edge lines | Lower chemical exposure, but careful cutting and slip-solution cleanup |
| Stenciled patterns | Varies because the stencil supports spray, cream, or film | Depends on the base method | Varies with design complexity and masking waste | Decorative patterns, borders, or partial translucence | Depends on the material used, plus extra masking time |
For a renter, film usually provides the cleanest exit strategy. For a homeowner who wants a permanent privacy pane and has confirmed compatible glass, etching may make sense. Spray works when the substrate accepts a coating and the finish doesn't face excessive abrasion, moisture, or sunlight.
Offices should think about future repairs and cleaning access. A decorative stencil can look excellent in a reception area, but a complex pattern takes more time to mask and can make later touch-ups visibly inconsistent.
Frosted surfaces still collect dust, fingerprints, soap film, and mineral deposits. The texture that diffuses light can also make streaks or hard-water marks more noticeable, especially on bathroom glass and entry sidelights. Cleaning technique matters because aggressive scrubbing can change the appearance of an etched surface or scratch a film.
For spray and cream finishes, use a soft microfiber cloth and a pH-neutral glass cleaner. Avoid abrasive pads and aggressive polishing compounds. On film installed in a shower, use an ammonia-free cleaner and a soft squeegee, then dry the edges so moisture doesn't remain against the adhesive.
Practical rule: Treat frosted glass as a finish, not as a surface that can tolerate every household cleaner.
Inspect the installation periodically for lifting corners, yellowing near sun-exposed edges, adhesive haze, and hard-water spotting. Mineral buildup can become more visible on frosted sections because the deposits interrupt the otherwise even diffusion. Don't use a Magic Eraser on frosted glass, since abrasive action can alter texture and create patchiness or haze. For a dedicated cleaning routine, use Professional Window Cleaning's frosted-glass cleaning guidance.
Adhesive film is usually softened with controlled heat, then lifted slowly. A citrus-based adhesive remover can help with stubborn residue, but test it in an inconspicuous area and keep solvents away from seals and painted finishes.
Paint residue may require careful razor scraping. Hold the blade at roughly 30 degrees, keep the surface lubricated where appropriate, and work in small sections. Etched glass can't be returned to clear glass by scraping, because the surface itself has been altered.
Dispose of paint chips, contaminated towels, and etching residue according to local requirements. Keep chemical waste out of storm drains and don't pour concentrated residue into household plumbing.
Three warning signs indicate that the problem may no longer be cosmetic:
At that point, stop experimenting and have the unit assessed.
Etching cream requires the most serious precautions. Wear chemical splash goggles, nitrile gloves, long sleeves, and a suitable respirator when the product label calls for respiratory protection. The safety documentation for Vari-Cream warns of severe skin burns and eye damage and discusses immediate water rinsing and calcium gluconate treatment after exposure, so read the etching cream safety data sheet before starting.
Spray products also need ventilation and respiratory protection appropriate to the label. Open opposing windows when possible, run an exhaust fan, protect nearby surfaces, and keep children and pets outside the work zone until the surface is rinsed or fully dry. Film has a lower chemical burden, but utility blades, solvents, and slippery floors still create avoidable hazards.
Rinse tools in a controlled container where the product instructions require it. Neutralize acid residue with a baking soda solution only when the product guidance permits that approach, then contain the waste. Double-bag contaminated paper towels and etching residue, and use a hazardous-waste drop-off when local rules classify leftover cream or spray paint that way.
Bag razor blades separately in a rigid puncture-resistant container. Wash your hands before touching food-contact glass, even if you wore gloves. Don't reuse brushes, cloths, or containers for kitchen tasks after chemical frosting work.
Professional help is the sensible option for large plate glass over 30 square feet, tempered or Low-E coated panes, second-story exterior windows, sidelights close to entry hardware, and any project where permanent etching has already gone wrong. A professional can also assess whether a cloudy appearance comes from residue, coating failure, seal damage, or actual glass alteration. For a broader PPE checklist, review window-cleaning safety equipment.
Professional Window Cleaning has been cleaning windows for over 26 years and provides residential, commercial, and high-rise window cleaning in Las Vegas, Phoenix, Denver, and Scottsdale. Ask during the quote whether the technician recommends a squeegee or pure-water system, whether the finish can be cleaned without scratching, how residue will be contained, and what restoration options exist if the glass has been permanently etched.
If you're weighing frosting glass DIY against a professional cleanup or restoration, visit Professional Window Cleaning to discuss the pane, finish, and access conditions with a window-care team. They can help clean frosted surfaces safely and identify whether the problem is removable residue, coating damage, or glass that has been permanently altered.
Read our blog posts regularly and keep learning.