Care and Maintenance
Hand Held Brush Types for Window Cleaning Compared
Compare hand held brush bristle types, stiffness, shapes and handles for window cleaning, plus which brush suits homes, commercial sites and high-rises.


Most residential asphalt driveways need resealing every two to three years, and concrete generally falls in the same range; harsh sun, heavy traffic, or freeze-thaw cycles push the interval toward two years. Treat that interval as a reminder to inspect, not an automatic appointment to apply another coat.
Published schedules stretch much further than many homeowners expect. In a University of Pittsburgh iRIDE survey, 61% of responding public pavement agencies expected seal-coat treatments to last four to six years. Those aren't residential driveway guarantees, but they demonstrate why sealing annually isn't a universal maintenance rule.
The useful question isn't just how often should you seal your driveway. It's whether the existing protection has worn out, whether the pavement needs repairs, and whether conditions will let the next application bond and cure properly.
Use sealing intervals to plan inspections, not automatic recoating. The right timing depends on the surface, sealer formulation, and exposure, and every range assumes the pavement beneath the coating is structurally sound.
| Surface or condition | Typical interval | Shorter interval when | Basis |
|---|---|---|---|
| Asphalt, residential, standard emulsion sealer | Every 2–3 years | Intense sun, multiple daily vehicles, heavy trucks, or freeze-thaw cycling | CoJo Asphalt's maintenance guide |
| Asphalt, polymer-modified sealer | Every 3–5 years | Heavy traffic or oil exposure warrants evaluation around 2–3 years, not a guaranteed recoating date | Industry technical guidance |
| Asphalt, public agency survey norm | Every 4–6 years | Early wear from sun, water, or heavy loads | University of Pittsburgh iRIDE survey |
| Asphalt, long protective life | Every 5–7 years | Hot, high-UV climates or poor drainage | 2024 Minnesota LRRB synthesis |
| Concrete, residential | Every 2–3 years | 1–2 years in severe freeze-thaw conditions; annually to every 18 months under heavy traffic or chemicals | Concrete maintenance guidance, subject to the installed product |
| New asphalt, before first sealcoat | Wait about 3–12 months | Don't shorten the wait without installer and product approval | Maintenance guidance on asphalt curing |
These ranges describe different situations, not competing rules. A residential asphalt-emulsion coating, a polymer-modified system, and a public-road seal coat can have different applications and expected service lives. Use the row that matches the product and setting, then let the pavement's condition determine whether to seal, repair first, or wait.
The Minnesota Local Road Research Board describes seal coating as recurring maintenance rather than a permanent treatment. Its longer planning range applies when the pavement and application conditions support that protective life. It does not mean every residential driveway should wait that long.
The Asphalt Institute says properly designed and constructed, low-traffic pavement generally does not require sealing for approximately two to five years. Climate severity and construction quality affect timing. That range is useful context, but it is not a residential schedule for every driveway.
Before approving a quote, ask the contractor to identify the proposed sealer, explain its preparation requirements, and point to the wear that supports recoating. Elapsed time alone does not show whether another layer is needed. If the existing coating remains sound, keep inspecting rather than paying for a new application just because the typical interval has passed. When the surface is damaged, address the repair before treating the calendar as a reason to seal.
The sealer is a protective surface layer. It can wear thin while the asphalt and supporting base remain serviceable, but another coat can't restore a weak foundation or reverse structural cracking.
Compare the exposed aggregate and uneven color with the more uniform coated surface.

Sun and ultraviolet exposure deserve early attention on an open driveway. UV exposure hardens asphalt binder, reducing its flexibility. CoJo Asphalt's maintenance guide recommends approximately two years for high-sun or high-traffic surfaces and up to three years for lightly used, shaded driveways with good drainage.
Traffic produces a different pattern. Look at turning areas, garage approaches, and delivery stopping points, where tires scrub the coating rather than merely roll across it. A lightly used parking strip may retain protection after the entrance has worn through.
Water becomes especially damaging when it enters cracks and freezes. Poor drainage also keeps vulnerable areas wet and can weaken support beneath the pavement. Oil and fuel require separate attention because contamination can soften asphalt and prevent a replacement coating from bonding.
| Factor | Shortens the interval | Lengthens the interval |
|---|---|---|
| Sun and UV exposure | Open, south-facing drive in Arizona or Nevada, near the shorter residential interval | Shaded, north-facing drive with adequate drying |
| Traffic and loads | Multiple daily vehicles, RVs, or delivery trucks | Single-car, light household use |
| Freeze-thaw and deicing | Repeated freezing and heavy winter maintenance | Mild winters with few freezing cycles |
| Drainage | Standing water, low spots, roof runoff | Slopes that shed water promptly |
| Sealer product | Standard emulsion with ordinary wear resistance | Suitable polymer-modified formulation |
| Existing coating and prep | Worn areas, oil contamination, poor cleaning | Compatible coating on clean, dry, sound pavement |
| Pavement age and build | Weak support, poor compaction, early cracking | Well-built pavement without active distress |
Product choice matters, but it doesn't cancel out poor preparation. A premium sealer over dust, moisture, or oily residue can perform worse than a simpler product applied to a properly prepared driveway.
The University of Pittsburgh iRIDE seal-coat report identified pre-existing pavement distress as the most common cause of seal-coat failure. Covering damaged asphalt changes its appearance without correcting the reason it failed.
Say a shaded household driveway drains freely, while another sits in full sun and regularly receives a delivery truck. The second deserves earlier attention even if both were sealed together. I would also bring inspections forward whenever several adverse conditions overlap, especially heavy turning traffic combined with pooling water.
Run the inspection on a dry afternoon, with a stiff broom, bucket, camera, and a simple sketch of the driveway. Sweep away dirt first so you aren't judging a coating through dust.
Use this checklist to identify areas that deserve closer inspection.
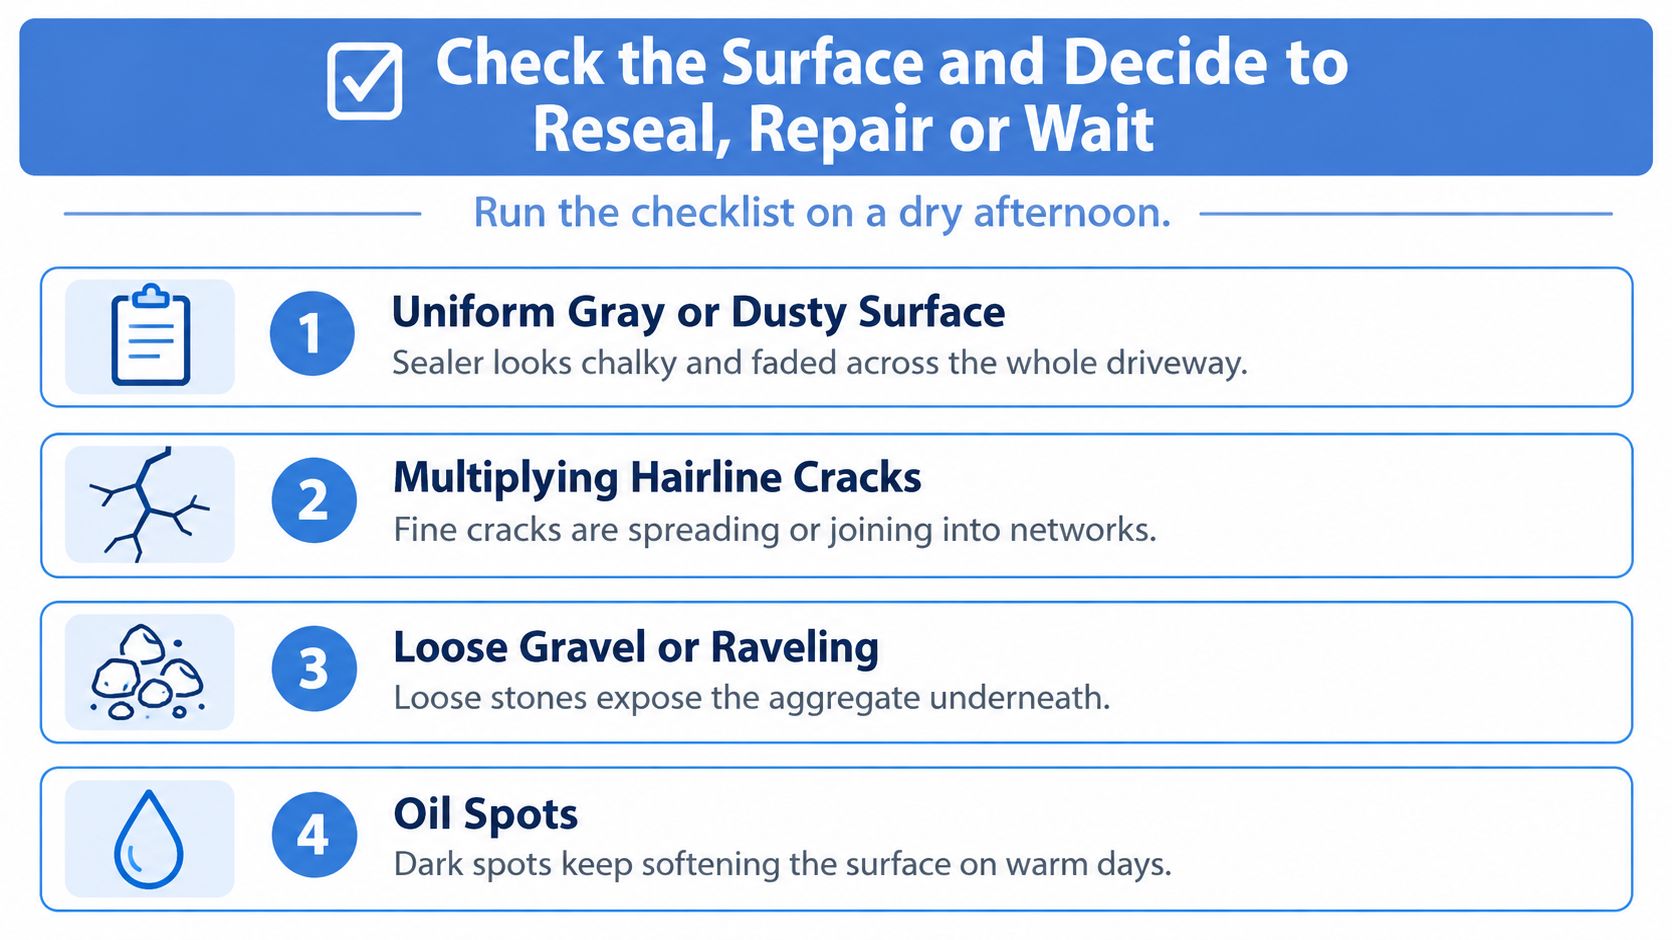
A University of Pittsburgh asphalt-preservation presentation distinguishes fixed-interval treatment from condition-based pavement management. For a homeowner, the practical application is straightforward: inspect annually and respond to actual deterioration, not just elapsed time.
Splash water onto representative areas, including a sheltered edge and a worn wheel path. Beading or resistance to wetting can indicate remaining water repellency; rapid darkening and absorption can suggest exposed, more absorbent pavement.
However, the bucket test isn't a universal pass-or-fail test for asphalt sealer. Surface texture, dirt, and formulation affect what you see, so combine the result with wear patterns and product information. Don't order a full reseal because a single patch absorbs water.
For adjoining concrete surfaces, this guide to how to clean cement can help distinguish surface dirt from wear before you assess the finish.
| Condition you see | Action | When to proceed |
|---|---|---|
| Faded gray surface, fine hairline cracks, no pooling | Seal now after suitable crack treatment | When wear justifies treatment and application conditions are suitable |
| Wide cracks, potholes, or crumbling edges | Repair first, then assess sealing | After repairs have cured as directed |
| Standing water or soft spots | Fix drainage and investigate the base | Before any sealer goes down |
| Asphalt laid within the last 3–12 months | Wait for curing confirmation | After the product's and installer's cure requirements are satisfied |
| Oil or fuel stains | Degrease, assess damage, dry, then seal | Once contamination is addressed and the substrate is sound |
| Rain forecast or cool, damp weather | Delay | When the forecast and pavement conditions meet application requirements |
The three-to-twelve-month initial waiting range appears in BitumenCalcPro's asphalt sealcoating guidance, which also emphasizes warm, dry application conditions. A Natural Handyman maintenance guide recommends about one year for new asphalt, illustrating why the paving date alone doesn't determine readiness.
A driveway can need maintenance today and still be unsuitable for sealing today.
Use a compatible crack-repair product for repairable cracks. For contaminated areas, scrub with an asphalt-compatible degreaser, collect residue responsibly, and assess whether damaged material needs removal; staining alone doesn't tell you whether the substrate is stable.
The following video provides an additional visual reference while you evaluate the work.
Photograph each marked location before repairs. Keep those images with the sealer name and application record so your next inspection measures change rather than relying on memory.
Concrete requires a concrete-compatible sealer, not asphalt sealcoat. Before choosing a reapplication date, identify whether the existing treatment is a film-forming coating or a penetrating water repellent.
The 2025 Perserbid concrete sealing guide recommends every two to three years under typical residential conditions, every one to two years in severe freeze-thaw climates, and annually or every eighteen months under heavy traffic or chemical exposure. These figures come from a single maintenance guide, so confirm the schedule against the actual product and installer rather than treating it as a rule for every concrete sealer.
| Sealer type | What to inspect | What to avoid |
|---|---|---|
| Film-forming topical sealer | Dulling, peeling, worn wheel paths, uneven gloss | Coating over loose or incompatible material |
| Penetrating sealer | Changes in water absorption on clean, dry concrete | Assuming an invisible treatment has failed because it isn't glossy |
A water test is more useful for assessing water repellency than appearance alone, but it still needs context. Compare similar areas, clean them first, and ask the manufacturer how its product should perform.
For cleaning-to-sealing preparation, Water Works Power Washing sealer tips provide a useful companion resource. The important distinction is between a surface that looks dry and one that meets the sealer's moisture requirements.
White powdery deposits aren't automatically worn sealer. Identify the deposit before applying a new finish, using this concrete efflorescence cleaner guide as a starting point.
Treat moving joints and repairable cracks separately, and investigate scaling or spalling before coating. In desert settings, check exposed topical finishes for weathering; in cold climates, prioritize moisture entry and winter damage.
Keep the product name, finish type, and application date. Without those details, the next contractor may be guessing about compatibility.
For asphalt, standard professional emulsion sealers are typically planned on a two-to-three-year cycle, while polymer-modified systems may last three to five years under suitable conditions, according to PaveDesk's asphalt sealcoating guide. Arizona and Nevada heat, along with Colorado freeze-thaw exposure and deicing, can move an inspection earlier. Treat the interval as a prompt to assess the surface, not an automatic order to reseal. Applying another coat before the existing one has weathered enough can cause adhesion problems.
| Region | Main pressure | Likely interval | Best application window |
|---|---|---|---|
| Phoenix, Scottsdale, Tempe, Chandler, and Gilbert, AZ | Intense sun and extreme heat | Inspect around the shorter residential interval | Late fall through early spring |
| Las Vegas, NV | Intense UV and heat | Inspect around the shorter residential interval | October to November or March to April, subject to product limits |
| Denver, CO | Freeze-thaw cycles and deicing | Assess earlier after harsh winters | May through September on suitable dry days |
| Flagstaff, AZ | High elevation, snow, and freeze-thaw | Inspect promptly after hard winters | Late spring to early fall |
These are practical booking windows, not guaranteed application conditions. Before scheduling, check pavement temperature, overnight conditions, rain risk, and the product's curing requirements.
In desert metro areas, cooler-season work helps avoid excessively hot pavement. Summer monsoon storms can interrupt curing, so a sunny morning alone is not enough to confirm a suitable application window.
Southern Nevada's spring and autumn windows can offer a workable balance between peak heat and colder nights. Shaded pavement may dry more slowly than an exposed entrance, so assess the whole area before booking.
Along Colorado's Front Range, schedule early enough to give the coating suitable conditions to cure before freezing weather returns. Flagstaff also has a short warm season because of its elevation.
Inspect near the start of the likely work window. That gives time to address repairs or drainage issues and accommodate contractor availability or a weather delay. Let the surface condition determine whether to seal, repair first, or wait.
Build a maintenance record before booking a coating. A short, consistent record is more useful than an elaborate spreadsheet nobody updates.
Use this sequence to turn the inspection into assigned work.
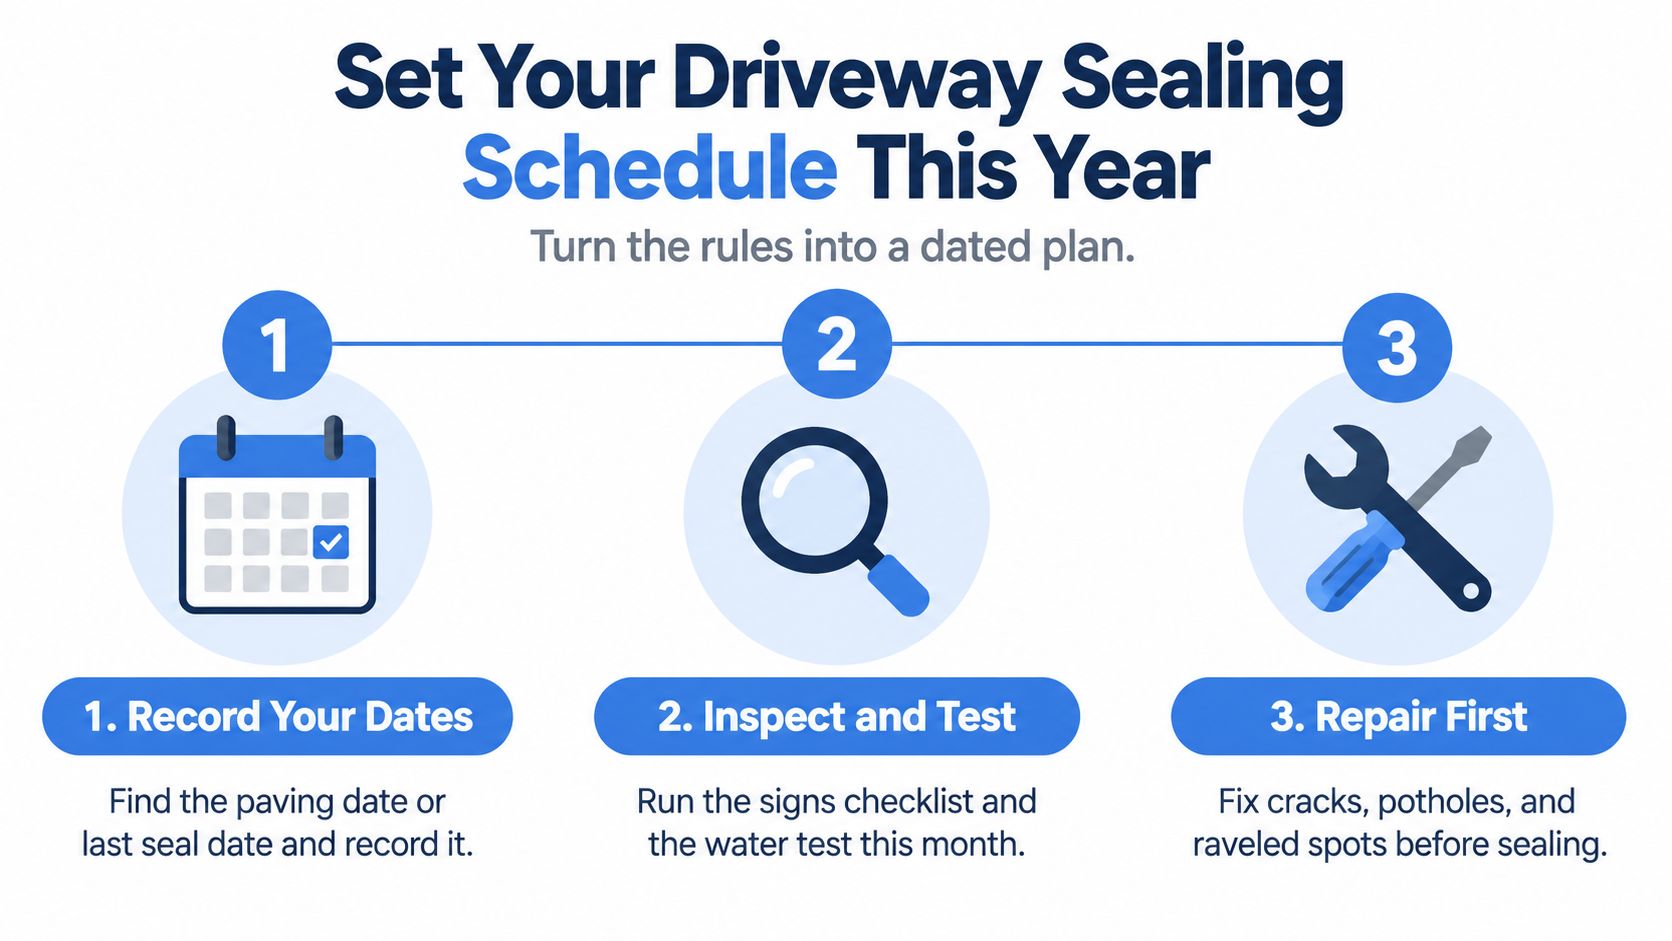
Don't let the maintenance record become just a list of sealing dates. Record what changed and why a treatment was chosen, including decisions to wait.
| Ownership stage | Maintenance priority |
|---|---|
| Newly paved | Confirm curing requirements and protect the developing surface |
| Early service | Inspect drainage, edges, and developing cracks |
| First residential recoating window | Assess exposed and heavily used areas before authorizing a full application |
| Later service on a lightly used, shaded driveway with a documented polymer-modified product | Continue monitoring coating performance rather than extending the schedule blindly |
| Any stage with structural distress | Obtain a repair assessment before spending on sealcoat |
A longer maintenance window isn't permission to leave the pavement unchecked. Equally, an intact coating doesn't become defective on its anniversary.
Budget for the work the pavement needs, not the darkest finish available.
For property managers, maintain a separate record for each lot. Entrances, loading areas, and turning circles deserve closer monitoring than lightly used parking bays, and localized maintenance may be more appropriate than recoating everything together.
Schedule closures around tenant access, accessible routes, and deliveries. Include repairs and recurring preservation in the property's maintenance reserve so a predictable task doesn't become an emergency purchase.
Book sealing when the pavement is sound and the combined inspection indicates worn protection. If it still resists wetting and shows little wear, keep inspecting; if you find instability, drainage failure, or significant cracking, repair first and reschedule.
Professional Window Cleaning offers residential, commercial, and high-rise window washing, with over 26 years of window-cleaning experience. While a paving specialist handles your driveway repairs and sealing, visit Professional Window Cleaning to arrange window cleaning as part of your property's exterior maintenance schedule.
Read our blog posts regularly and keep learning.