Care and Maintenance
Long Handle Squeegee: Your Ultimate Guide to Pro Results
Master high-reach window cleaning with our guide to the long handle squeegee. Learn to choose the right size, use proper technique, and get streak-free results.


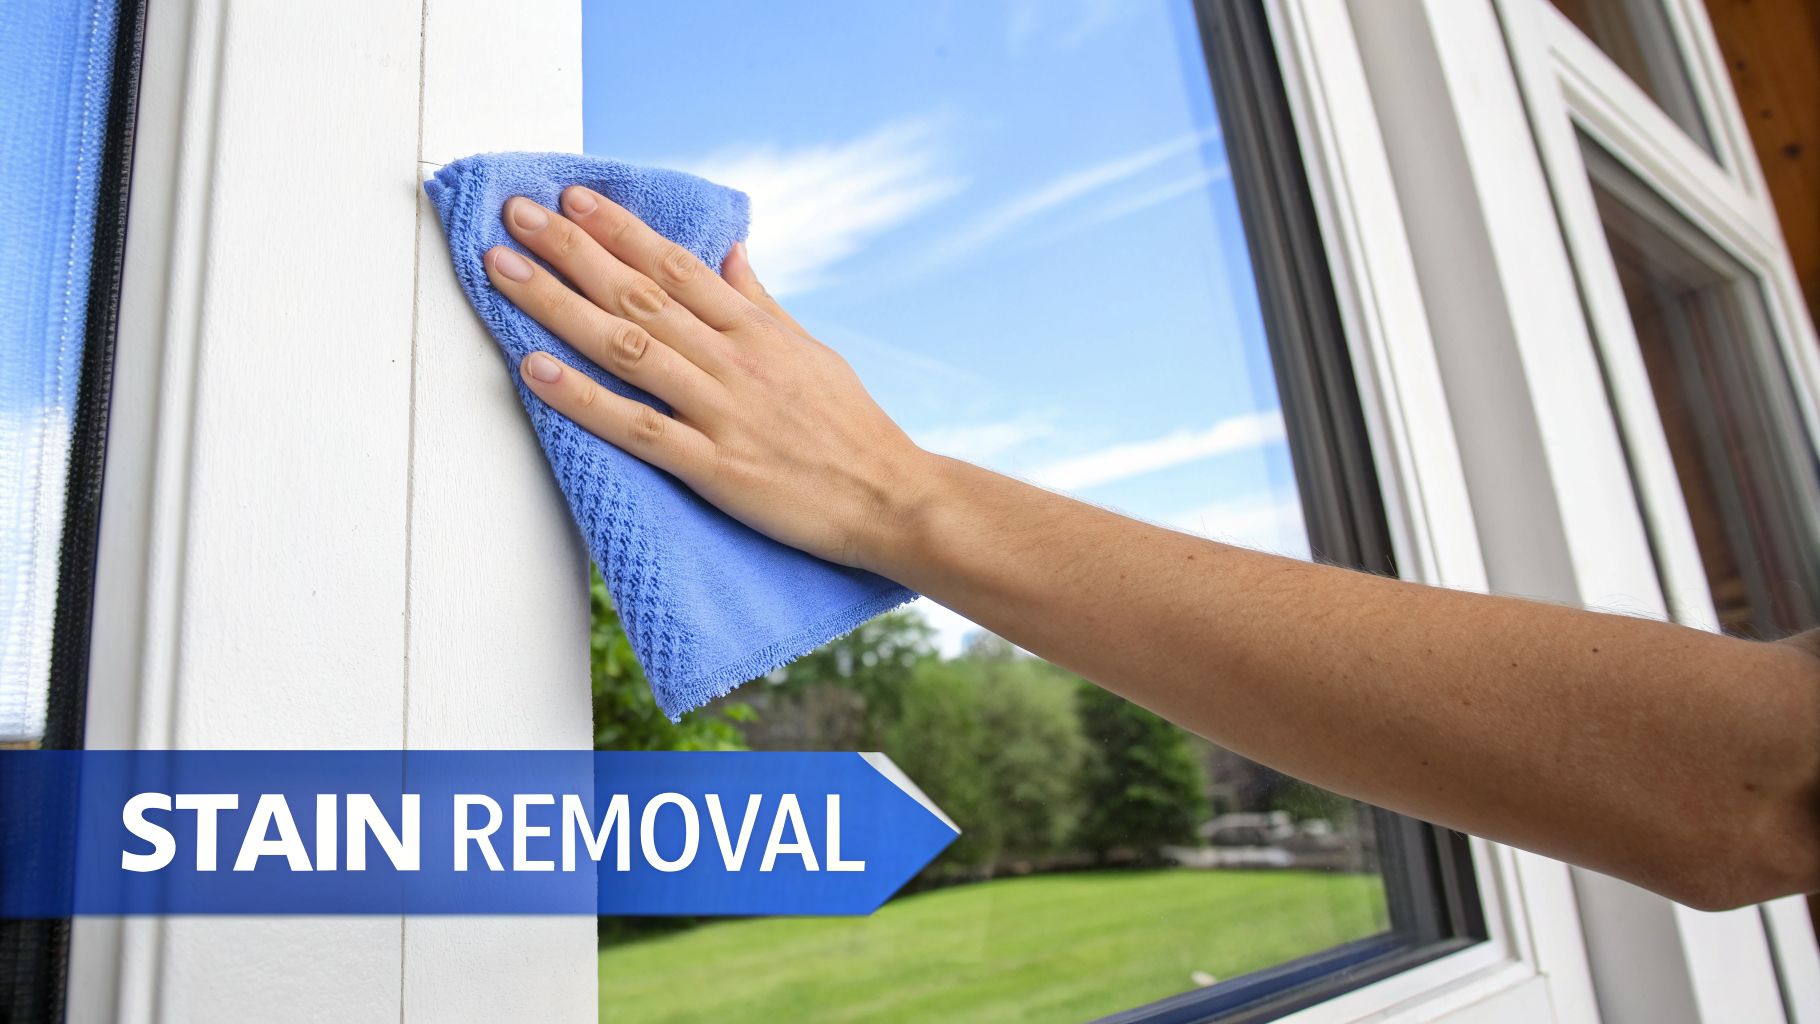
To get your vinyl windows truly clean, the secret isn't some magic formula. It's about using a gentle, non-abrasive cleaning solution paired with the right tools—specifically, good microfiber cloths and a quality squeegee. This simple combo is your ticket to preventing scratches on the vinyl frames while getting a perfectly clear, streak-free finish on the glass.
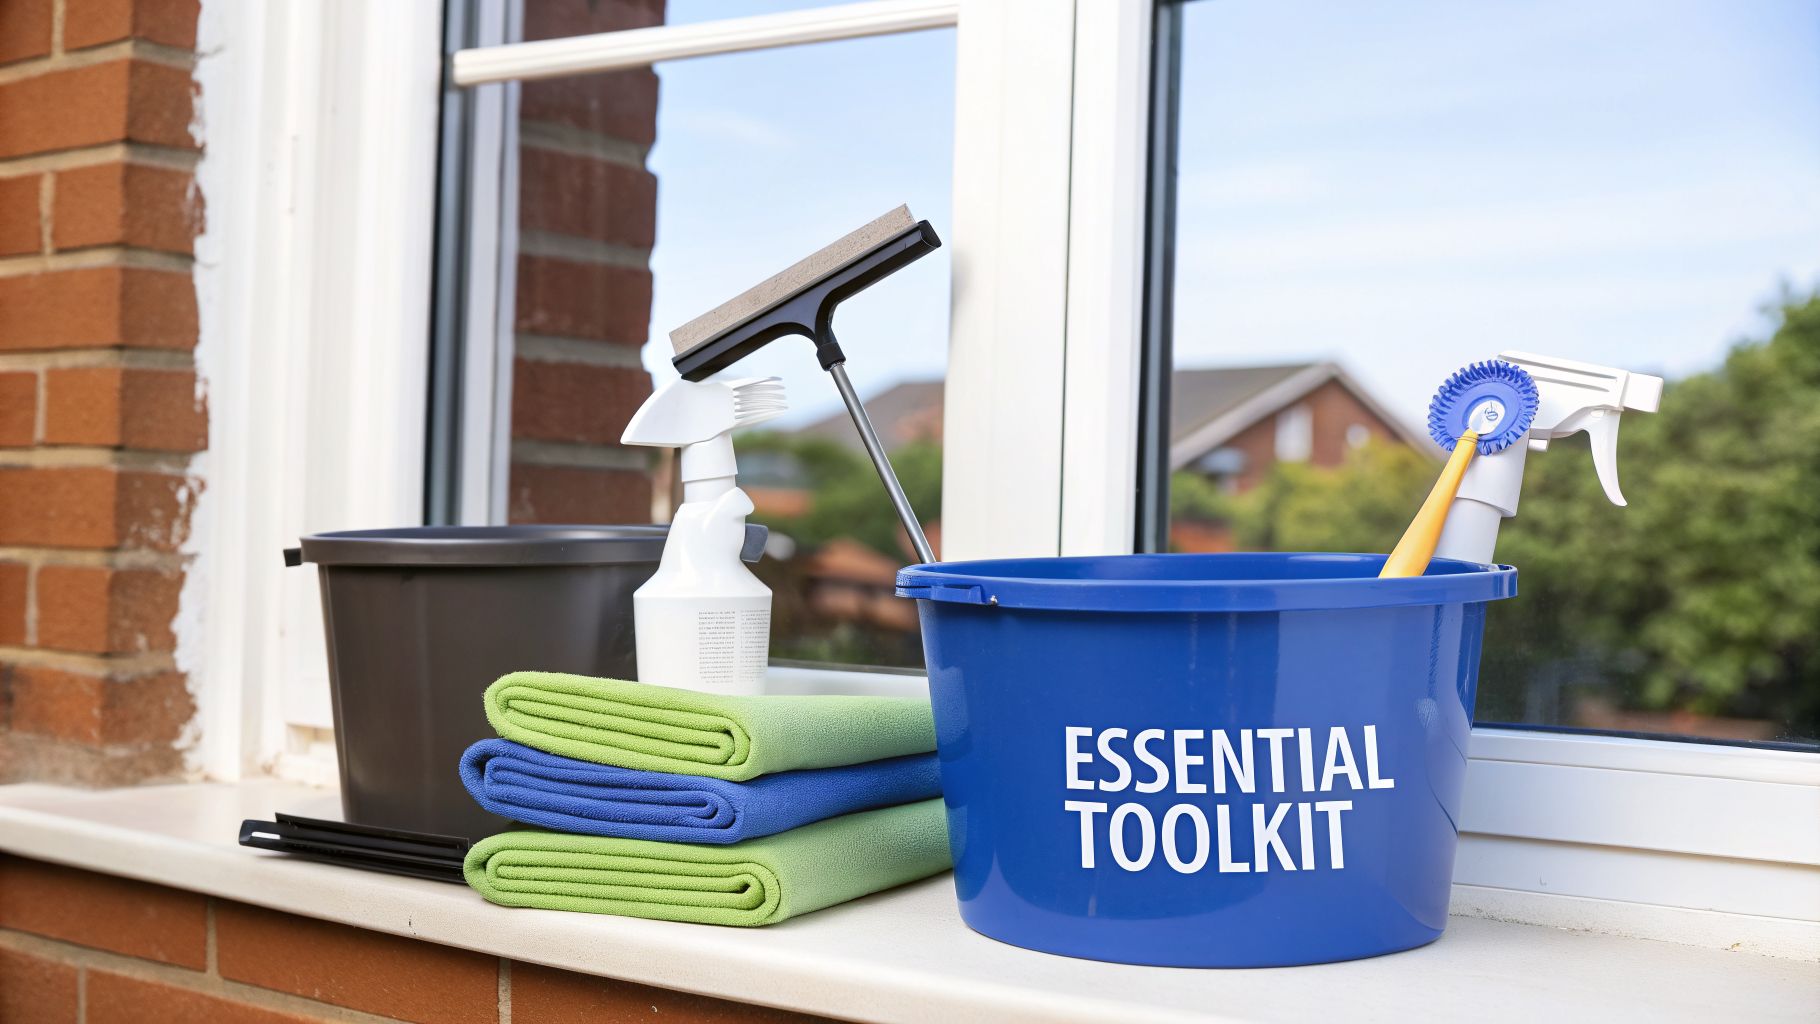
Before you even think about touching your windows, let's talk gear. Assembling the right toolkit is probably the most critical step toward getting professional-level results. Trust me, rushing this part almost always leads to frustration, stubborn streaks, or worse, damaged frames. Having everything you need within arm's reach makes the whole process go so much smoother.
After 26 years in this business, we've learned that pros rely on specific tools for a reason. There are really only two methods of window cleaning professionals use: the classic squeegee method or a sophisticated pure-water system. For any DIY project, the squeegee method is fantastic—it's accessible and highly effective when done right.
First things first, let's focus on your primary tools. A high-quality squeegee is non-negotiable. Look for one with a sharp, pliable rubber blade. A 10 to 14-inch blade is a great, versatile size for most residential windows. A cheap squeegee is just a fast track to a streaky mess.
Next, you'll need at least two or three lint-free microfiber cloths. I recommend one for washing, another for detailing the edges, and a third just for wiping your squeegee blade clean. Microfiber is perfect because it grabs dirt without leaving behind those fuzzy bits you get from paper towels or old rags.
Here's a trick straight from the pros: the two-bucket system. It's simple. One bucket holds your soapy cleaning solution, and the other is filled with clean rinse water. This setup stops you from transferring grime right back onto the glass, which is a classic mistake that leaves a hazy, dirty finish.
When it comes to the cleaning solution, you’ve got some great, simple options. Vinyl is tough, but harsh chemicals can make it yellow or become brittle over time. You’ll want to stay far away from abrasive cleaners or solvents like acetone for general cleaning, as they can soften or even discolor the surface.
For a powerful DIY mix that’s still gentle, just combine a few drops of pH-neutral dish soap with a gallon of warm water. This solution is easy on the vinyl frames but tough enough to cut through grime on the glass. Many homeowners we work with, from sunny Phoenix to the high altitudes of Denver, find this simple recipe is all they need for routine upkeep.
Pro Tip: For an extra bit of cleaning power against hard water spots, add about a half-cup of distilled white vinegar to your soapy water. The mild acidity helps dissolve mineral deposits without being aggressive enough to harm the vinyl.
If you'd rather go with a commercial product, just make sure it's specifically formulated for windows and vinyl. To keep your vinyl frames looking brand new, specialized products like Gold Class™ Leather & Vinyl Cleaner work wonders at removing grime without causing damage. Always check the label to ensure it’s free from ammonia or petroleum-based solvents.
Jumping straight into spraying and wiping your windows is one of the biggest mistakes you can make. Think of it like painting a room—you wouldn't start rolling paint without taping the edges or putting down a drop cloth, right? Proper prep is what separates a decent cleaning job from a professional, streak-free finish, and it honestly saves you a ton of time and effort in the long run.
The whole point here is to set the stage for a flawless clean. We're talking about protecting your home, clearing your workspace, and getting rid of all that loose debris that turns into a muddy, streaky mess the second it gets wet. Skipping these initial steps is exactly why so many people get frustrated with their results and give up.
Before you even think about mixing your cleaning solution, spend a few minutes prepping the area, both inside and out. A little bit of prep work prevents a whole lot of cleanup later. Our teams in Las Vegas and Scottsdale always start with this step.
Inside, start by laying down old towels or a drop cloth at the base of each window. This simple move protects your floors, window sills, and carpets from any drips or spills. Next, you’ll want to completely clear the window area.
The same logic applies outside. Move any patio furniture, grills, potted plants, or garden decor away from the windows you're about to clean. This gives you a safe, clear space to move around, especially if you need to use a step stool.
This is the secret that separates the pros from the amateurs. Never, ever apply water or a cleaning solution to a window that’s covered in dust, cobwebs, and loose grime. If you do, you’ll instantly create a muddy paste that you'll just end up smearing across the glass, which is a guaranteed recipe for streaks.
Instead, start with a thorough dry-cleaning of the entire window area. Grab a soft-bristled brush or the brush attachment on your vacuum. Carefully go over the vinyl frames, the window tracks, and the screens to remove all that loose dirt. Pay extra attention to the corners where cobwebs and dead bugs love to hang out. Taking the time for this step ensures your cleaning solution is working on the stuck-on grime, not just surface-level dust. If you need a hand with screen removal, you can learn more about how to remove a window screen to make this part even easier.
A critical part of how to clean vinyl windows effectively is starting with a clean slate. A quick vacuum or brushing prevents you from turning dust into mud, which is the primary cause of streaks for most DIY window cleaners.
Finally, one of the best tips for a perfect finish has nothing to do with tools or technique—it’s all about timing. You want to avoid cleaning your windows in direct, intense sunlight at all costs. When the sun is beating down on the glass, your cleaning solution will evaporate almost instantly. This leaves behind soap residue and mineral deposits in the form of stubborn streaks before you even have a chance to squeegee it off.
For the best results, plan your window cleaning for an overcast day. If you live in a sunny climate like Las Vegas or Scottsdale, cleaning in the early morning or late afternoon when the sun isn't directly hitting the windows will give you a much better outcome. This gives you plenty of time to work, ensuring the glass stays wet until you're ready to wipe it clean for that crystal-clear, professional shine.
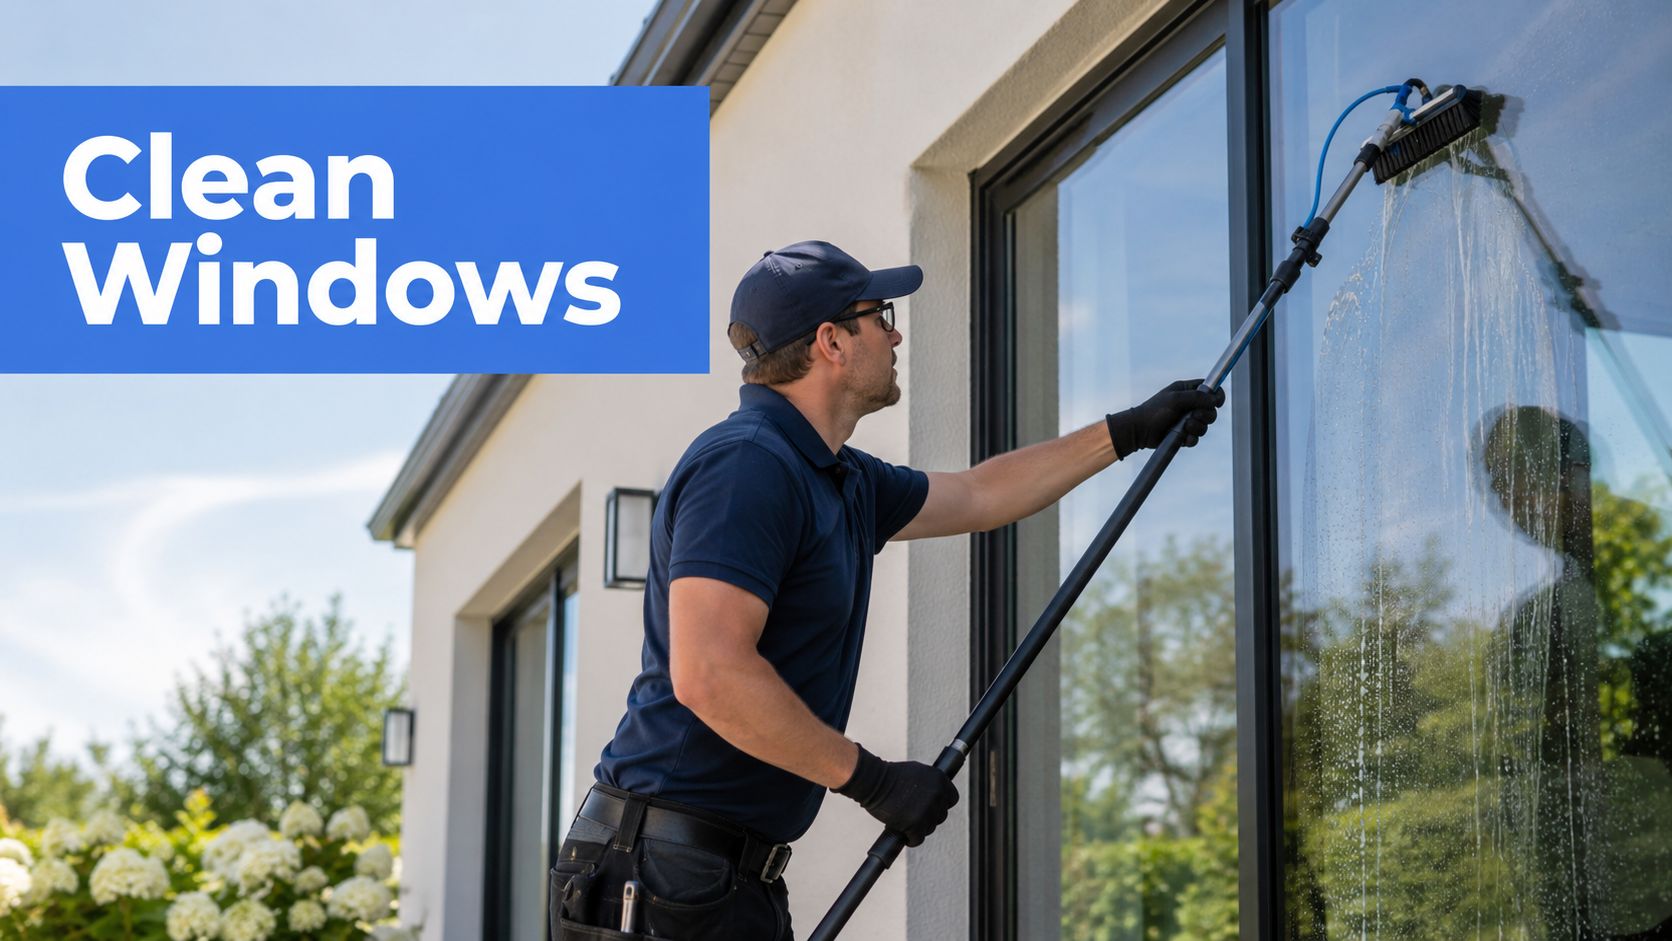
The secret to a flawless, streak-free shine isn’t some magic spray—it’s all in the technique. For over 26 years, our team at Professional Window Cleaning has relied on one of two methods for perfect results: a pure-water system or the classic squeegee. Learning to handle a squeegee is a skill any homeowner can pick up, and it’s what separates a quick wipe-down from a truly crystal-clear finish.
This isn’t just about wiping away dirt; it's about lifting it off the glass completely without leaving a single trace. Once you get the hang of it, you’ll wonder why you ever bothered with paper towels.
Before your squeegee even touches the glass, the way you apply your cleaning solution is critical. The goal is to get the entire pane of glass evenly wet without making a drippy mess on your frames or floors. You want just enough solution to lubricate the squeegee blade and break down the grime.
Grab a strip washer (often called a T-bar and mop) or a good microfiber cloth. Dip it in your cleaning bucket, wring out the excess so it’s not dripping, and scrub the whole window from top to bottom. Pay special attention to the corners and edges along the vinyl frame. A consistent layer of moisture is your best friend here—it stops the squeegee from skipping or chattering, which is what causes most streaks.
Here’s a simple look at the prep work that makes the whole job cleaner and more efficient.
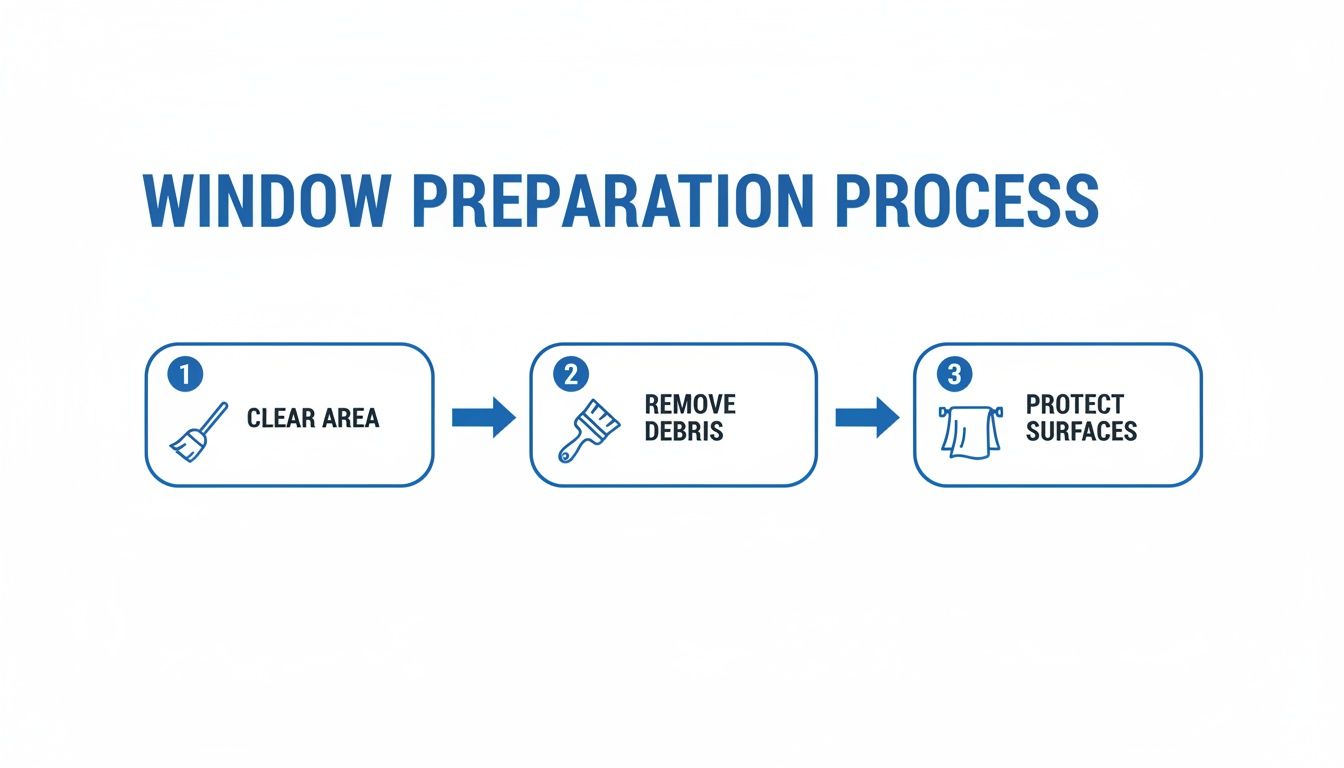
This simple flow—clearing the area, brushing off loose dirt, and protecting your sills—sets you up for a professional-level squeegee job without the mess.
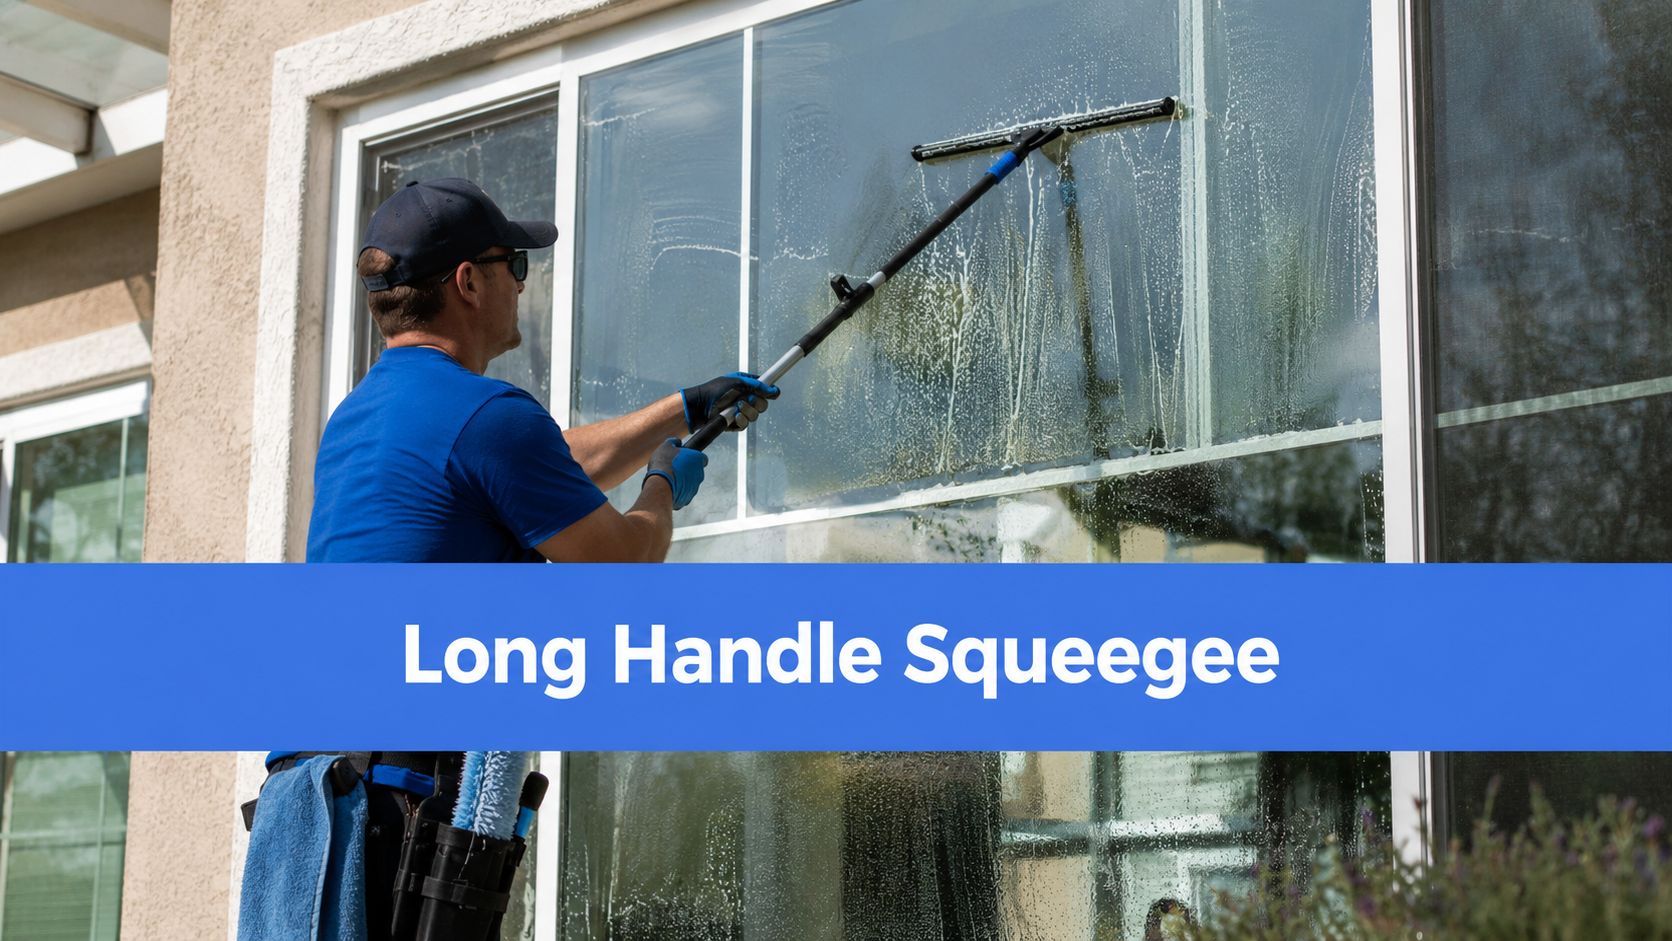
The real art of using a squeegee is finding that sweet spot between pressure and angle. You want to hold the blade at a consistent 30 to 45-degree angle against the glass. Go too shallow, and the blade will just skim over the water. Too steep, and it’ll chatter across the surface, leaving thin, wavy lines.
As for pressure, think firm but not forceful. You’re not trying to scrub the window with the blade; you’re guiding it so the rubber edge can shear the water cleanly off the glass. Let the tool do the work. Light, consistent pressure is far more effective than brute force.
A pro tip is to press just the top corner of the squeegee blade against the glass to create a small, dry "anchor" spot. This gives you a clean starting point and stops drips from the top of the frame. This kind of meticulous approach is what separates amateurs from experts, a principle that applies to other outdoor cleaning tasks, just as experts detail in guides on how to clean a pool deck like a pro.
For bigger windows, the "S-stroke" (also called the snake or fanning method) is the most efficient way to clean the glass without lifting your squeegee.
For smaller panes or divided-light windows, simple straight pulls are much more practical. Just pull the squeegee straight down from top to bottom, overlapping each stroke slightly. This technique is easier to master and works perfectly for those tighter spaces. You can see these professional movements in action by exploring our guide on how to use a squeegee.
The Golden Rule: Always wipe your squeegee blade with a clean microfiber cloth after every single pass. This is non-negotiable. Skipping this step drags dirty water right back onto your clean glass, creating an instant streak.
This simple habit is what allows professionals in cities like Scottsdale and Denver to get that signature crystal-clear finish. Once you're done, use a separate, dry microfiber cloth to detail the edges and wipe away any leftover water from the corners and the vinyl frame.
Even with a perfect routine, some messes just refuse to cooperate. You know the ones—stubborn hard water spots, dried-on paint splatters, and that gross gunk that builds up in the window tracks. These call for more than just soap and water.
This is where a more targeted approach comes in, but you have to be careful. It’s all about finesse, not brute force. Grabbing the wrong product can turn a small blemish into a costly repair. For instance, harsh solvents like acetone can actually soften or discolor vinyl frames, while an abrasive scouring pad will leave permanent scratches on both the frame and the glass. The trick is to match the right solution to the specific stain.
Hard water spots are those chalky white stains left behind when mineral-rich water evaporates. It’s a common headache for homeowners in places like Phoenix where the water is notoriously hard. These deposits, mostly calcium and magnesium, will literally etch into the glass over time if you let them sit.
For lighter stains, a simple 50/50 mix of white vinegar and distilled water often does the trick. The mild acid in the vinegar is great for dissolving the minerals. Just spray it on, let it dwell for a few minutes (but don't let it dry!), then give it a gentle scrub with a non-scratch pad before squeegeeing it off.
When you're facing more stubborn, layered deposits, you'll need something with a bit more bite. This is a job for #0000 super-fine steel wool.
And I can't stress this enough: never use any other grade of steel wool. Anything coarser will absolutely leave deep scratches on your windows.
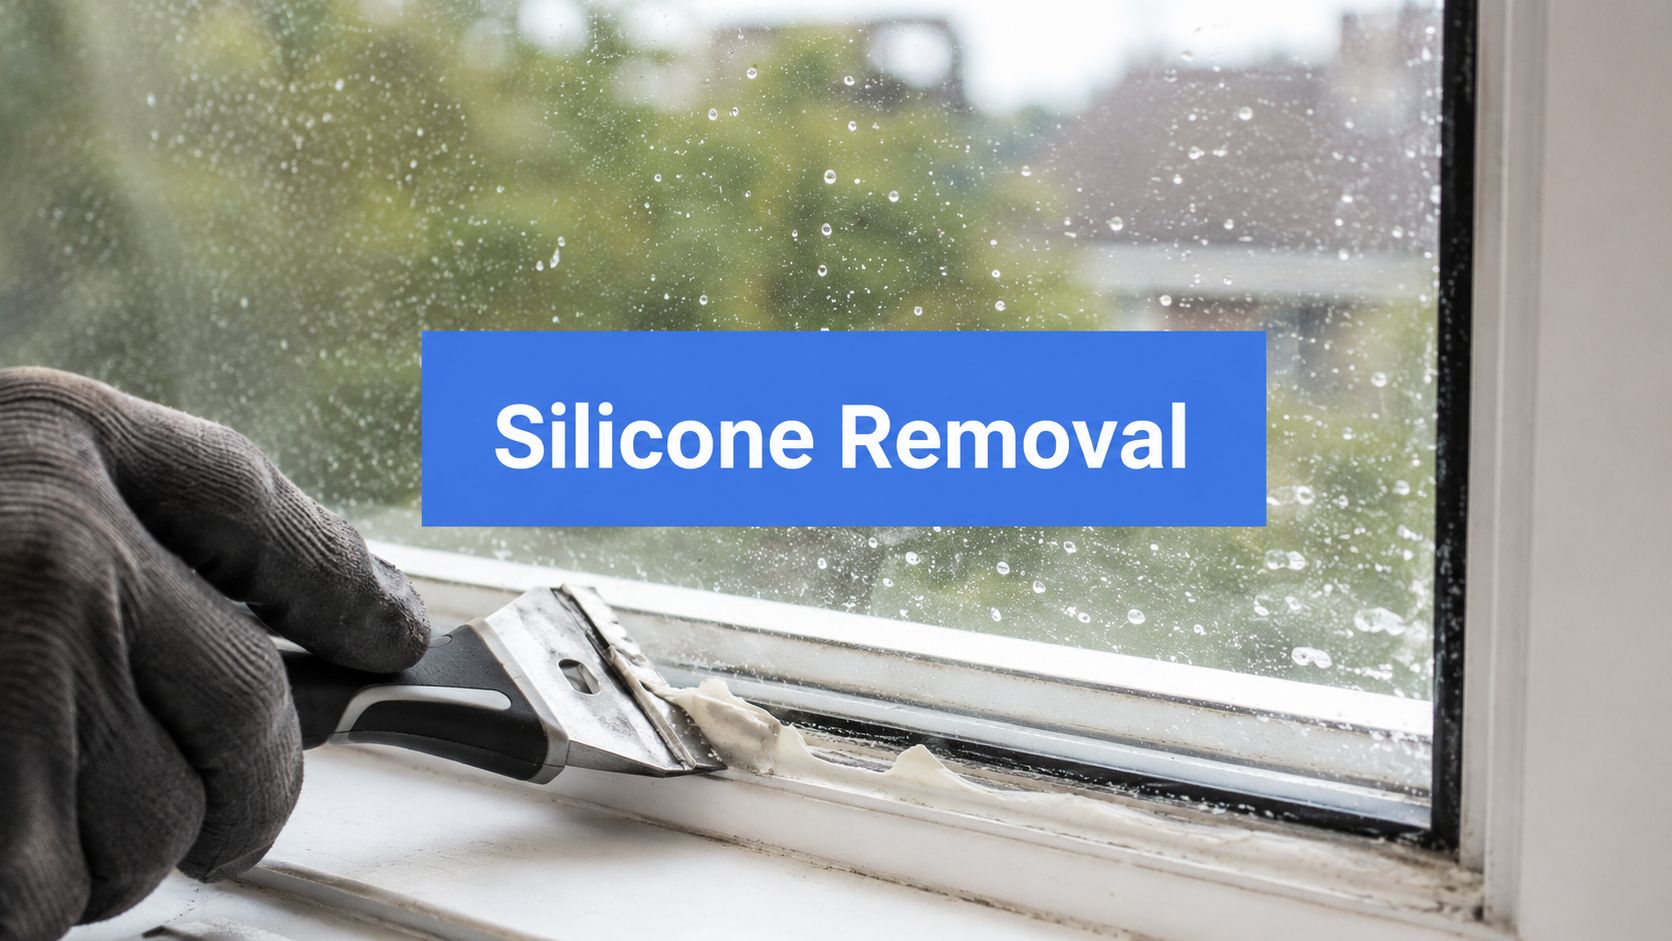
Whether it’s overspray from a recent paint job or the ghostly remains of an old decal, stuck-on gunk can ruin the view. The pro’s tool of choice is a new, sharp 1-inch flat razor blade, but using it correctly is non-negotiable if you want to avoid scratches.
Safety First: A razor blade should only ever touch wet, lubricated glass. Using a razor on a dry window is a guaranteed way to cause deep, irreversible scratches. Keep the glass soapy and wet the entire time.
Hold the blade at a shallow 30-degree angle to the glass. Push forward in a single, smooth motion to "shave" the paint or residue off the surface. Don't drag the blade backward or move it side-to-side, as this can catch an edge and gouge the glass. It’s an incredibly effective technique, but it demands a steady hand and a little patience.
Window tracks are magnets for dust, dead bugs, and all sorts of grime. When they get clogged, they not only look terrible but can also make your windows a pain to open and close. Your first move should be to grab a vacuum with a crevice tool to suck up all the loose debris.
Once vacuumed, spray the tracks with your all-purpose cleaner and let it sit for a minute to loosen things up. An old toothbrush or a stiff-bristled brush works perfectly for scrubbing the dirt out of the corners. Wipe everything clean with a microfiber cloth. For really stubborn gunk, try wrapping the cloth around the tip of a screwdriver to get deep into those tight channels.
And don't forget the screens! A dirty screen will just coat your freshly cleaned glass in dust the next time it rains. Pop them out, wash them down with soapy water and a soft brush, rinse them well, and let them air dry completely before putting them back. It’s that final step that truly makes your windows look professionally done.
Knowing how to clean vinyl windows is only half the battle. Even with the best gear and a solid plan, a few common slip-ups can leave you with a frustrating, streaky mess that looks even worse than when you started. Avoiding these simple mistakes is the secret to getting that perfectly clear, professional finish you’re after.
After more than 26 years of doing this professionally, we’ve seen every mistake in the book. It’s tough to watch well-intentioned homeowners work so hard only to be disappointed by the results. The good news? These errors are incredibly easy to fix once you know what you’re looking for.
Let's break down the most frequent missteps we see people make. A tiny adjustment to your process can make a world of difference, turning a frustrating chore into a deeply satisfying project.
Another huge mistake is forgetting to wipe your squeegee blade with a clean cloth after every single pass. If you skip this, you're just dragging dirty water right back onto the clean glass, guaranteeing a streak.
Sometimes, the DIY route just isn't the safest or most effective option. Recognizing when a job is bigger than you can handle saves you time, prevents damage to your home, and most importantly, keeps you safe. Certain situations are best left to the pros who have the right equipment and training.
For instance, trying to clean second-story or hard-to-reach windows from a wobbly ladder is a massive safety risk. It’s just not worth it. Professionals use specialized tools like water-fed poles and proper safety harnesses to get the job done right.
When you're up against severe hard water staining that has been building up for years or you need to clean windows on upper floors, calling a professional is the smartest move. It’s not just about getting better results; it’s about making sure the job is done safely and correctly, without risking injury or damage to your home.
This need for professional expertise is what keeps the service industry strong. In fact, the window cleaning industry has a stable, low-risk business model, with commercial services making up about 55% of the market because of the constant need for maintenance. You can learn more about the stability of the window cleaning industry from this analysis.
At Professional Window Cleaning, we have the specialized pure-water systems and squeegee skills to handle any job, no matter how tough it looks. For decades, we’ve been delivering guaranteed, streak-free results for homeowners and businesses in communities from Las Vegas to Phoenix.
Even with a step-by-step guide, you're bound to have a few questions when you get down to the actual work of cleaning your vinyl windows. We get it. After 26 years in this business, we've heard just about everything, and we want to pass that knowledge on to you.
Think of this as the final check-in with an expert before you start—the kind of straightforward advice you'd get if we were standing right there with you. Let’s tackle some of the most common questions homeowners ask.
For most homes, a good, thorough cleaning twice a year is the sweet spot. We usually recommend tackling it in the spring to wash away winter grime and again in the fall to clear off summer dust and pollen. This rhythm keeps buildup from getting out of hand and etching your glass, which makes future cleanings a whole lot easier.
But—and this is a big but—where you live matters. If your home is in a dusty or windy area, like many parts of Phoenix, or you're right next to a high-traffic road, you might find that cleaning them every three months is what it takes to keep them looking great. The real trick is to clean them before the dirt becomes a major project.
Please don't. We can't stress this enough: never use a pressure washer on your vinyl windows. That high-pressure blast of water is powerful enough to cause some serious, and expensive, damage. It can easily force water behind your siding, cause leaks inside your walls, and even break the airtight seals on double-paned windows.
Once a window's seal is broken, you'll start seeing condensation and fog build up between the panes. Unfortunately, that's not something a cleaning can fix—it usually means the entire window needs to be replaced.
A much safer bet is a regular garden hose with a spray nozzle. It has just enough power to rinse away loose dirt from the exterior glass and frames without risking any damage.
You know that frustrating feeling when you clean your windows perfectly, and two days later they look dirty again? Your screens are almost always the culprit. The slightest bit of rain will wash all that trapped dust and pollen right back onto your spotless glass.
Cleaning them the right way is simple but crucial. Here’s how the pros do it:
Yes, definitely. Using the wrong chemicals is one of the fastest ways to ruin your vinyl window frames, causing them to yellow, become brittle, or even warp. Remember, the frames are just as important as the glass.
Steer clear of any products containing these ingredients:
There’s no need to get complicated. The simple, safe cleaners we mentioned earlier—a mix of pH-neutral soap and water or a vinegar-water solution—are all you need to get the job done right without causing any harm.
When the job feels too big or you're just not getting the streak-free results you want, don't hesitate to call in the experts. Professional Window Cleaning has been making homes and businesses shine for over 26 years. Learn more about our services at https://www.professionalwindowcleaning.com.
Read our blog posts regularly and keep learning.