
Care and Maintenance
Professional Window Cleaning Solutions: Guide & Tips
Get professional window cleaning solutions: methods, eco-friendly tips, pricing, and how to choose a provider in Phoenix, Denver, LV.


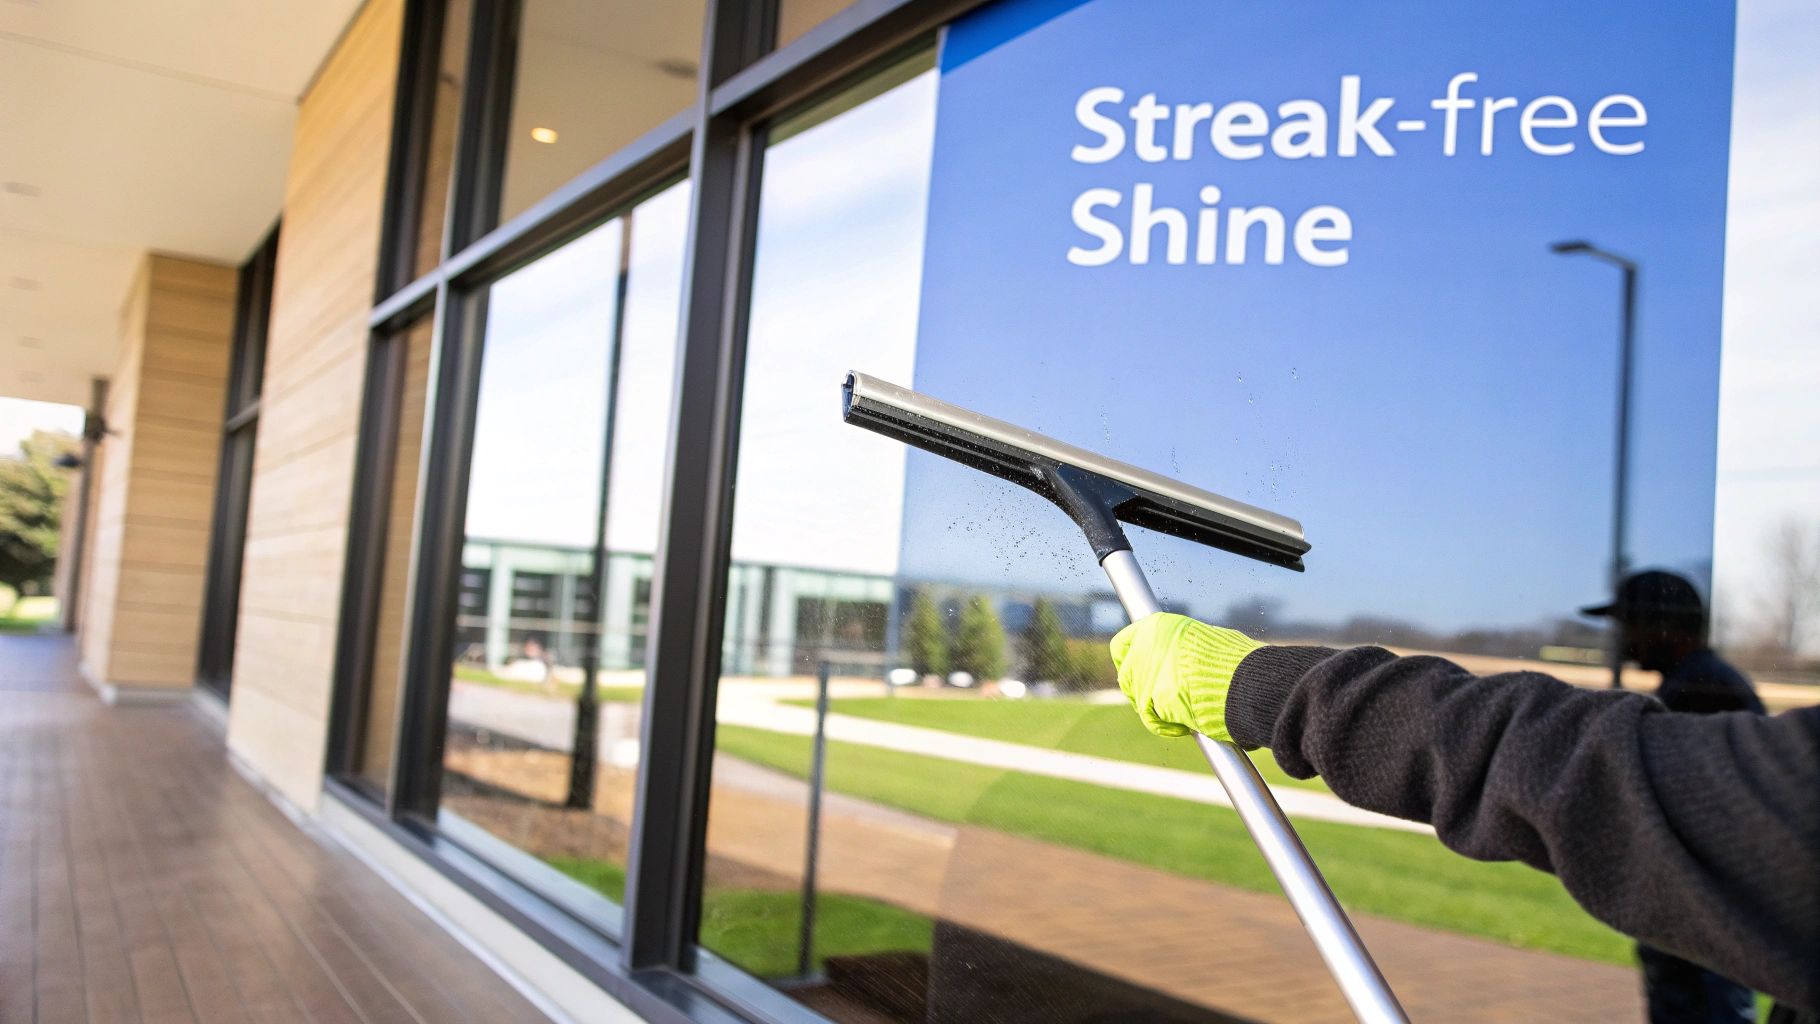
When you see a professional window cleaner at work, the squeegee seems to glide effortlessly, leaving a perfectly clear, streak-free path. The secret isn't in the tool itself, but in the technique. It boils down to applying your cleaning solution with a washer, then pulling the squeegee across the glass at a consistent 30-degree angle. Each stroke should overlap the last one by about an inch.
This method is one of only two ways—the other being a pure-water system—that professionals like us at Professional Window Cleaning rely on for a flawless finish. And honestly, it’s an art form.
Forget the frustrating dance with paper towels and spray bottles that just push dirt around and leave lint behind. The real key to flawlessly clean windows, used by pros for decades, is the humble squeegee. It's one of only two methods professionals use, the other being a pure-water system. Once you master it, you'll transform your windows, leaving behind a pristine shine that other methods just can't touch.
With over 26 years of hands-on experience, Professional Window Cleaning can tell you that getting those perfect, invisible-glass results is all about proven techniques. This guide is dedicated to the art of the squeegee. We'll break down everything you need to know, from the essential tools in a pro's bucket to the ideal soap-to-water ratio.
Using a squeegee is a game of precision. It’s a skill that marries the right angle with consistent pressure and a fluid, confident motion.
Learning the correct technique does more than just make your windows look incredible; it makes the whole process faster and more efficient. It’s a skill that’s been at the core of our business since we started transforming homes and businesses back in 1999.
In the global window cleaning market, a massive $102.54 billion industry in 2023, proper squeegee use is a huge deal. It accounts for up to 70% of a job's speed and streak-free success. You can discover more insights in these cleaning industry statistics and see just how much technique impacts the pros.
By the end of this guide, you’ll have the same foundational knowledge our teams use to make windows sparkle in homes across Scottsdale, Phoenix, Las Vegas, and Denver. You'll feel confident tackling any glass surface and achieving a truly professional finish.
Before you can get that perfect, streak-free finish, you need to have the right tools in hand. I’ve seen it a hundred times: the difference between a frustrating, messy job and a crystal-clear window almost always comes down to the quality of your gear. Investing in professional-grade equipment isn't just a suggestion—it's the first real step to mastering the art of the squeegee.
The heart and soul of your kit is, of course, the squeegee itself. It’s a simple tool with three key parts: the handle, the channel, and the rubber blade. Don't underestimate that little strip of rubber—it's the most critical piece of the puzzle. A quality, soft rubber blade will glide like butter across the glass, while a cheap, hard one will skip, chatter, and leave streaks behind.
Quick tip: if your blade has any nicks, feels stiff, or has a rounded edge from wear, it's time for a replacement. No amount of skill can make up for a bad blade.
Size matters, and the right one depends entirely on the job in front of you. For those tricky French panes or small, divided-light windows, a small 6-inch squeegee is your best friend. It gives you the control you need for detailed work. Our teams in Phoenix find these invaluable for historic homes.
But for those huge, beautiful picture windows? You’ll want an 18-inch squeegee to cover that surface area quickly and efficiently.
To get your cleaning solution on the glass, you’ll need a T-bar washer (you’ll also hear it called a wand or an applicator). This tool, fitted with a microfiber or cloth sleeve, soaks up a ton of soapy water. That’s crucial because it lets you scrub the entire window and lubricate the glass properly before the squeegee even touches it.
A squeegee and washer are just the start. A few other items are non-negotiable if you want to work like a pro.
From cleaning residential homes in Denver to large commercial properties in Las Vegas, the first lesson we learned was the value of investing in quality gear. Good tools don't just give you better results—they last longer and save you money and headaches in the long run.
Putting together a complete kit from the start makes the whole process smoother and the results far more impressive. For a deeper dive into all the gear you might need, check out our guide on essential window cleaning supplies.
Building your toolkit can feel overwhelming, but it doesn't have to be. The key is understanding the difference between what works for a quick weekend job and what professionals rely on for flawless results day in and day out.
Ultimately, while DIY tools can get the job done for small tasks, stepping up to professional-grade equipment is what truly separates an amateur from an expert. The investment pays for itself in efficiency, safety, and a consistently perfect finish.
Alright, you've got your gear. Now comes the part that separates a DIY job from a professional, streak-free shine. This is where the real skill comes in, and with our 26 years of on-the-job experience, we'll walk you through the two core squeegee methods the pros rely on every single day.
The principles are the same whether you're tackling a massive storefront in Phoenix or a bay window at home in Scottsdale. It’s all about fluid motion and consistent pressure.
Before you even touch the squeegee to the glass, you need to "cut in" the edges. Just run your applicator along the perimeter of the glass. Then, grab a microfiber towel and wipe a one-inch dry strip down one side or across the top. This little step is a game-changer—it gives your squeegee a dry place to start and stops it from dragging dirty water from the frame back onto your clean pane.
The straight pull is the bread and butter of window cleaning. It’s perfect for most residential windows and is the foundational technique everyone should master. The concept is simple: pull the squeegee straight down in a single, smooth stroke.
The trick is to maintain a consistent 30-degree angle between the blade and the glass. This angle is the sweet spot that lets the rubber edge shear water off the surface without skipping or chattering. Each downward pull needs to overlap the previous one by about an inch. Don't skip this—that overlap is crucial for getting rid of those annoying vertical lines that can ruin an otherwise perfect job.
Here's a habit you need to build right now: wipe your squeegee blade with a lint-free cloth after every single stroke. This is non-negotiable. It clears away dirt and extra water, ensuring each pull starts clean and stops drips from ruining the glass you just cleaned.
Once you're comfortable with the straight pull, you can level up to the "S-Method," or fanning. This is that fluid, rhythmic motion you see pros use to fly through huge panes of glass. By keeping the leading edge of the squeegee constantly moving on wet glass, you work faster and drastically reduce the chance of leaving lines.
This pro technique is a big reason the window cleaning industry keeps growing. Ever wonder why the pros swear by fanning for large panes in places like Las Vegas? It's a method that helped fuel the industry's growth from a $2.9 billion valuation in 2024, with projections to hit $3.2 billion by 2029.
This approach is perfect for commercial high-rises or sprawling residential estates. You start with a few horizontal strokes at the top, then fan downward in overlapping arcs. It covers 15-20% more surface per pull than straight lines and, according to industry stats, slashes water usage by 35%, which aligns perfectly with the green cleaning trend. To see the numbers behind the boom, check out the data on the residential window cleaning service market.
This simple visual breaks down the core professional process into its three essential steps.
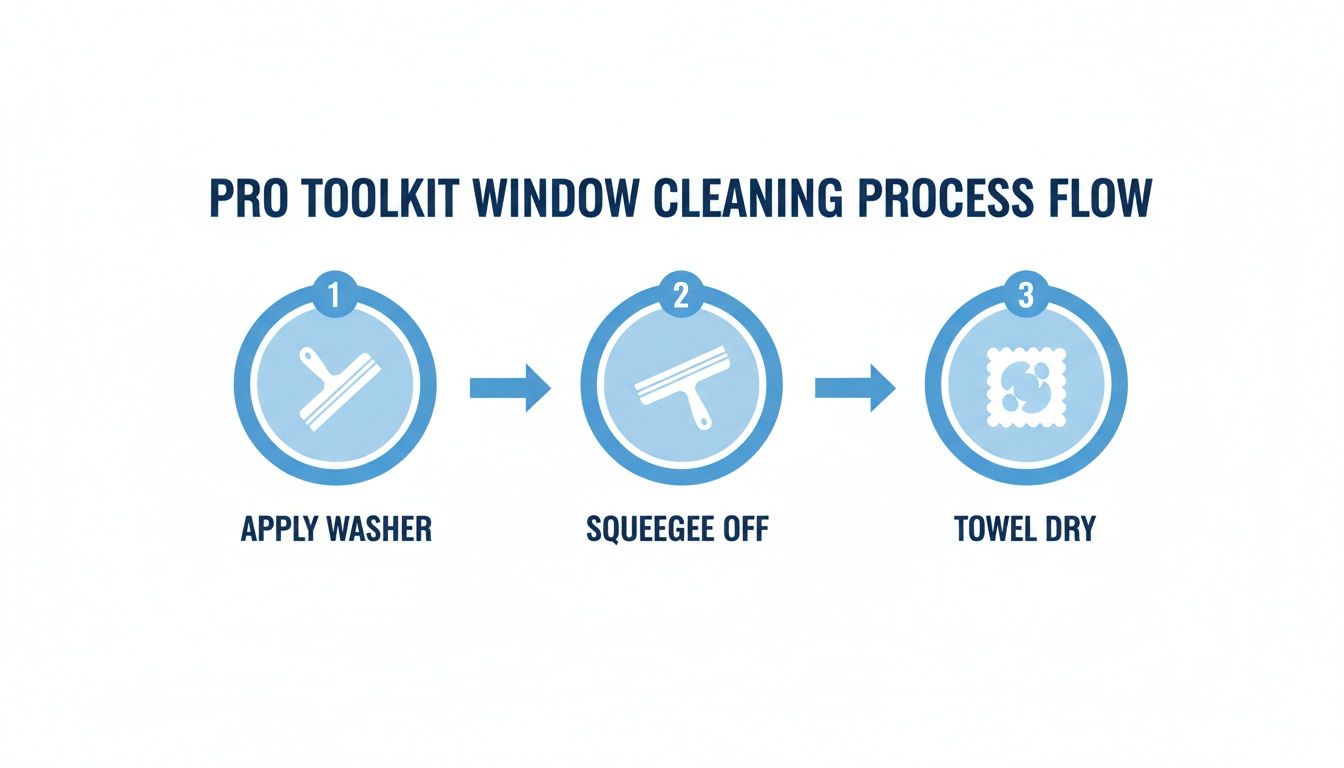
It really reinforces that a perfect finish depends on the right sequence: apply your solution, squeegee it off, and finish by detailing the edges.
What you really need is a solution that gives you great lubrication—what we call 'slip' in the business—without leaving anything behind.
After 26 years of cleaning every kind of window imaginable, we've learned that simpler is almost always better. The most effective professional methods, whether it's with a squeegee or a high-tech pure-water system, all rely on surprisingly basic solutions.
Our go-to, field-tested recipe is about as simple as it gets: a bucket of cool, clean water and just a few drops of basic dish soap. That's it. This simple mix creates the perfect amount of slip, letting your squeegee blade glide smoothly across the glass without dragging, chattering, or skipping.
You're not trying to create a mountain of suds here. In fact, too much soap is the number one cause of streaks. A good rule of thumb is about a half-teaspoon of soap for every two gallons of water.
Pro Tip: We always tell our crews in cities like Scottsdale and Phoenix to skip the soaps with fancy additives like lotions or oxygenating bleach. A classic, no-frills formula like original Dawn dish soap is perfect because its entire job is to cut through grease and grime without leaving a film.
If you want a more detailed breakdown, we've put together a complete guide on how to mix the ideal window cleaning solution recipe.
Once your solution is ready, it's time to get it on the glass. Dip your T-bar washer into the bucket and give it a gentle squeeze to get rid of the excess water before you lift it out. The goal is to have the applicator fully saturated but not dripping all over the place.
Apply it generously to the window, scrubbing from top to bottom. You want to make sure the entire surface is wet and lubricated, setting the stage for a smooth squeegee pull.
A huge challenge, especially for our clients in sunny places like Las Vegas and Denver, is cleaning windows in direct sunlight. The heat can make your solution evaporate in seconds, leaving behind soap scum and creating stubborn streaks before you even have a chance to pull the squeegee. If you can, always try to work in the shade or on an overcast day.
Getting this prep work right is just as critical as your squeegee technique. A properly mixed solution and a thoroughly wet window are the foundation for a perfect, streak-free finish every single time.
Here’s a little secret from the pros: the difference between a pretty good job and a truly flawless one is all in the finishing touches. A perfectly clean pane of glass can be instantly ruined by a single drip or a grubby frame. Mastering these details is what separates the novices from the experts.
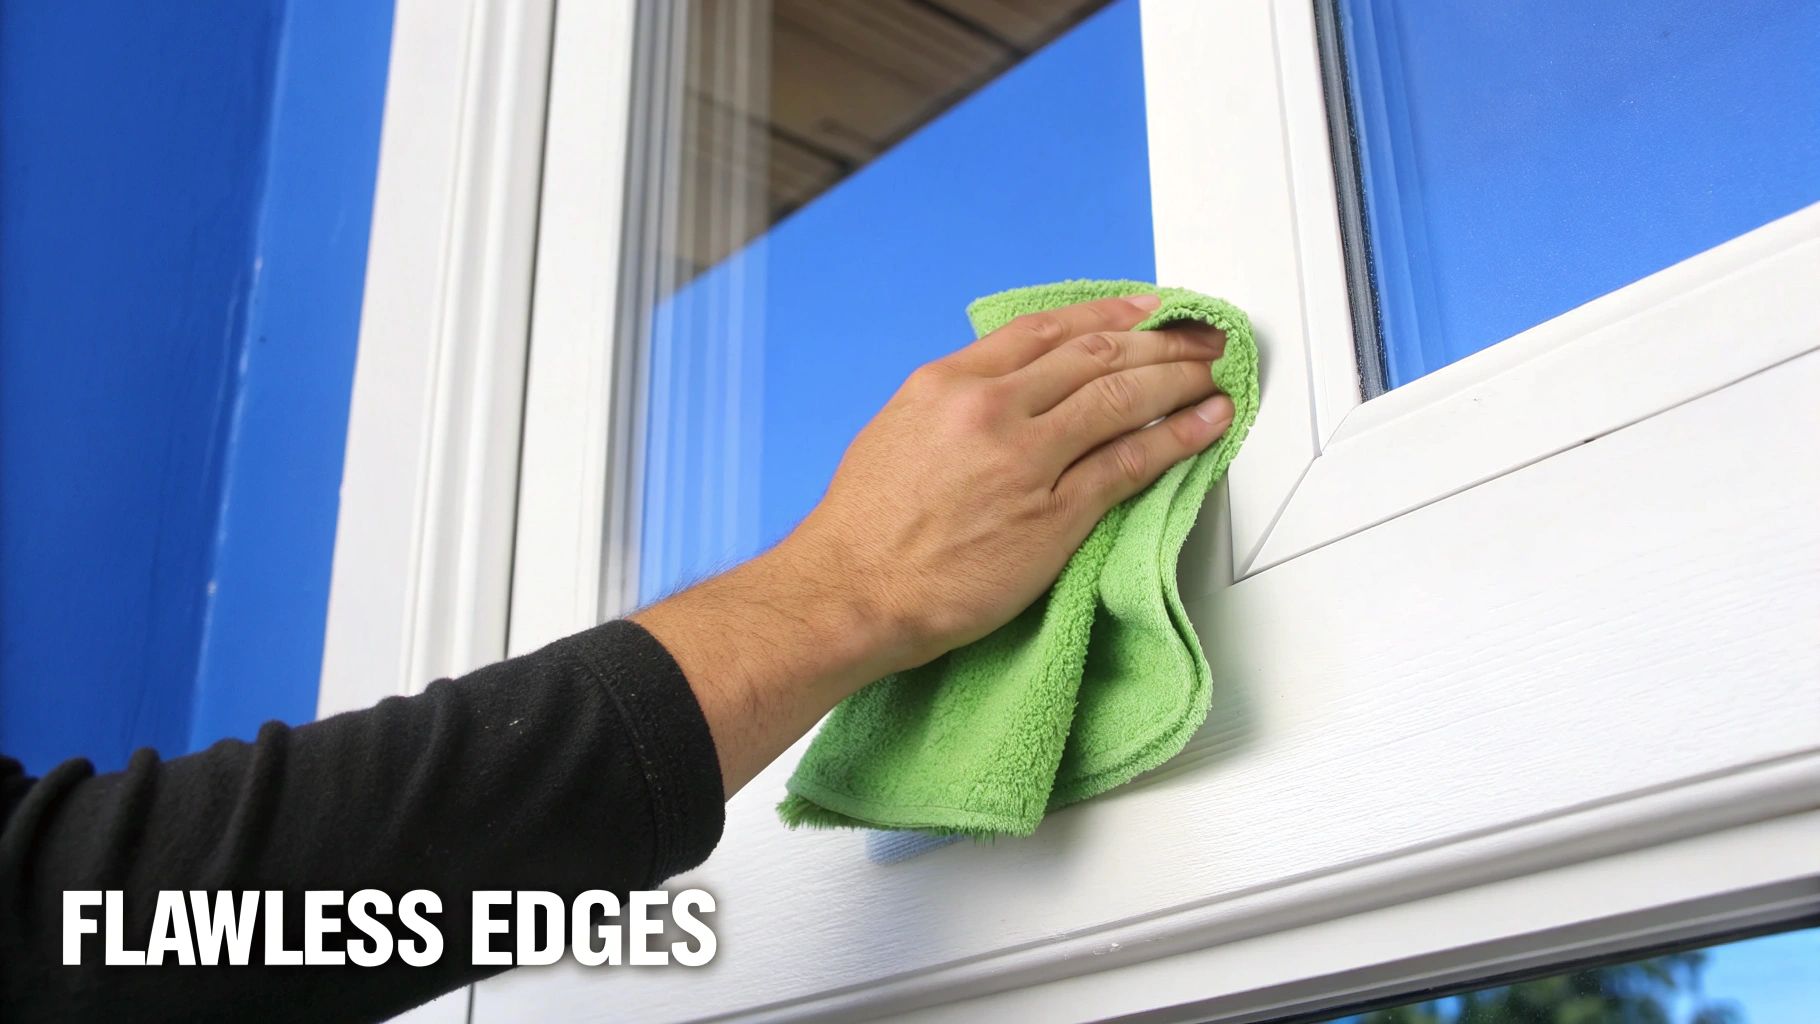
Once you’ve made that final pull with the squeegee, your work isn’t quite over. You'll almost always have a tiny bead of moisture left along the edges and tucked into the corners. Leaving it behind is a classic rookie mistake—it will inevitably run down and create new streaks on your otherwise perfect work.
This is the moment your lint-free microfiber cloth becomes your best friend. Grab a dry, clean corner of the cloth and carefully trace the entire perimeter of the window pane. It’s a small, deliberate action, but it wicks away every last bit of moisture and ensures a crisp, sharp edge.
This step is standard procedure for our crews on every single job, whether it’s the multi-pane windows common in Denver homes or the big sliding glass doors you see all over Scottsdale. It’s a simple habit that makes a world of difference.
Here's another technique we've refined over our 26 years in the business: the 'reverse squeegee' for edges. In a global commercial cleaning market that hit $93.2 billion in 2024, efficiency is king. This method involves flipping your squeegee to detail the borders after the main pulls. It can eliminate up to 95% of residual soap and has been shown to slash cleanup time by 25%. It's a game-changer. For more on industry trends, check out this report on U.S. commercial window cleaning services.
A sparkling pane of glass sitting in a dirty frame just looks wrong. It’s an often-overlooked step, but cleaning the frame and sill is what completes the professional look.
Grab a separate, slightly damp microfiber cloth and wipe down the entire window frame. Get rid of any dust, cobwebs, or solution that might have splashed onto it. To finish, give the window sill and the track of any sliding windows a thorough wipe.
Remember, a clean window is more than just the glass. It's the entire unit—glass, frame, and sill. Taking that extra minute to detail these areas elevates the whole result and shows a true commitment to quality work.
Even with the best tools and techniques, questions always come up. After 26 years in this business, we've pretty much heard them all. Here are some of the most common questions we get from clients and DIYers trying to master the squeegee for the first time.
This is a great question, and the answer really depends on how you use it. For a professional window cleaner using their tools all day, every day in a city like Las Vegas, a blade might only last a week. But for a homeowner tackling the windows a few times a year, a quality blade can last for many, many cleanings.
The real test isn't the calendar; it's the performance. The moment you start seeing new streaks or fine lines appearing, it's time to inspect the rubber. Look for tiny nicks, chips, or a rounded edge that’s lost its sharpness. Even a microscopic flaw can ruin an otherwise perfect finish.
A pro tip? Always store your squeegee with the blade protected. Don't just toss it in a bucket where it can get damaged.
For windows that are caked in grime, a pre-wash is absolutely essential. Don't even think about putting a squeegee on them yet.
First, grab your T-bar applicator and a bucket of soapy water and give the glass a really thorough scrub. Your goal here is to loosen all that heavy, caked-on dirt and debris. For really neglected windows in places like Phoenix, you might even need to give them a gentle rinse with a hose first.
Only after the heavy lifting is done should you apply a fresh coat of cleaning solution and bring in the squeegee. Trying to pull a squeegee through thick mud and grit is a recipe for a streaky disaster and could even scratch the glass.
A squeegee is a finishing tool, not a scrubbing tool. Its job is to remove water and suspended dirt from an already cleaned surface, leaving a perfect shine.
Absolutely. The secret here is all about water control. It’s a technique our crews use every day in homes across Denver and Scottsdale.
Start by using a bit less water in your cleaning solution. When you load up your T-bar applicator, give it a good wringing out before it ever touches the glass. That one simple step drastically cuts down on drips from the get-go.
Next, place a thick, absorbent towel along the windowsill or floor to catch any runoff. And here's the most critical part for indoor work: wipe your blade with a clean cloth after every single pull. This prevents you from accidentally slinging soapy water onto the walls or floor.
For a guaranteed streak-free shine without the learning curve, trust the experts. Professional Window Cleaning has been delivering exceptional results for over 26 years. Get your free estimate today!
Read our blog posts regularly and keep learning.