
Care and Maintenance
Window Cleaning for Business: A Complete Property Guide
Window cleaning for business boosts curb appeal and tenant satisfaction. Learn practical tips to keep commercial properties spotless and safe all year.


You've just stepped onto the deck and spotted the problem: last season's stain is peeling in strips, even though you washed before applying it. It's tempting to blame the stain, but the trouble may have started earlier, when the wash removed visible dirt without preparing the wood evenly or giving it enough time to dry.
A deck wash before staining isn't a quick cosmetic rinse. The cleaner, the rinse, the runoff path, and the condition of the wood all affect whether the next coat can penetrate and hold. The most useful shortcut is to skip the shortcuts: clean gently, rinse completely, then judge readiness by the wood, not the clock.
A successful stain job starts with a surface that accepts the finish evenly. Dirt trapped in the grain, greasy patches, loose wood fibers, and remnants of an old coating can each leave a different result across the same deck. Washing needs to address those conditions without damaging the boards underneath.
Good preparation removes dust, dirt, grease, mildew, loose fibers, and previous coating residue before stain goes on. That may require more than washing where an existing finish is loose or failing. Check those areas before assuming a brighter board is ready to coat. Sherwin-Williams' deck preparation guidance treats cleaning, rinsing, and drying as distinct parts of preparing wood for stain.
Treat the work as surface preparation and moisture management. Dry-to-the-touch is an unreliable signal because the exposed face can dry while moisture remains inside the wood. Compare moisture-meter readings in sunny and shaded areas against the chosen stain's requirements, rather than letting the warmest board represent the whole deck. Shade can change the decision.
The wash also involves a trade-off: enough cleaning action to remove contamination, with enough restraint to avoid raised grain and wand marks. Rushing the rinse can leave cleaner behind and interfere with penetration or adhesion. In dry markets such as Phoenix, Las Vegas, and Denver, account for where cleaner-laden runoff will go before starting. Water use and runoff control belong in the preparation job, even when the weather looks ideal for drying.
The practical test: Check for visible suds during the final rinse, and revisit any area that continues to foam.
For a homeowner-oriented preparation reference, see I PAINT STUFF deck prep tips. Careful washing takes effort, but repairing an uneven or poorly bonded finish means repeating work you thought was finished.
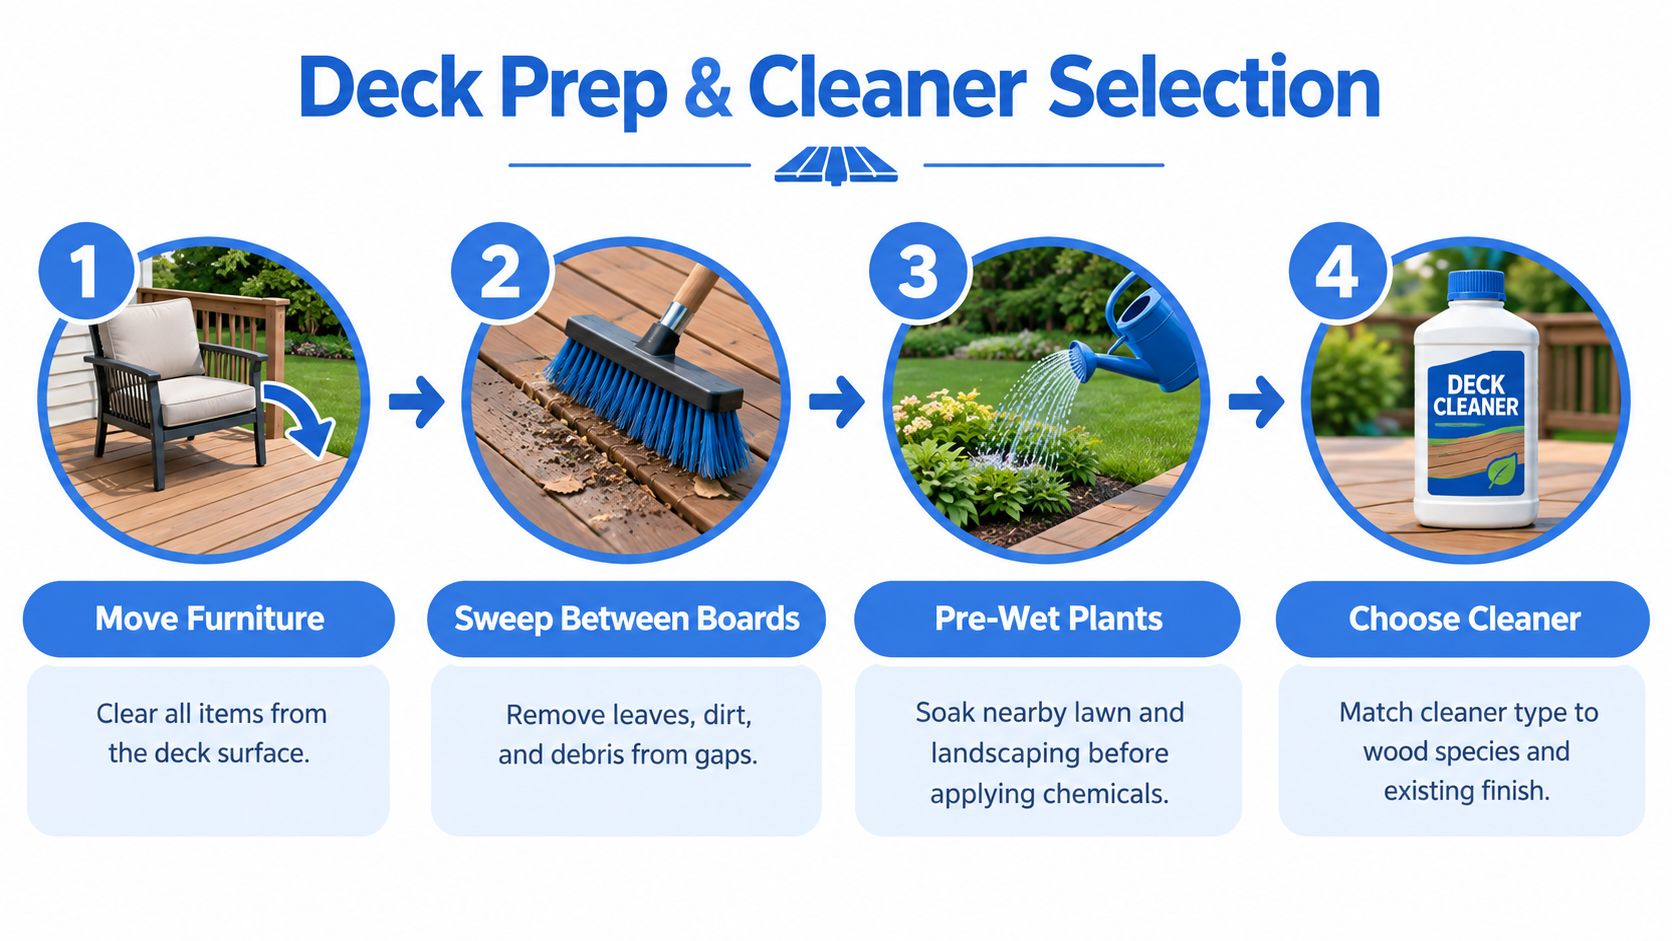
Start by removing furniture, planters, mats, and anything else that will block the boards. Sweep leaves and loose dirt off the surface, then clear the gaps between boards. Dry cleanup matters because it removes debris before it can be carried into landscaping or toward a drain by wash water.
Pre-wet nearby plants and lawn before applying a cleaner, and keep them protected during the wash. The right cleaning agent depends on what's on the deck. General grime and weathering usually call for an oxygen-bleach or deck-cleaner formulation. Algae or black mildew spots need a labeled mildew treatment suited to the job, not a stronger dose of a general cleaner. Avoid indiscriminate chlorine use around grass and ornamental plants because it can damage vegetation and discolor wood.
Follow the product label for dilution and application. A practical dwell time is about 10–15 minutes, allowing the cleaner to loosen contamination before you scrub. Don't let it dry on the boards. On a warm afternoon, work in smaller areas or lightly re-wet the cleaner as needed so it remains active while you prepare the next area.
Scrub with a stiff deck brush, preferably with synthetic or nylon bristles, and work along the grain. Brushing helps loosen dirt and organic growth without asking a pressure washer to do the chemical cleaner's job. A complete rinse comes next. For background on how different decking and railing materials vary, Utah Deck Supply's material information can help you consider what the deck is made of before choosing an approach.
The order is straightforward:
For related care around outdoor recreation areas, this pool deck cleaning guide offers another example of why surface type and surrounding areas matter during exterior cleaning.
A clean stripe followed by a fuzzy patch means the washer is damaging the board. Stop there. More pressure will deepen the damage and leave a rough surface that needs attention before staining.
For most softwood decking, start at 1,200 psi, use a wide fan tip, and test an inconspicuous board. That starting pressure sits at the low end of the 1,200–1,400 psi guidance in Sherwin-Williams' deck-prep recommendations, which also specifies a 45-degree tip and 8–12 inches of working distance. Keep the nozzle moving with the grain. Increase pressure only if the test area shows no fiber lift or striping and dirt remains after proper cleaning.
Menards' deck stain buying guide also discusses pressure washing, but a higher setting should never become the default for older, soft, or pressure-treated boards.
| Setting | Practical default | Shortcut to avoid |
|---|---|---|
| Pressure | Start at the low setting above; inspect the test board | Raising pressure to compensate for inadequate cleaner dwell |
| Tip | Wide fan at the angle above | Narrow or turbo nozzle |
| Distance | Maintain the working distance above | Moving closer to blast a stubborn spot |
| Direction | Steady passes with the grain | Cross-grain spraying or pausing over one board |
A garden hose with an adjustable nozzle may be enough after brushing a small deck. It takes longer, but avoids the repair work caused by gouging. soft washing explains another gentler exterior-cleaning approach; treatment still needs to suit the wood.
In Phoenix, Las Vegas, and Denver, controlled washing also means accounting for runoff rather than spraying indefinitely. Dry-to-the-touch boards still need moisture checks in both sunny and shaded areas before staining.
For coordinating cleaning with wider outdoor work, Premier Gardens' guide to transforming an outdoor space in Dublin offers related maintenance context.
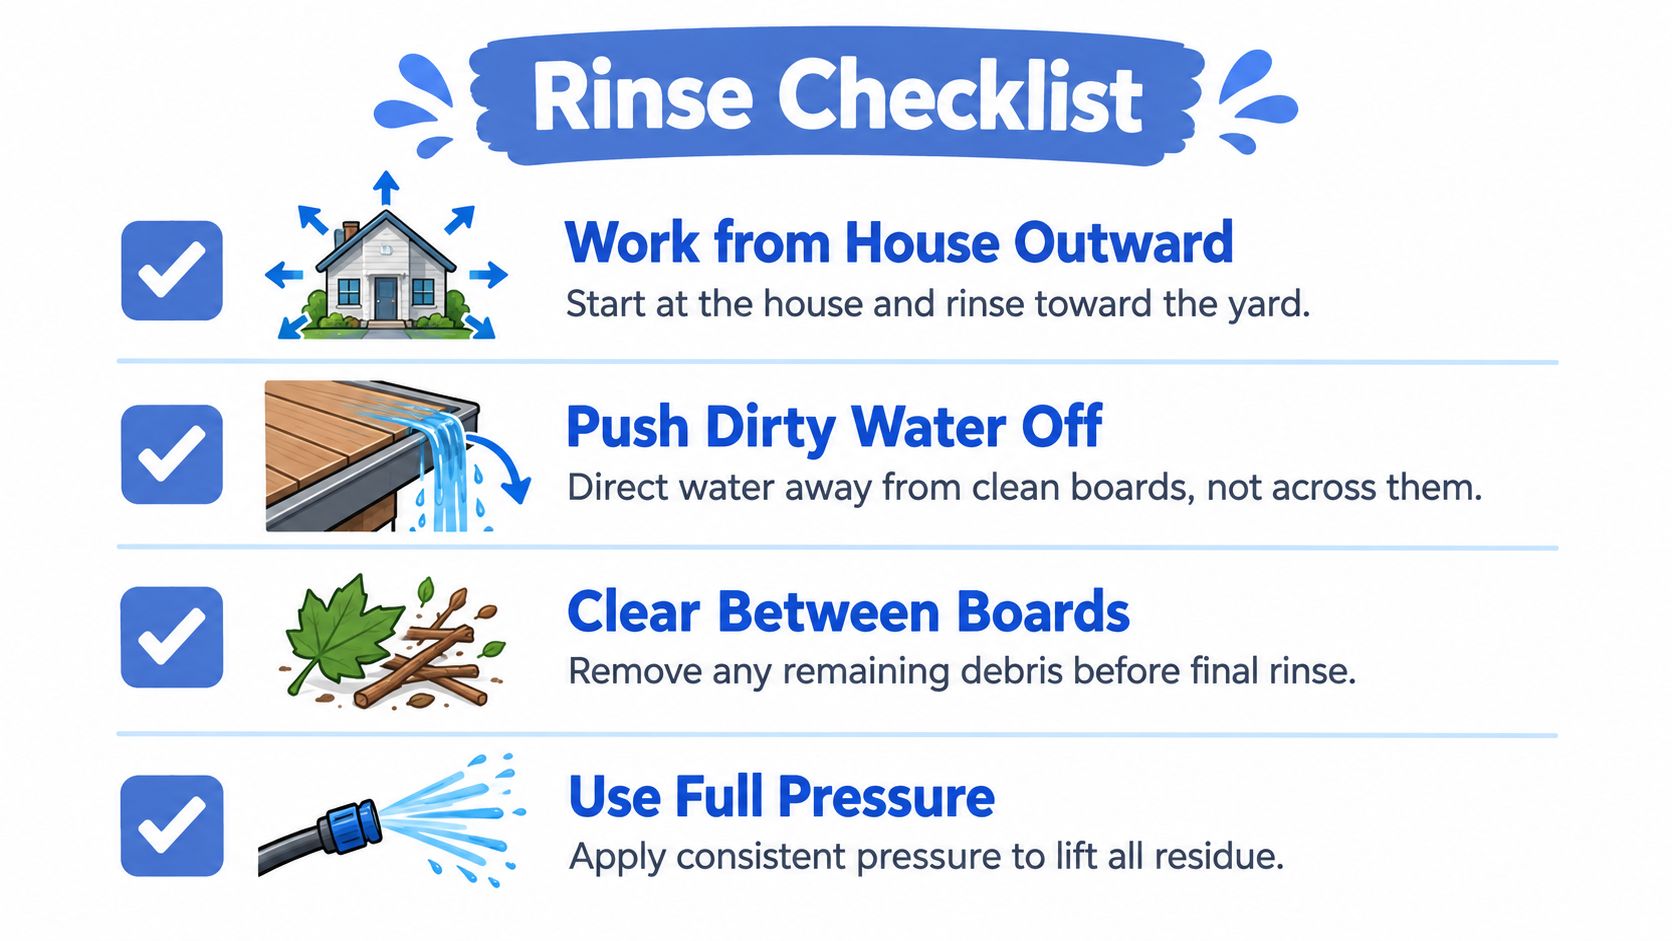
The rinse deserves its own attention. Begin at the house and work outward, pushing dirty water off the deck rather than carrying it across boards you've already cleaned. Rinse consistently, then inspect the surface from different angles. If you see foam, streaks, or patches that look coated, keep rinsing.
Afterward, clear any debris that has collected between boards and remove standing water. If vegetation beneath the deck blocks airflow, move it back where practical. These details help the structure dry more evenly, but a surface that appears dry still doesn't prove the boards have released enough moisture for stain.
Before washing, sweep up loose leaves, dirt, and coating flakes so they don't become part of the runoff. Check the slope and identify where water will go. Redirect downspouts where needed, protect landscaping, and use barriers or other practical controls to keep wash water from entering storm drains, ponds, or neighboring property. Minimize water use while still rinsing thoroughly, and check local stormwater requirements, which can vary by municipality.
Deck cleaners can carry dirt, mildew residue, and degraded coating material away from the boards. That means a rinse that looks successful on the wood may still send unwanted material into a drain or sensitive area. A large commercial deck can create more runoff than a small home project, so property managers should plan containment and disposal rather than treating drainage as an afterthought.
Don't judge readiness by touch alone. If water drops soak into the wood, the surface may accept a penetrating stain; if they bead, an existing sealer may still be present. Treat that as a useful field check, not a moisture measurement. For a more reliable decision, test several locations, including shaded edges, board joints, and areas near walls, which may stay damp after the exposed surface feels dry.
By the morning after washing, a sunlit deck can feel ready for stain while moisture remains deeper in the boards. 24–48 hours is a planning window in Sherwin-Williams' deck preparation guidance, with drying affected by weather and exposure. Shade, airflow, humidity, temperature, and wood condition all affect readiness. Reserve the staining day provisionally.
In Phoenix, Las Vegas, and Denver, strong sun can dry the visible surface quickly without drying the full board thickness. Water-conscious washing and responsible runoff handling still belong in the job, even when the forecast looks dry. Once rinsing is complete, give the wood time rather than trying to force the weekend schedule.
Use an electronic moisture meter at the locations covered in the rinse section, comparing the sunny and slower-drying readings. Follow the meter's instructions for wood settings and measurement depth. A shallow reading describes the wood within the meter's sensing range; it does not establish that the entire board is dry. Treat end-grain measurements as local readings rather than substitutes for measurements on the board face. Keep your measurement method consistent so comparisons mean something.
The University of Houston exterior-wood finishing specification sets a maximum moisture content of 15 percent for exterior wood substrates measured with an electronic moisture meter.
Use the stain manufacturer's limit if it is stricter, and let the dampest relevant reading govern the decision. Pressure-treated wood and poorly ventilated boards warrant patience. Penetrating stains enter the wood; film-forming products leave a surface coating, and their moisture requirements may differ.
The product label and the deck's measured condition should guide the decision.
A dry-feeling surface is a reason to measure, not permission to stain.

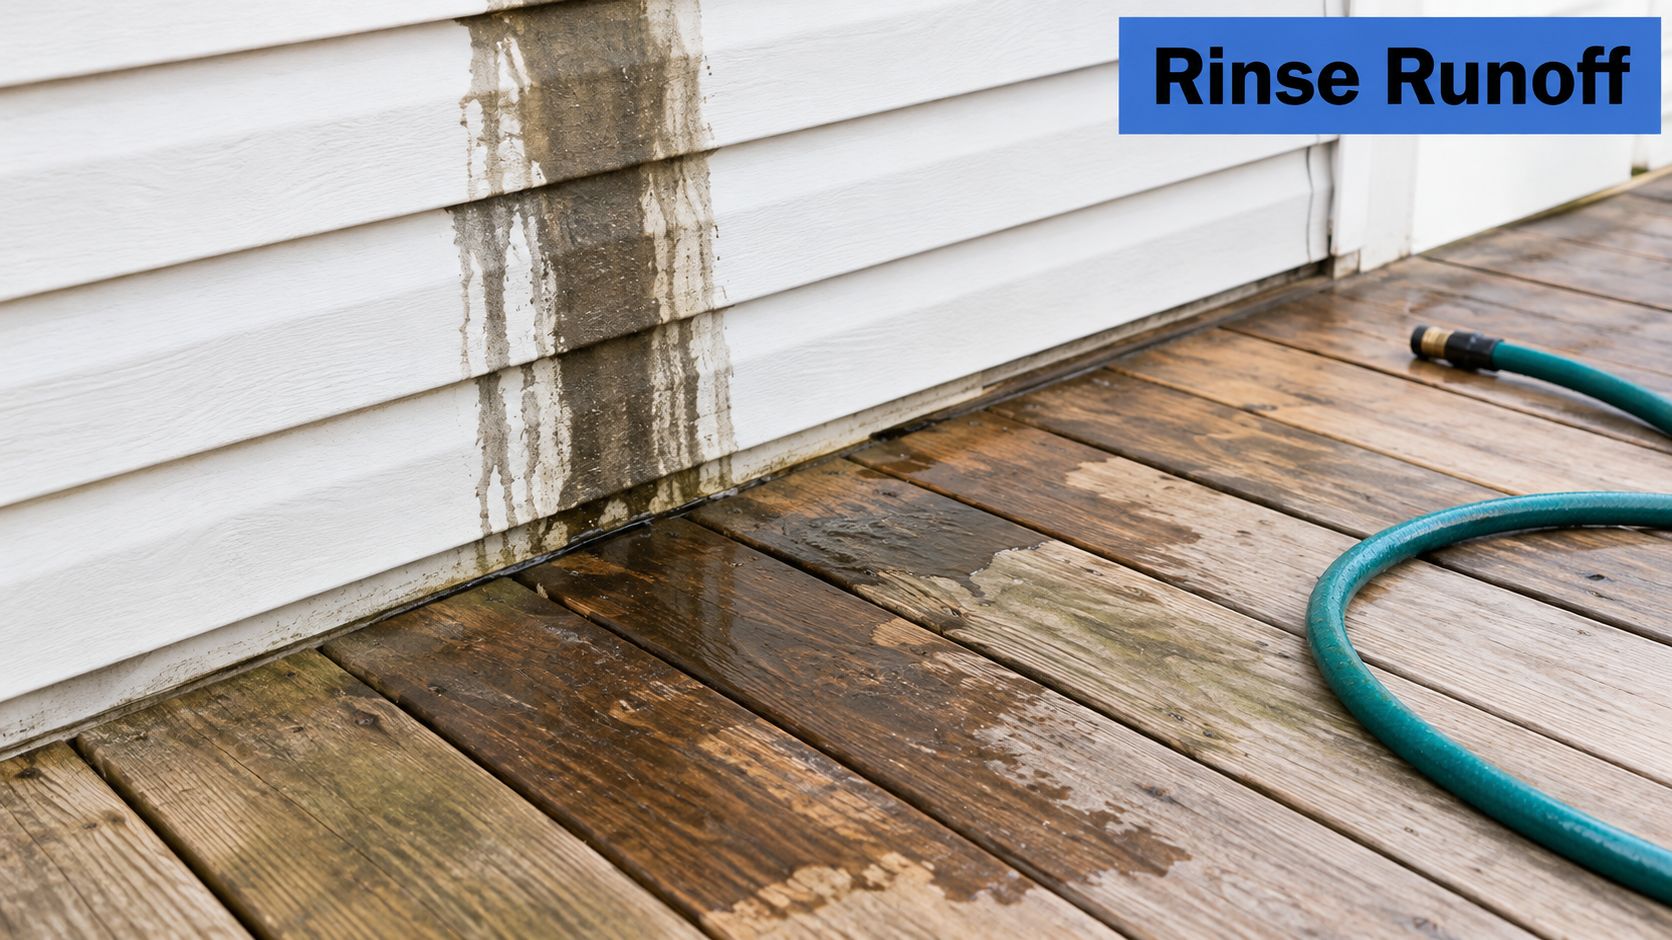
If wash water leaves dark tracks on nearby siding, the rinse likely ran downhill or splashed against the wall. Redirect the flow away from the house and use a splash guard where needed. The deck and siding may need a separate, gentle rinse, but don't send contaminated water back across freshly cleaned boards.
Splotchy boards that still look dirty often point to uneven cleaning. The cleaner may have dried during its dwell, or residue may remain because the rinse was too quick. Re-clean the affected area with the appropriate product, keep it wet while it works, and rinse more slowly. Avoid spot-blasting a stubborn mark, which can leave a clean-looking stripe surrounded by raised grain.
Mildew that returns after washing usually means the treatment didn't match the contamination. Use a labeled mildew treatment according to its directions, then rinse thoroughly. A generic deck cleaner may loosen dirt without addressing persistent organic growth.
Fuzzy or raised fibers after drying are a warning that the pressure was too high, the nozzle was too close, or the spray lingered. Once the wood is verified dry and cleaner residue is gone, lightly sand the raised fibers. Don't sand aggressively as a substitute for proper washing. Sanding won't remove every coating or fix a poor rinse.
For a visual example of how rinse water can affect adjacent surfaces, watch this short demonstration.
Read the surface before you choose a fix. Runoff points to flow direction, persistent patches often point to cleaning or rinsing, recurring mildew calls for the right treatment, and fuzzy grain signals excessive force.
The sunny boards feel dry, and the stain is ready. Before opening it, check the shaded boards and areas beneath furniture with a moisture meter. Dry-to-the-touch is an unreliable signal for the whole deck. Compare readings across exposed and sheltered areas with the stain label's moisture requirements.
Let the label set the application conditions and drying window, including temperature, humidity, and rain restrictions. A clear afternoon alone doesn't establish that the wood is ready or that the finish will have time to cure.
Call a pro when deck size, multiple levels, widespread mildew, older boards, or sensitive surroundings make careful washing difficult. Ask how the crew will check moisture and control runoff.
For coordinated exterior maintenance, Professional Window Cleaning has cleaned windows since 1999 and serves residential, commercial, and high-rise properties in Arizona, Colorado, and Nevada (company profile; service information). It also offers pressure washing for pool decks and other exterior surfaces; review Professional Window Cleaning for its services.
A final check costs less effort than stripping a failed finish and starting again.
Read our blog posts regularly and keep learning.