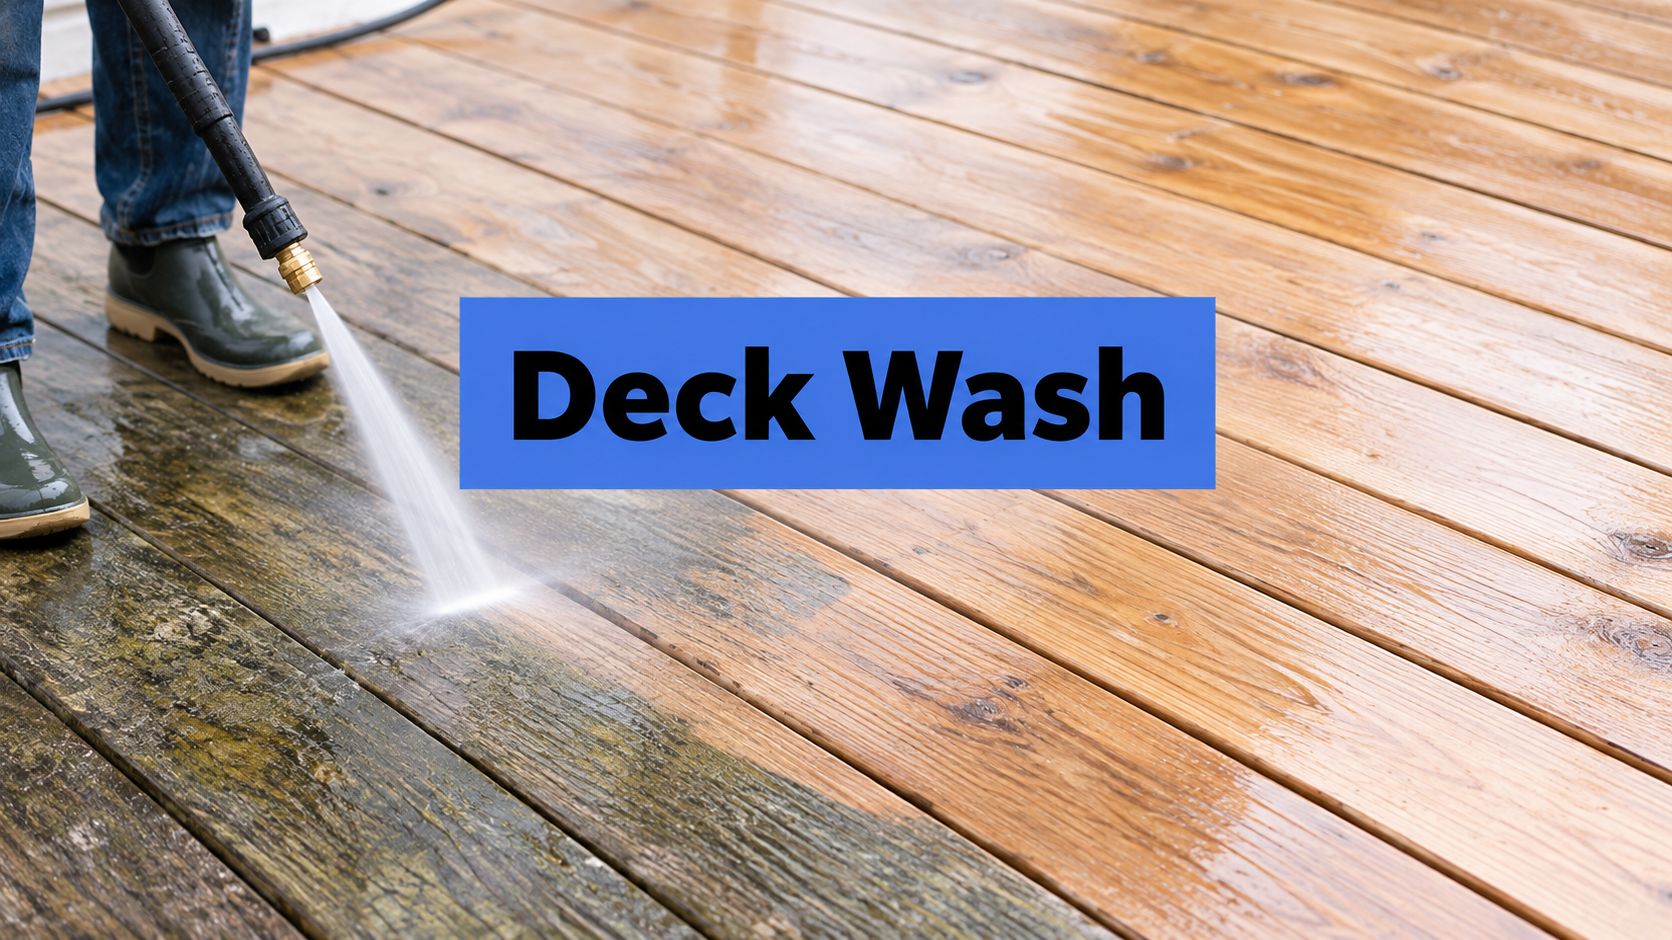
Care and Maintenance
Deck Wash Before Staining a Practical Guide That Works
Learn how to do a proper deck wash before staining, from cleaner choice to pressure setting and drying checks, so your stain holds longer and looks even.


You wipe the glass until it shines, then notice the black-grey line tucked into the rubber around the frame. A paper towel removes some surface dirt, but the grooves still look stained, damp, and gritty. That's the point where many homeowners reach for bleach or a stiff brush, and that's also where expensive seal damage often begins.
Learning how to clean window seals properly means treating the gasket as a working part of the window, not as decoration. The right approach removes debris, controls moisture, matches the cleaner to the material, and identifies damage that cleaning can't fix. Professional Window Cleaning has been cleaning windows for over 26 years, and the field lesson is consistent: gentle preparation does more for seal life than aggressive scrubbing.
After the glass dries, a dark line may remain around the frame. The pane has a smooth, exposed surface that sheds water. A rubber, vinyl, EPDM, or silicone seal sits in a recessed channel, often shaded and textured. That channel catches pollen, dust, cooking vapors, and oily HVAC residue that a routine glass-cleaning pass does not remove.
Material and climate change the failure pattern. EPDM and vinyl can retain fine particles in their grooves, while silicone can hold moisture along uneven edges. In hot, sunny locations, repeated UV exposure can harden and stiffen gasket materials. Once a seal loses flexibility, scrubbing and stretching it during cleaning can create small tears or gaps.
Moisture is the reason seal cleaning requires more care than wiping a frame. Condensation can remain against the gasket after the pane appears dry, especially where warm indoor air meets a cooler window edge. Window seals and related wall assemblies can also be vulnerable to moisture migration and reduced performance, as described in this building-science reference on window moisture control. The reference notes a planning assumption that about 1% of rain striking a cladding system may penetrate a face-sealed assembly, so surface wiping cannot replace inspection and drying.
Room use affects what grows in the channel. A 2022 study indexed by PubMed found 26 fungal isolates across bedroom and kitchen window seals. It identified 20 isolates from eight species on bedroom seals and six isolates from four species on kitchen seals. Kitchen seals had an occurrence chance almost twice as high as bedroom seals, while bedroom species diversity was nearly six times higher. Those findings show why ventilation, condensation, and cleaning conditions matter. See the PubMed study of fungi on window seals.
Field rule: Seal grime is a moisture-management problem before it is a dirt problem. Hard scrubbing can roughen EPDM, distort vinyl, and tear aging silicone without correcting trapped moisture.
Before choosing a cleaner or rinse method, understand what a window seal does. The seal keeps contact between the sash and frame, so its material and condition should determine whether the job uses a controlled squeegee process or a low-residue pure-water rinse.
Most avoidable damage happens before the first wet wipe. Grit trapped in a gasket groove becomes abrasive mud when water hits it, so a professional starts dry.
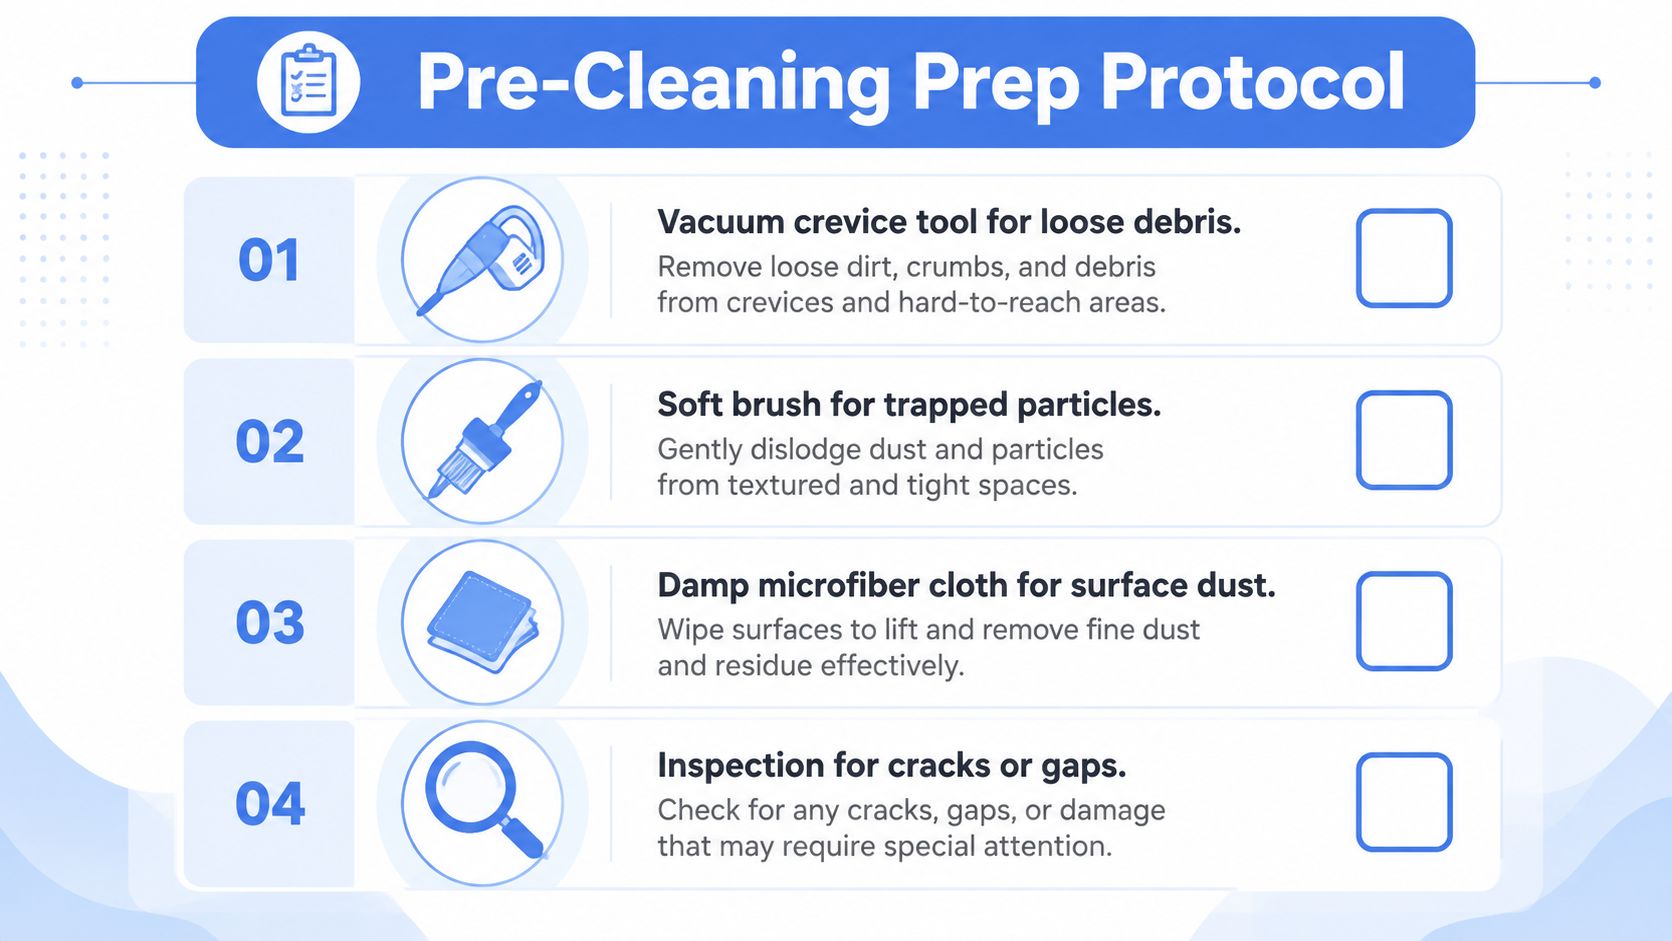
Dry-fit inspection matters. Look for cracked caulk, lifted gasket edges, hardened rubber, open corners, and gaps between the seal and frame. Water forced behind a compromised seal can reach areas that are difficult to dry, turning a maintenance job into the moisture problem you were trying to prevent.
For higher windows, an extension pole with a soft brush head may reduce unsafe reaching. Don't improvise from a ladder position that leaves you twisting or stretching. A clean seal isn't worth a fall or a forced application that drives water behind the frame.
A product labelled “all-purpose” isn't automatically suitable for a gasket. The material determines how much chemical strength and tool pressure the seal can tolerate.
EPDM rubber is durable and common, but it still dislikes petroleum-based solvents, harsh bleach exposure, and aggressive abrasion. Use warm water with a neutral detergent and a soft cloth or soft brush.
Vinyl, or PVC, gaskets tolerate routine household cleaning well, but abrasive pads can scour the surface and create texture that catches future grime. Mild soap is usually sufficient. Avoid acetone and similar strong solvents.
Silicone seals often appear around commercial joints and windows near bathrooms or other damp areas. Silicone generally tolerates targeted isopropyl alcohol and diluted peroxide better than rubber, but the surrounding frame finish may not. Keep the application controlled.
Painted wood and aluminium cladding introduce a second material into the decision. The seal may tolerate a cleaner that the painted edge doesn't, so test an inconspicuous area and remove pooled liquid quickly.
| Seal Material | Recommended Cleaner | Safe Tools | Avoid |
|---|---|---|---|
| EPDM rubber | Warm water with neutral detergent | Soft brush, microfibre cloth | Petroleum solvents, abrasive pads, repeated harsh bleach |
| Vinyl or PVC | Mild soapy water | Soft cloth, non-abrasive pad | Acetone, scouring pads, stiff scraping |
| Silicone | Controlled alcohol or diluted peroxide for targeted contamination | Cotton swab, soft cloth | Excess liquid, abrasive tools, untested frame chemicals |
| Painted wood or aluminium edge | Cleaner approved for the finish | Soft cloth, gentle brush | Pooling, untested solvents, aggressive scrubbing |
Neutral, non-abrasive cleaning is the safest baseline because it reduces scratching across rubber, vinyl, and coated surfaces. This professional sealant-cleaning guidance also places dry debris removal before a warm, soapy wipe.
The label's first ingredients matter more than the phrase “deep clean.” A stronger chemical may remove a stain faster while shortening the life of the gasket, dulling aluminium, or lifting paint at the frame edge.
The bleach-and-scrub default looks effective because it changes the color of visible staining quickly. It's a poor routine for long-term seal care. Repeated undiluted bleach can degrade rubber and sealant, while neutral detergent and diluted treatments are gentler for scheduled maintenance, as explained in this guide to mold on window seals.
Start every material with dry brushing or vacuuming. Then dampen, rather than soak, a soft cloth with warm water and neutral detergent. Work into the groove with light pressure, rinse with clean water, and dry immediately.
| Seal Material | Recommended Cleaner | Tool | Avoid |
|---|---|---|---|
| EPDM or synthetic rubber | Neutral detergent, approximately pH 6 to 8 | Soft-bristle brush and lint-free cloth | Petroleum solvents, stiff brushes, routine alcohol use |
| Vinyl | Mild dish soap solution | Microfibre cloth or non-abrasive pad | Abrasives, acetone, scouring action |
| Silicone | Mild detergent for routine dirt, targeted alcohol for sticky residue | Cotton swab and soft cloth | Heavy soaking, rough pads, untested products |
| Painted frame edge | Finish-compatible cleaner, tested first | Soft cloth | Pooling liquid and forceful scrubbing |
A short dwell can help loosen bonded grime, but don't let the cleaner dry on the frame. Wipe the groove, rinse away residue, and use a dry cloth to remove moisture from corners. Painted frames deserve extra caution because a cleaner that's acceptable for silicone can still affect a decorative coating.
For readers comparing small rubber components and replacement parts, Bormioli Rocco Fido seals provide a useful reminder that rubber sealing materials are designed for a purpose and shouldn't be treated like ordinary plastic. Window gaskets should be cleaned, not saturated or lubricated with random household oils.
Detailed maintenance guidance advises cleaning rubber or EPDM and silicone seals 2 to 3 times annually and using silicone spray on those materials every 6 to 12 months, while also discouraging bleach and abrasive tools. See the material-specific window-seal care guidance before applying any conditioner. Use only a product intended for the seal material, and follow its label.
Mold needs a controlled escalation, not an immediate blast of bleach. Begin with the least aggressive treatment and move upward only when staining or growth remains.
Wear nitrile gloves and ventilate the room. Never mix vinegar and peroxide in the same container, and keep liquids away from weep holes. Finish by drying the seal with microfibre and improving airflow around the window.
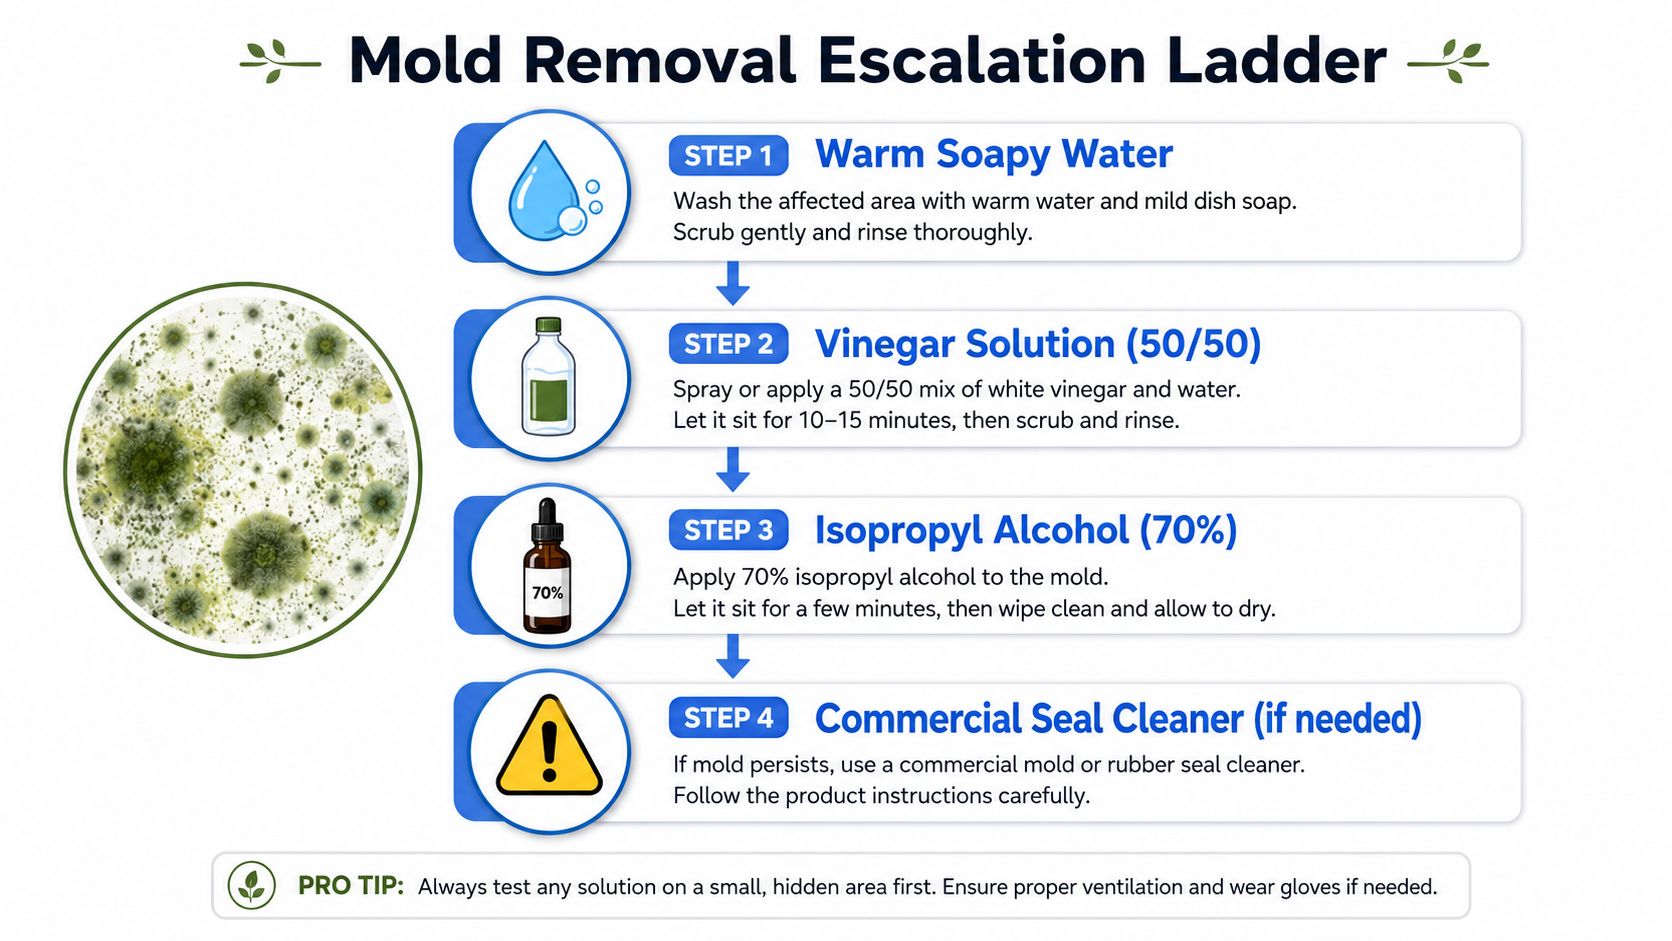
Mold that returns quickly usually points to retained moisture, poor ventilation, or a damaged gasket. For related treatment considerations on wood surfaces, consult this guide for treating wood mold, because wood and rubber don't respond identically to cleaning chemicals.
This short demonstration can help you visualise the cleaning sequence:
A cracked, hardened, shrinking, or detached seal needs replacement rather than another chemical treatment. Cleaning can remove contamination, but it can't restore lost elasticity or close a structural gap.
A fixed monthly rule doesn't fit every property. Climate, room use, exposure to dust, and the material itself should determine the schedule.
For many homes, a light wipe every 2 months keeps surface residue from hardening, while a deeper clean in spring and fall catches seasonal buildup. Humid, coastal, and pool-adjacent environments deserve monthly checks because condensation and airborne moisture can keep the gasket damp.
| Seal Material | Light Cleaning | Deep Clean | Inspection Check |
|---|---|---|---|
| EPDM rubber | Every 2 months | Spring and fall | At least annually, including elasticity and gaps |
| Vinyl | Every 2 months, more often where scuffed | Spring and fall | Check for surface wear and discoloration |
| Silicone | As needed for moisture and residue | Spring and fall | Check adhesion, edges, and recurring mildew |
| Painted frame junction | With each seal-cleaning visit | Spring and fall | Check paint lift, pooling, and water trails |
Industry guidance recommends checking seals at least once a year, while another maintenance approach recommends inspections every 18 to 24 months and re-caulking before the heating season. Those intervals reflect different property conditions, so use the shorter interval when condensation, dust, or visible deterioration is present. The guidance on weatherstripping and caulking tips can help with draft-related checks.
Seasonally, remove pollen and condensation residue in spring, examine UV exposure and surface brittleness in summer, clear leaf debris from drainage paths in fall, and check for drafts or ice-related stress in winter.
Professional visits can combine the squeegee method for traditional glass work with pure-water pole cleaning for exterior tracks and upper frames. That distinction matters because the two methods address different access and residue challenges.
DIY cleaning is reasonable when the window is safely reachable, the seal remains flexible, and the contamination is superficial. Stop when the gasket is cracked, brittle, pulling away, or showing daylight through a gap. A stain that remains after careful cleaning may indicate deteriorated material, not stubborn dirt.
Fogging between insulated panes needs separate attention. It can indicate a failed thermoseal inside the glass unit, and wiping the exterior gasket will not remove moisture trapped between panes. If the sash will not stay open or water streaks appear on the sill after cleaning, have a technician assess the window rather than applying more cleaner.
Professional work combines two main methods. The traditional squeegee method uses a bucket, scrubber, and squeegee for controlled interior cleaning. Pure-water cleaning uses a water-fed pole and purified water for upper-story exterior glass, frames, and tracks. This comparison of squeegee and pure-water window cleaning explains the practical difference.
A technician can select a neutral pH solution for EPDM, vinyl, silicone, or nearby painted and anodised surfaces, then adjust pressure and agitation to suit the material. If the seal itself has failed, window seal repair information is more useful than another cleaning product.
Seasonal service can be arranged in Las Vegas, Phoenix, Denver, or Scottsdale, with scheduling based on local dust, humidity, and winter conditions. Commercial buildings with anodised aluminium frames may benefit from planned visits, keeping residue, moisture clues, and seal wear under review.

Professional Window Cleaning handles residential, commercial, and high-rise work. Visit Professional Window Cleaning to arrange cleaning and inspection when grime, condensation, or damaged seals need a closer assessment.
Read our blog posts regularly and keep learning.